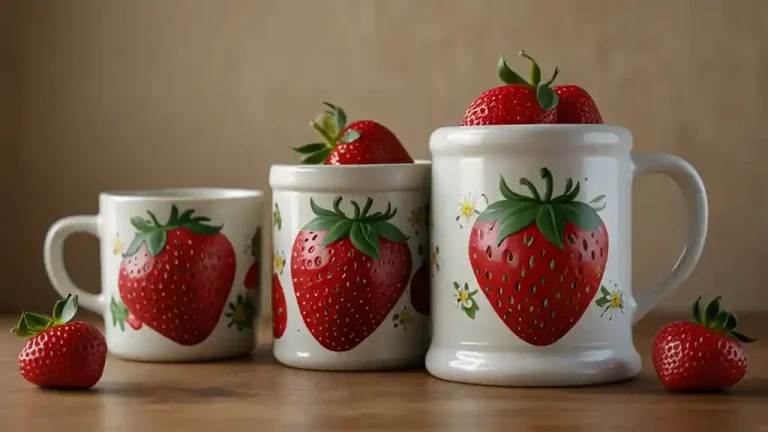
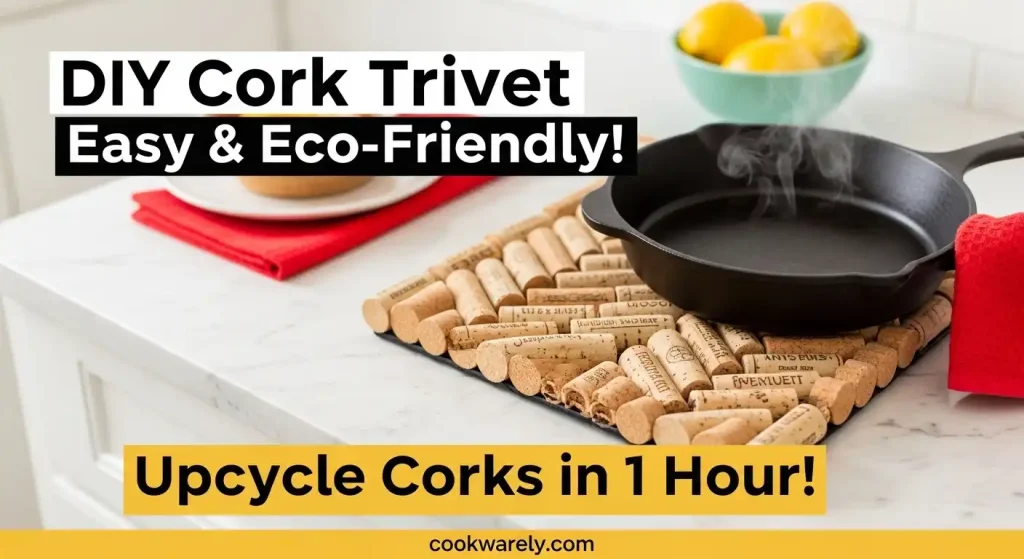
DIY Cork Trivet: A Simple, Eco-Friendly Craft Project
I’ve been on a bit of a DIY kick lately—and let me tell you, there’s something so satisfying about making something useful and cute with your own two hands.
The other day, I realized I needed something to protect my table from hot pans and dishes, and I thought… why not make a trivet?
Not just any trivet, though—a DIY cork trivet that’s eco-friendly, affordable, and surprisingly fun to make!
Plus, cork is such a great material to work with. It’s natural, lightweight, and it gives off that cozy, earthy vibe I love in home decor.
If you’re in the mood for a quick craft project that’s both functional and stylish, you’re going to love this one.

Let’s get into it!
Materials Needed
Before you start, you’ll need to gather a few supplies. Here’s what I use for a standard 8-inch trivet:
Corks
About 20–30, depending on the size and pattern.
I prefer natural corks over synthetic ones because they have a more rustic look and are easier to glue.
You can save corks from your own bottles, ask friends to contribute, or check with local restaurants or wineries.
I once scored a bag of corks from a nearby bistro for free, which felt like a crafting jackpot!
Hot glue gun and glue sticks
This is the backbone of the project.
I recommend a high-temperature glue gun for a strong bond, as low-temp versions sometimes fail to hold corks securely.
Optional tools
A craft knife, cutting board, ruler, and sandpaper for trimming corks to uniform lengths.
I don’t always bother with this, as I like the slightly uneven, handmade vibe, but it’s handy for a polished look.
Optional decorations
Acrylic paint, twine, ribbon, or even small beads for embellishments.
I love adding a pop of color with paint, but I’m not a fan of overly fussy decorations like glitter—it gets everywhere!
I dislike the idea of buying new corks when so many used ones are available, so I encourage you to go the upcycling route.
It’s better for the planet and your wallet.
For more creative ideas, check out these DIY kitchen craft projects to personalize your space!
Tools Required
The tools for this project are minimal, which is one reason I love it. Here’s what you’ll need:
- Hot glue gun: Essential for sticking corks together. I’ve tried other adhesives like super glue, but they’re messier and less reliable for this purpose.
- Scissors: Useful for cutting twine or ribbon if you’re decorating.
- Optional tools: A craft knife for trimming corks and a ruler for measuring. Sandpaper can smooth rough edges, though I rarely use it unless a cork is splintering.
Safety is key when working with hot glue.
I’ve burned my fingers more times than I’d like to admit, so keep a bowl of cold water nearby in case of accidents.
If you’re using a craft knife, always cut on a stable surface like a cutting board to avoid slips.
I’m not a fan of flimsy tools, so invest in a decent glue gun if you plan to do more crafts—it makes a big difference.
Step-by-Step Instructions: DIY Cork Trivet
Now, let’s get to the fun part: making the trivet! I’ve broken this down into detailed steps to ensure you get great results, even if you’re new to crafting.
Step 1: Prepare the Corks
Start by cleaning your corks.
Some may have dark stains, which I find add character, but if you prefer a cleaner look, soak them in warm water with a drop of dish soap for 10 minutes.
Scrub gently with a sponge, then let them air dry completely—wet corks won’t glue well.
I once skipped this drying step in a rush, and my trivet fell apart a week later. Lesson learned!
If you want a uniform trivet, trim the corks to the same length using a craft knife.
Lay them on a cutting board, measure with a ruler, and slice carefully. Sand the cut edges for smoothness.
I usually skip this because I like the natural variation, but it’s worth the effort for a sleek design.
Step 2: Plan the Design
Before gluing, decide on your trivet’s shape and pattern. Common options include circular, square, or hexagonal layouts.
I’m partial to circular trivets because they look organic and fit most pots nicely.
Lay your corks on a flat surface to experiment with arrangements.
You can place them upright (ends facing up) for a textured look or on their sides for a smoother surface.
Play around until you’re happy—I often spend more time on this step than I expect because it’s so fun to see the design come together.
For a circular trivet, start with a central cork and build outward in a spiral. For a square, align corks in rows.
Take a photo of your layout to reference once you start gluing, as it’s easy to forget the pattern.
Step 3: Assemble the Trivet
Plug in your hot glue gun and let it heat up.
Working on a protected surface (like cardboard), apply a thin line of glue to the side of one cork and press it firmly against another.
Hold for 10 seconds to set. Repeat, following your planned design.
I work in small sections—gluing three or four corks at a time—to keep things manageable.
Be generous with glue but avoid globs, as they can look messy.
I dislike when glue strings get everywhere, so I keep a pair of tweezers handy to remove them.
If your design is complex, like a spiral, check alignment frequently to avoid gaps.
For a circular trivet, I start with the center cork and glue others around it, rotating as I go.
Patience is key here—rushing can lead to a wonky trivet, which I’ve learned the hard way.
Step 4: Finishing Touches
Once all corks are glued, inspect your trivet for loose spots.
Add extra glue where needed and let it dry for 30 minutes to an hour.
I like to press the trivet gently to test its sturdiness before using it.
For customization, consider painting the cork ends with acrylic paint.
I love bold colors like teal or mustard yellow, but soft pastels work well for a subtle look.
Use a small brush for precision, and apply two coats for even coverage.
Alternatively, wrap twine or ribbon around the trivet’s edge for a rustic touch—I’ve done this for gifts, and it always gets compliments.
Avoid over-decorating; I find simple designs more elegant than cluttered ones.
Customization Ideas
One of the joys of this project is making it your own. Here are some ideas I’ve tried or seen:
- Paint: Add stripes, polka dots, or ombre effects. I once painted a trivet in a gradient from blue to green, and it became my favorite kitchen accessory.
- Patterns: Arrange corks in a chevron or herringbone pattern for a modern twist. This takes more planning but looks stunning.
- Backing: Glue a piece of felt or thin wood to the bottom for stability. I’ve used felt for coasters, and it prevents scratches on delicate surfaces.
- Multi-purpose: Make smaller versions for coasters or larger ones for placemats. I’ve even seen cork wall art made with similar techniques.
Experiment with what suits your style.
I’m not a fan of overly ornate designs, but I love how versatile corks are for creating both functional and decorative pieces.
Care and Maintenance
To keep your trivet in top shape, wipe it with a damp cloth when needed.
Avoid soaking it, as water can weaken the glue. I’ve found that a quick wipe after use keeps it looking fresh.
If a cork comes loose, re-glue it promptly to prevent further damage.
Store your trivet in a dry place—I keep mine on a kitchen shelf, where it doubles as decor.
Cork is naturally heat-resistant, so your trivet can handle hot pots and pans, but don’t place it directly in an oven or on a stovetop burner.
I made this mistake once, and the smell of singed cork is not pleasant!
Benefits of a DIY Cork Trivet
This project has so many perks, it’s hard to pick a favorite.
For starters, it’s eco-friendly, turning potential waste into something useful.
I love knowing my trivets are keeping corks out of landfills.
It’s also budget-friendly—most of the cost is in the glue sticks, especially if you source corks for free.
Compared to store-bought trivets, which can cost $20 or more, this is a steal.
The personal touch is another big win.
Handmade items have a warmth that mass-produced ones lack.
I’ve given cork trivets as housewarming gifts, and they’re always a hit.
Plus, the process is relaxing.
I find gluing corks together oddly meditative, especially with some music in the background.
Conclusion
Creating a DIY cork trivet is a rewarding project that combines creativity, sustainability, and practicality.
Whether you’re protecting your dining table or adding a handmade touch to your kitchen, this craft delivers.
I love how accessible it is—no fancy skills or tools required—and how every trivet tells a story through its unique design.
I encourage you to give it a try, experiment with colors and patterns, and make it your own.
Share photos of your finished trivet online or with friends; I’d bet they’ll be inspired to make one too.
If you’re hooked, explore other cork crafts like bulletin boards or wreaths. Happy crafting!
FAQs
How many corks do I need?
About 20–30 for an 8-inch trivet, but it varies by design. Count as you plan your layout.
Can I use synthetic corks?
Yes, but they’re harder to glue and less heat-resistant. I prefer natural corks for better results.
What if I don’t have a hot glue gun?
You can try strong craft glue, but it dries slower and may not hold as well. I’d borrow a glue gun if possible.
How do I make the trivet food-safe?
Cork is naturally antimicrobial, but for food contact, seal with a food-grade sealant. I rarely do this, as trivets are typically used under cookware, not directly with food.