How to Clean Marble Kitchen Floor for a Lasting Shine

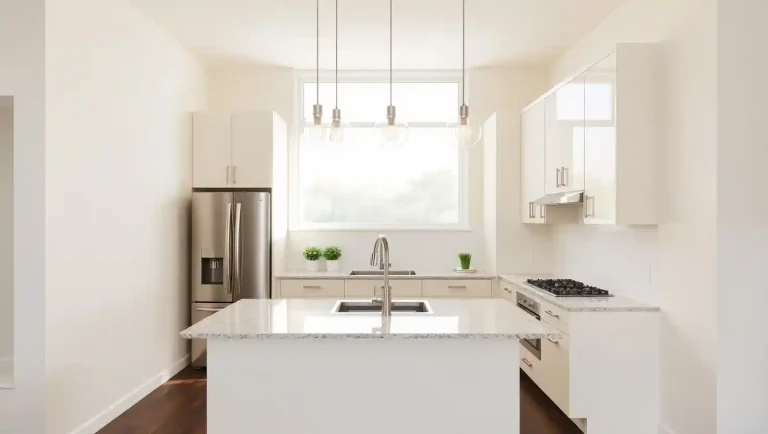
Marble floors are the epitome of luxury and timeless elegance. In a kitchen, they provide a bright, sophisticated aesthetic that can make even a small space feel like a high-end culinary studio.
However, marble is a natural stone, and with its beauty comes a certain level of vulnerability. Unlike ceramic tile or laminate, marble is porous and chemically sensitive.
If you don’t know the specifics of how to clean marble kitchen floor surfaces, you risk causing permanent damage like etching, staining, or dullness.
In this comprehensive guide, we will walk you through everything you need to know about maintaining your marble floors, from daily dusting to deep cleaning and long-term protection.
🛍️ Top Amazon Deals & Must-Have Finds
Discover great discounts and highly rated products you’ll love—updated regularly so you never miss a smart buy.
*As an Amazon Associate, I earn from qualifying purchases.
Understanding Your Marble Floor
Before diving into the cleaning process, it is essential to understand what marble is. Marble is a metamorphic rock composed primarily of calcium carbonate.
This chemical composition makes it highly reactive to acids. Even “natural” cleaners like vinegar or lemon juice, which are great for other parts of the home, can “eat” into the surface of the marble, creating dull spots known as etching.
Because the kitchen is a high-traffic area prone to spills—think tomato sauce, wine, oils, and citrus juices—knowing the right way to handle these surfaces is paramount to protecting your investment.
A Comprehensive Guide on How to Clean Marble Kitchen Floor
Cleaning marble isn’t necessarily difficult, but it does require a specific touch. You cannot simply grab any mop and bucket and go to town. Here is the step-by-step process to ensure your floors remain pristine.
1. The Daily Dusting Routine
The biggest enemy of a marble floor isn’t actually liquid; it’s grit. Small particles of dirt, sand, and debris act like sandpaper under your shoes.
Every time you walk across a dirty marble floor, you are micro-scratching the polished surface.
- Use a Microfiber Dust Mop: Avoid vacuum cleaners with beater bars, as the plastic or metal parts can scratch the stone. Instead, use a clean, dry microfiber dust mop daily to remove surface debris.
- Avoid Treated Mops: Some commercial dust mops are treated with oils to pick up dust. Avoid these, as the oils can seep into the pores of the marble and cause discoloration.
2. The Wet Cleaning Process
When it’s time for a deeper clean—usually once a week or after a heavy cooking session—you’ll need to use water and a cleaning agent.
- Choose the Right Cleaner: This is the most critical step in how to clean marble kitchen floor areas safely. You must use a pH-neutral cleaner. You can purchase specialized marble cleaning solutions, or you can use a very small amount of highly diluted, mild dish soap (ensure it does not contain lemon or citrus extracts).
- Mix Your Solution:Fill a bucket with warm water and add your pH-neutral cleaner. Do not overdo the soap; too much suds will leave a filmy residue that makes the floor look dull.
- Use a Soft Mop: A microfiber string mop or a flat microfiber mop is best. Avoid sponge mops, as they tend to push dirty water into the grout lines.
- Wring it Out: Never saturate a marble floor. Marble is porous, and excessive water can seep into the stone, potentially causing “blooming” or internal staining. The mop should be damp, not dripping.
- Mop in Small Sections: Work in small areas, using “S” motions to trap dirt rather than spreading it around.
3. The Drying Phase (The Secret Step)
Most people make the mistake of letting marble air dry.
On marble, air drying often leads to water spots or streaks, especially if you have hard water.
Once you have finished mopping an area, go back over it with a fresh, dry microfiber cloth or a dry mop head.
Buffing the floor dry not only prevents spots but also brings out the natural cluster of the stone.
Dealing with Stains and Spills
In a kitchen, spills are inevitable. The key to preventing a spill from becoming a permanent stain is speed.
Immediate Action
If you drop something acidic (like orange juice or vinegar) or something highly pigmented (like red wine or coffee), blot it immediately with a paper towel.
Do not wipe, as wiping spreads the liquid. Flush the area with a little water and mild soap, then dry it thoroughly.
🛍️ Top Amazon Deals & Must-Have Finds
Discover great discounts and highly rated products you’ll love—updated regularly so you never miss a smart buy.
*As an Amazon Associate, I earn from qualifying purchases.
Removing Deep Stains with a Poultice
If a stain has already set into the stone, you may need a “poultice.” This is a paste-like cleaning agent that draws the stain out of the pores of the marble.
- For Oil-Based Stains (Grease, Cooking Oil):Create a paste using baking soda and a little water.
- For Organic Stains (Coffee, Tea, Food): You can use a paste made of baking soda and a tiny bit of hydrogen peroxide (though test this on a small, inconspicuous area first, as peroxide can slightly lighten dark marble).
- Application: Apply the paste over the stain (about ¼ inch thick), cover it with plastic wrap, and tape down the edges. Let it sit for 24 to 48 hours. As the paste dries, it pulls the stain out of the stone.
- Removal:Gently scrape the paste off with a plastic spatula and wipe the area clean with water.
What to Avoid: The “Don’ts” of Marble Care
Knowing how to clean marble kitchen floor surfaces also means knowing what not to do. Many common household cleaners are “marble killers.”
- No Vinegar or Lemon Juice: These are acidic and will cause immediate etching.
- No Bleach or Ammonia: These chemicals are too harsh and can dull the finish of the stone and damage the structural integrity over time.
- No Abrasive Scrubbers: Never use steel wool, scouring pads, or “magic” erasers. These are all abrasive and will scratch the polished surface.
- No Vacuum Beater Bars: As mentioned, the rotating brushes can chip or scratch the marble.
Long-Term Maintenance: Sealing and Polishing
To make the process of how to clean marble kitchen floor easier in the long run, you must maintain the stone’s protective barrier.
Sealing Your Marble
Most marble floors should be sealed every 6 to 12 months, depending on the amount of traffic.
A sealer is an “impregnator” that fills the pores of the stone, giving you a window of time to wipe up spills before they soak in.
To test if your floor needs sealing, drop a small amount of water on the surface. If it beads up, your sealer is still working.
If it soaks in and leaves a dark spot after a few minutes, it’s time to reseal.
Professional Polishing
Over the years, even with perfect cleaning habits, marble may develop “traffic patterns” or minor etching.
Every few years, you may want to hire a professional stone restoration expert to polish the floors.
They use diamond-infused pads to gently grind down a microscopic layer of the stone, revealing a fresh, unblemished surface underneath.
Preventive Measures for a Cleaner Floor
The best way to clean a marble floor is to keep it from getting dirty in the first place.
- Use Rugs and Mats: Place non-slip rugs at entryways to catch grit and near the sink or stove to catch splashes. Ensure the backing of the rug is safe for natural stone (avoid some rubbers that might discolor the marble).
- Use Felt Protectors:If you have a kitchen table or chairs on the marble, put felt pads on the legs to prevent scratching when they are moved.
- Shoe Policy: Encourage a “no shoes” policy in the house to minimize the amount of outdoor debris tracked onto the delicate stone.
Conclusion
Learning how to clean marble kitchen floor surfaces is about balancing gentleness with consistency.
🛍️ Top Amazon Deals & Must-Have Finds
Discover great discounts and highly rated products you’ll love—updated regularly so you never miss a smart buy.
*As an Amazon Associate, I earn from qualifying purchases.
While marble is more demanding than other flooring materials, the reward is a stunning, luminous kitchen that adds significant value to your home.
By sticking to pH-neutral cleaners, avoiding acidic substances, and ensuring the floor is dried manually after mopping, you can keep your marble looking as spectacular as the day it was installed.
Treat your marble with respect, and it will remain a centerpiece of your home for decades to come.