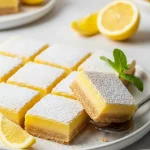
Bright & Tangy Lemon Curd Bars Everyone Loves
Bright, buttery, and unapologetically tangy, these lemon curd bars are the kind of dessert that instantly wakes up your palate.

A crisp shortbread crust supports a silky, citrus-forward filling that strikes the perfect balance between sweet and sharp.
They’re simple to make, easy to slice, and just fancy enough to feel special—whether you’re baking for guests or keeping a stash in the fridge for yourself.
Lemon Curd Bars
Ingredients
- Preheat your oven. Set it to 350°F 175°C. Yes, actually preheat it. This is not optional. Cold ovens ruin dreams.
- Make the crust. Mix flour sugar, salt, and cold butter until crumbly. Press it firmly into a lined baking pan. Think “packed sandcastle,” not “loose beach sand.”
- Bake the crust. Bake for about 18–20 minutes until lightly golden. It should look set not sad.
- Whisk the lemon filling. While the crust bakes whisk eggs, sugar, lemon juice, zest, and flour until smooth. No lumps allowed—this isn’t oatmeal.
- Pour and bake again. Pour the filling over the hot crust and return to the oven for 20–25 minutes. The center should jiggle slightly not wave hello.
- Cool completely. This part tests patience. Let it cool fully so the bars set properly. Warm lemon bars = lemon soup.
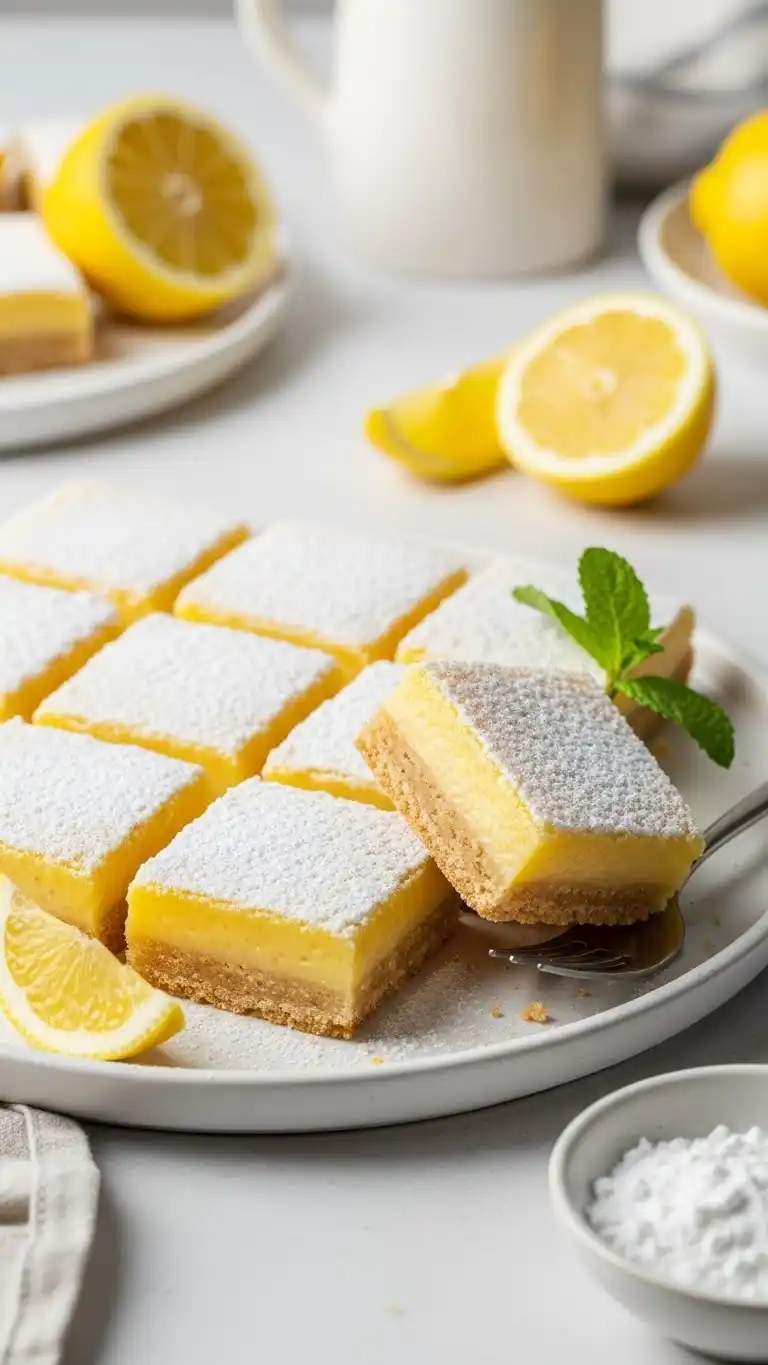
- Slice and dust. Cut into squares and dust with powdered sugar if you’re feeling extra. Or not. You do you.
Instructions
- Preheat your oven. Set it to 350°F (175°C). Yes, actually preheat it. This is not optional. Cold ovens ruin dreams.
- Make the crust. Mix flour, sugar, salt, and cold butter until crumbly. Press it firmly into a lined baking pan. Think “packed sandcastle,” not “loose beach sand.”
- Bake the crust. Bake for about 18–20 minutes until lightly golden. It should look set, not sad.
- Whisk the lemon filling. While the crust bakes, whisk eggs, sugar, lemon juice, zest, and flour until smooth. No lumps allowed—this isn’t oatmeal.
- Pour and bake again. Pour the filling over the hot crust and return to the oven for 20–25 minutes. The center should jiggle slightly, not wave hello.
- Cool completely. This part tests patience. Let it cool fully so the bars set properly. Warm lemon bars = lemon soup.
- Slice and dust. Cut into squares and dust with powdered sugar if you’re feeling extra. Or not. You do you.
Why This Recipe is Awesome
First of all, lemon desserts are criminally underrated.
Chocolate gets all the attention, but lemon? Lemon is refreshing, bold, and wakes up your taste buds like a polite slap to the face.
Second, this recipe is shockingly low effort for how good it tastes. We’re talking:
- A buttery crust you press in (no rolling pins, no drama)
- A silky lemon filling that whisks together in minutes
- One pan. ONE. PAN.
Also, these bars are:
- Perfect for make-ahead desserts
- Crowd-pleasing without being boring
- Sweet but not “I regret this” sweet
IMO, it’s the kind of recipe you make once and then casually mention forever like, “Oh yeah, I make lemon curd bars sometimes.”
Ingredients You’ll Need

Nothing weird here. No obscure ingredients you’ll use once and forget forever.
Subscribe to Cookwarely
Get updates on the latest posts and more from Cookwarely straight to your inbox.
For the crust:
- All-purpose flour – The reliable friend of baking.
- Granulated sugar – Just enough sweetness.
- Butter (unsalted, cold) – The star. Don’t skimp.
- Salt – A tiny pinch, but it matters. Trust me.
For the lemon filling:
- Fresh lemon juice – Bottled is… fine, but fresh is brighter and happier.
- Lemon zest – Flavor booster. Don’t skip it.
- Granulated sugar – Balances the tartness.
- Eggs – They give the filling structure.
- All-purpose flour – Thickens everything up nicely.
Optional but encouraged:
- Powdered sugar – For dusting and pretending you’re fancy.
Step-by-Step Instructions

- Preheat your oven. Set it to 350°F (175°C). Yes, actually preheat it. This is not optional. Cold ovens ruin dreams.
- Make the crust. Mix flour, sugar, salt, and cold butter until crumbly. Press it firmly into a lined baking pan. Think “packed sandcastle,” not “loose beach sand.”
- Bake the crust. Bake for about 18–20 minutes until lightly golden. It should look set, not sad.
- Whisk the lemon filling. While the crust bakes, whisk eggs, sugar, lemon juice, zest, and flour until smooth. No lumps allowed—this isn’t oatmeal.
- Pour and bake again. Pour the filling over the hot crust and return to the oven for 20–25 minutes. The center should jiggle slightly, not wave hello.
- Cool completely. This part tests patience. Let it cool fully so the bars set properly. Warm lemon bars = lemon soup.
- Slice and dust. Cut into squares and dust with powdered sugar if you’re feeling extra. Or not. You do you.
How to Serve
Lemon curd bars are best served chilled or at room temperature. That’s when the filling is set, silky, and easy to bite into.

Serve them:
- On a simple plate with a dusting of powdered sugar
- With fresh berries on the side for contrast
- Cut into small squares for parties (they’re rich—small goes far)
They’re perfect for brunch tables, afternoon snacks, or late-night “just one more piece” moments.
Nutrition Facts
(Approximate values per bar, based on standard ingredients)
- Calories: ~220
- Carbohydrates: 30g
- Sugar: 20g
- Fat: 10g
- Protein: 4g
- Fiber: 1g
These are definitely a treat, not health food—but hey, balance is a thing.
Common Mistakes to Avoid
- Skipping the parchment paper. Unless you enjoy chiseling dessert out of pans, line it.
- Overbaking the filling. If it cracks, you went too far. Lemon bars should be soft, not rubbery.
- Not zesting before juicing. Trying to zest a naked lemon is a rookie move. Zest first. Always.
- Rushing the cooling time. I get it—you’re excited. But cutting too early = messy bars. Patience pays off.
Alternatives & Substitutions
- Gluten-free? Use a good 1:1 gluten-free flour blend. Works surprisingly well.
- Less sugar? You can reduce the sugar slightly, but don’t go wild. Lemon needs balance.
- Lime instead of lemon? Absolutely. Lime curd bars are underrated and delicious.
- Orange? Softer flavor, but still tasty. Add extra zest to boost it.
- Dairy-free butter? It works, but the crust won’t be quite as rich. Still solid though.
FYI, fresh citrus juice really does make a difference here. Bottled juice works in emergencies, but fresh makes the bars pop.
Subscribe to Cookwarely
Get updates on the latest posts and more from Cookwarely straight to your inbox.
Final Thoughts
These Lemon Curd Bars are bright, buttery, and dangerously easy to eat.
They’re the kind of dessert that disappears fast—sometimes suspiciously fast.
Whether you’re baking for guests, family, or just yourself on a random Tuesday, this recipe delivers every time.
So go ahead—make a batch, cut generous squares, and enjoy something homemade that feels way more impressive than the effort required.
You deserve a dessert win. Now go impress someone—or just eat three bars standing at the counter. No judgment.
FAQ (Frequently Asked Questions)
Can I make these ahead of time?
Absolutely. They actually taste better after chilling for a few hours. Future you will be very grateful.
Do I really need fresh lemons?
Need? No. Should you? Yes. Fresh juice and zest give the best flavor—no contest.
Subscribe to Cookwarely
Get updates on the latest posts and more from Cookwarely straight to your inbox.
Why did my filling turn out runny?
Usually underbaking or cutting too soon. Let it set completely before slicing.
Can I freeze lemon curd bars?
Yep! Freeze them sliced, tightly wrapped. Thaw in the fridge when cravings strike.
How long do they last?
About 4–5 days in the fridge. If they last that long. Big “if.”
Can I double the recipe?
Totally. Just use a larger pan and add a few extra minutes to baking time.
Do I have to dust them with powdered sugar?
Nope. It’s optional. Delicious bars don’t need accessories—but they do look cute with it.