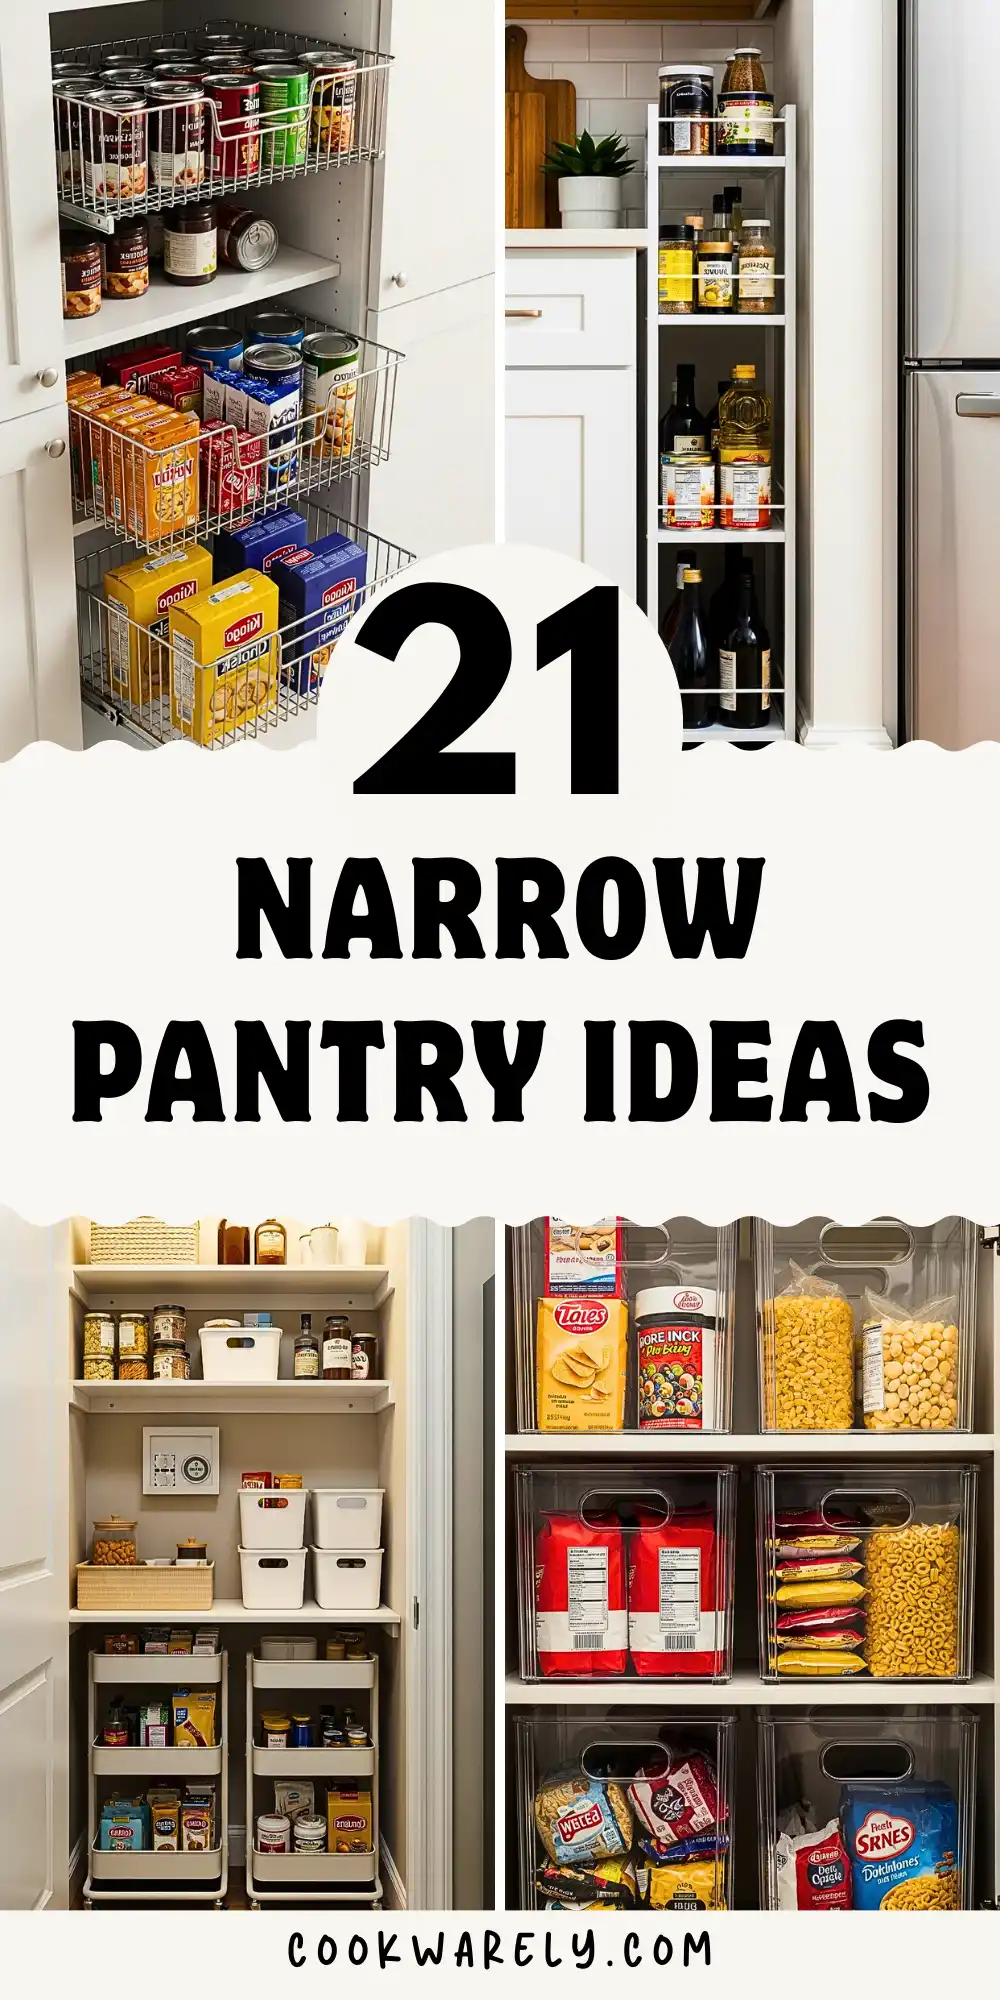
Storage Struggles End Here: 21 Narrow Pantry Ideas You’ll Love
Struggling with storage? These narrow pantry ideas are perfect for creating a tidy and functional kitchen space.
Your pantry feels too small. Every time you open it, boxes tumble out, cans get lost in the back, and you waste time hunting for snacks.
A narrow pantry can feel impossible to organize—but it doesn’t have to stay that way.
The truth is, you don’t need a huge walk-in pantry to keep things neat. You just need smart tricks that make the most of every inch.
From adding hidden shelves to using the back of the door, there are simple ways to make your skinny pantry work harder.
Below, you’ll find 21 narrow pantry ideas that actually save space.
These are real solutions you can try right away, whether you live in a small apartment or just have a tight pantry closet.
Pick one or two, test them out, and you’ll see how much easier cooking and storing food becomes.
1) Add Ceiling-High Shelves to Gain a Full Extra Level
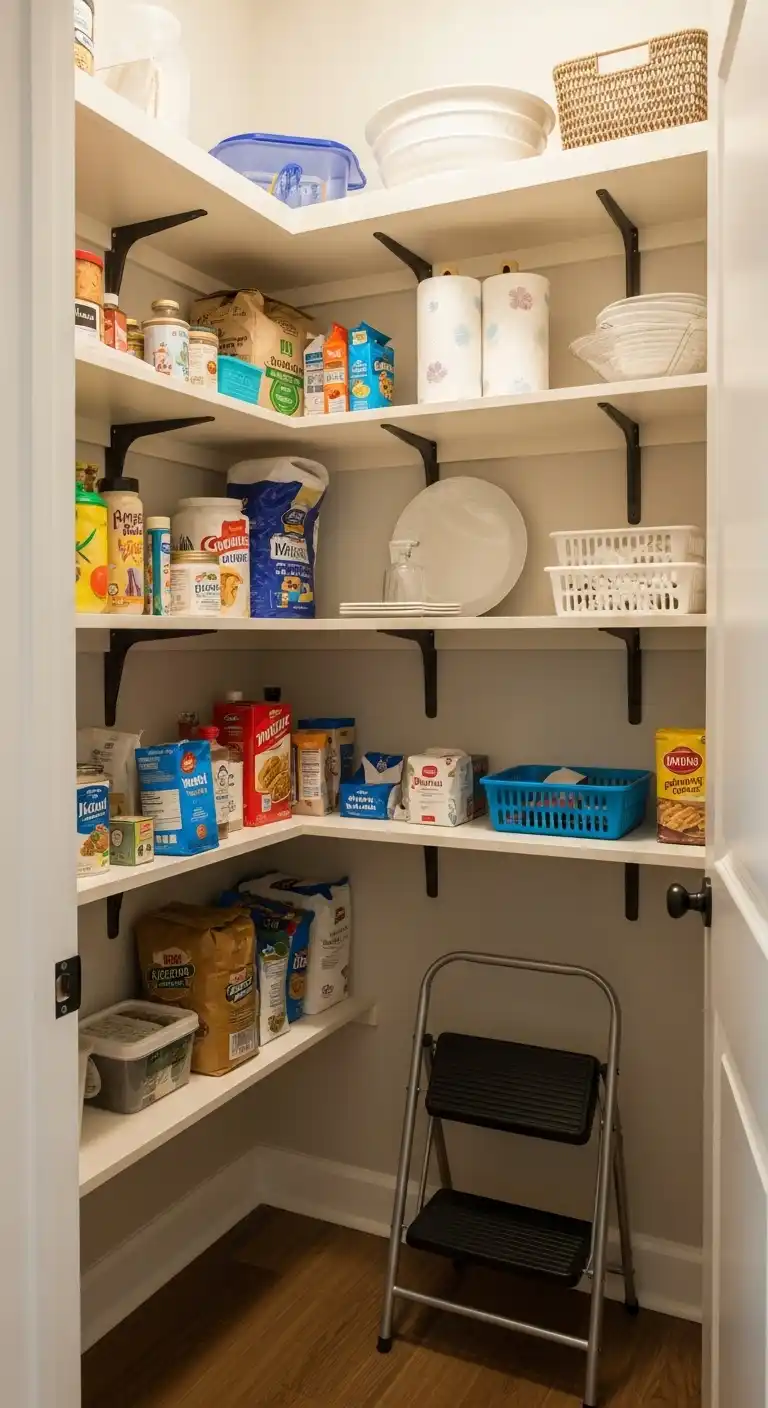
Most pantries stop short of the ceiling. That empty gap is wasted space.
Look above your top shelf. You probably have 8–18 inches sitting unused. That’s almost the size of another shelf.
Here’s how to fix it:
- Measure the space between your top shelf and the ceiling.
- Aim for a new shelf about 10–12 inches deep. Any deeper will block light or make things hard to grab.
- Use a stud finder to mark where the wall studs are. This keeps your brackets sturdy.
- Install strong metal brackets, then add a wood shelf that fits the space.
What should go up there? Things you don’t use every day.
- Bulk pasta.
- Paper towels.
- Holiday platters.
Store the light or rare-use stuff so you don’t risk accidents when reaching.
Keep a foldable step stool inside your pantry so you can get up there safely.
Time: About 45–90 minutes.
Cost: Medium (wood shelf + brackets).
Quick win: This simple upgrade gives you 25–40% more storage without adding square feet.
2) Use Wire Shelf Risers to Stop Stacking Chaos
Tall shelves look great until you start stacking cans and boxes. Then things topple over, and you can’t see what you own.
You end up buying doubles because that soup hiding in the back gets lost.
A wire shelf riser fixes this in seconds. It’s a small stand that sits right on your existing shelf.
Now you have two levels instead of one. Cans go below, jars or spices go on top.
Here’s how to use them:
- Measure the depth of your pantry shelf. Most risers come in 10–12 inch widths.
- Pick risers that fit snugly but still leave room in front to grab things.
- Group items by type. For example, canned beans below, tomato sauce on top.
- Don’t overload the riser. They hold plenty, but too much weight can bend them.
The best part? You’ll see everything at a glance. No digging, no tipping.
Time: 5 minutes to set up.
Cost: Low ($10–20 each).
Quick win: Doubles your shelf space and makes every item easy to spot.
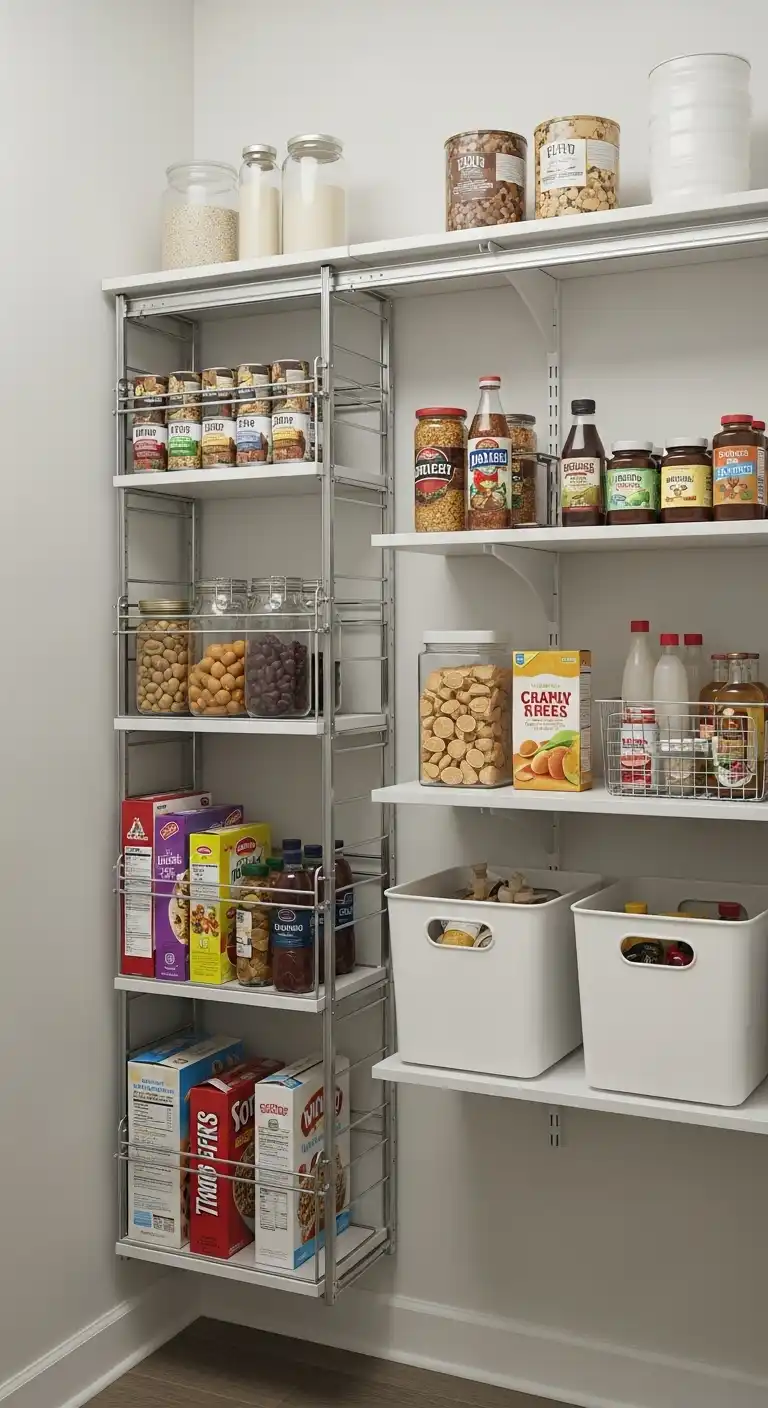
3) Install Slim Pull-Out Shelves So Nothing Gets Lost
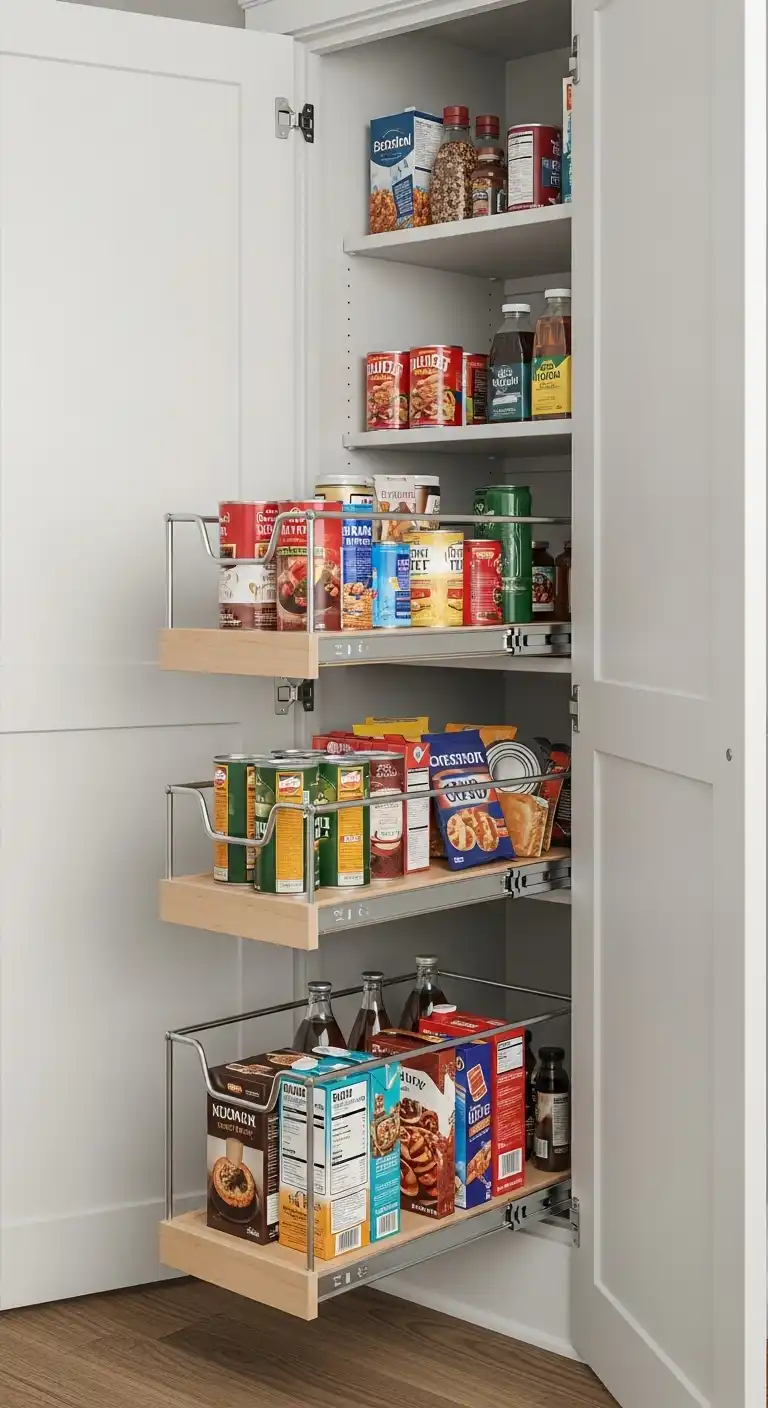
A deep pantry can feel like a black hole. Food slides to the back, and you forget it’s there until it expires. That wastes money and space.
Slim pull-out shelves fix this. They work like drawers inside your pantry. Instead of reaching in and moving everything around, you just slide the shelf forward. Now every item is right in front of you.
Here’s how to do it:
- Measure the width and depth of your pantry opening.
- Choose slim pull-out shelves that fit snug but still glide easily.
- Use them for cans, snacks, or boxed foods—items that often get buried.
- Keep heavier items on lower pull-outs so they’re easy to grab.
It takes more effort to install than bins, but it pays off. You’ll stop wasting food because nothing hides in the shadows anymore.
Time: 1–2 hours to install.
Cost: Medium to high ($50–150 per shelf, depending on quality).
Quick win: You can see everything with one pull. No more expired food surprises.
4) Add Floating Shelves on Empty Walls
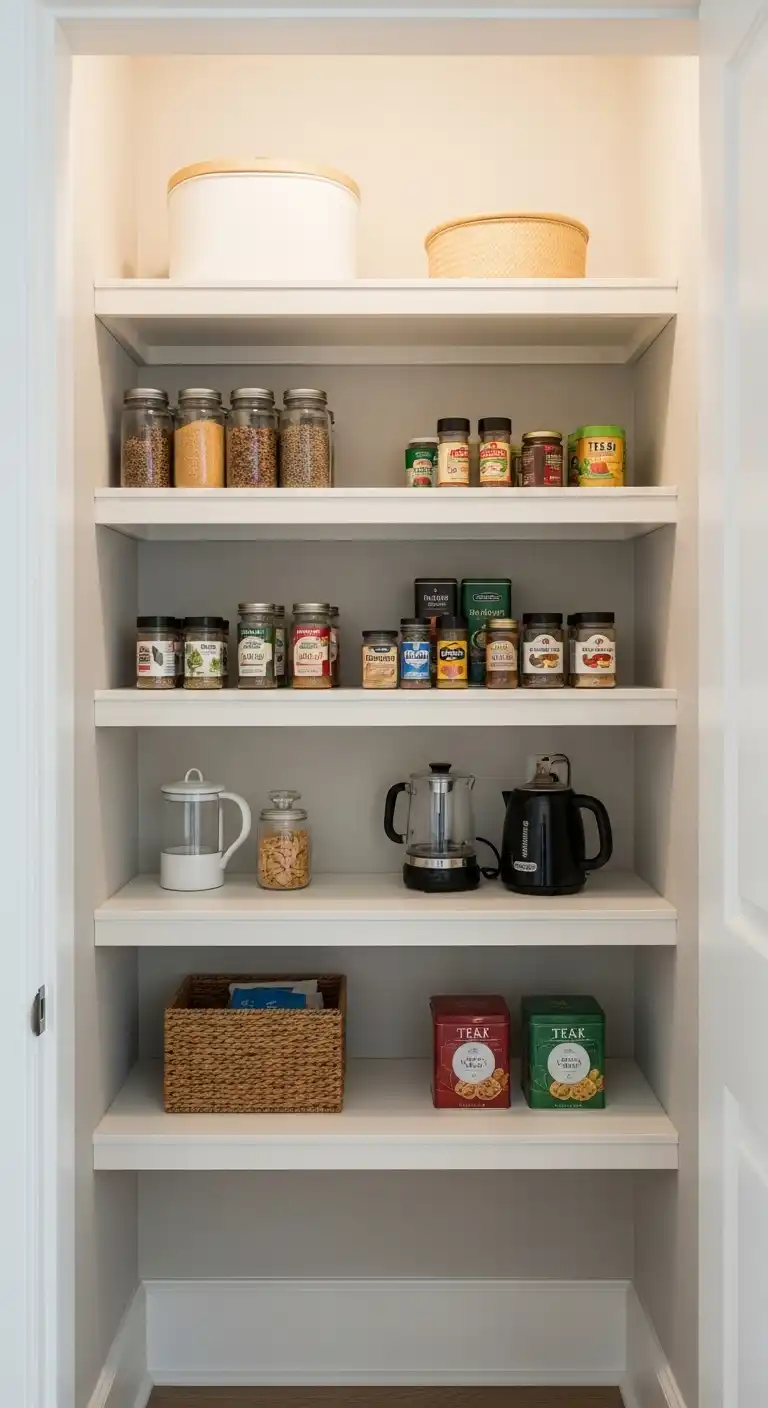
Look at the side walls inside your pantry. Are they bare? That’s free space waiting to be used.
Floating shelves work well here. They don’t take much depth—3 to 4 inches is plenty.
But that slim strip of space can hold a row of spice jars, small baking supplies, or tea tins.
How to make it work:
- Measure the wall section you want to use.
- Choose narrow floating shelves that won’t block the door from closing.
- Group light items together, like spices or small condiments.
- Avoid heavy jars or appliances—they need deeper shelves.
This small change keeps clutter off the main shelves. It also gives you a quick “grab zone” for the items you use all the time.
Time: 30–60 minutes to mount.
Cost: Low to medium ($15–50 per shelf).
Quick win: Turns dead wall space into storage for dozens of small items.
5) Try Adjustable Shelving Systems So Everything Fits
Fixed shelves look neat, but they often waste space. A tall shelf might fit cereal boxes, but then half the space above your cans goes unused. That’s frustrating.
Adjustable shelving systems fix this. They let you raise or lower each shelf whenever you need. One week you can fit tall jars.
The next, you can rearrange for shorter bins. Your pantry changes with you instead of working against you.
How to use them best:
- Measure your pantry and choose a track or peg system that fits.
- Start by grouping foods by height, then adjust shelves to match.
- Leave at least 2 inches of “grab space” above items so you don’t fight to pull them out.
It takes a little setup at first, but the payoff is long-term flexibility.
Time: 1–3 hours to install.
Cost: Medium ($50–150 depending on system).
Quick win: Shelves fit your food instead of forcing your food to fit them.
6) Store Baking Sheets and Cutting Boards Vertically
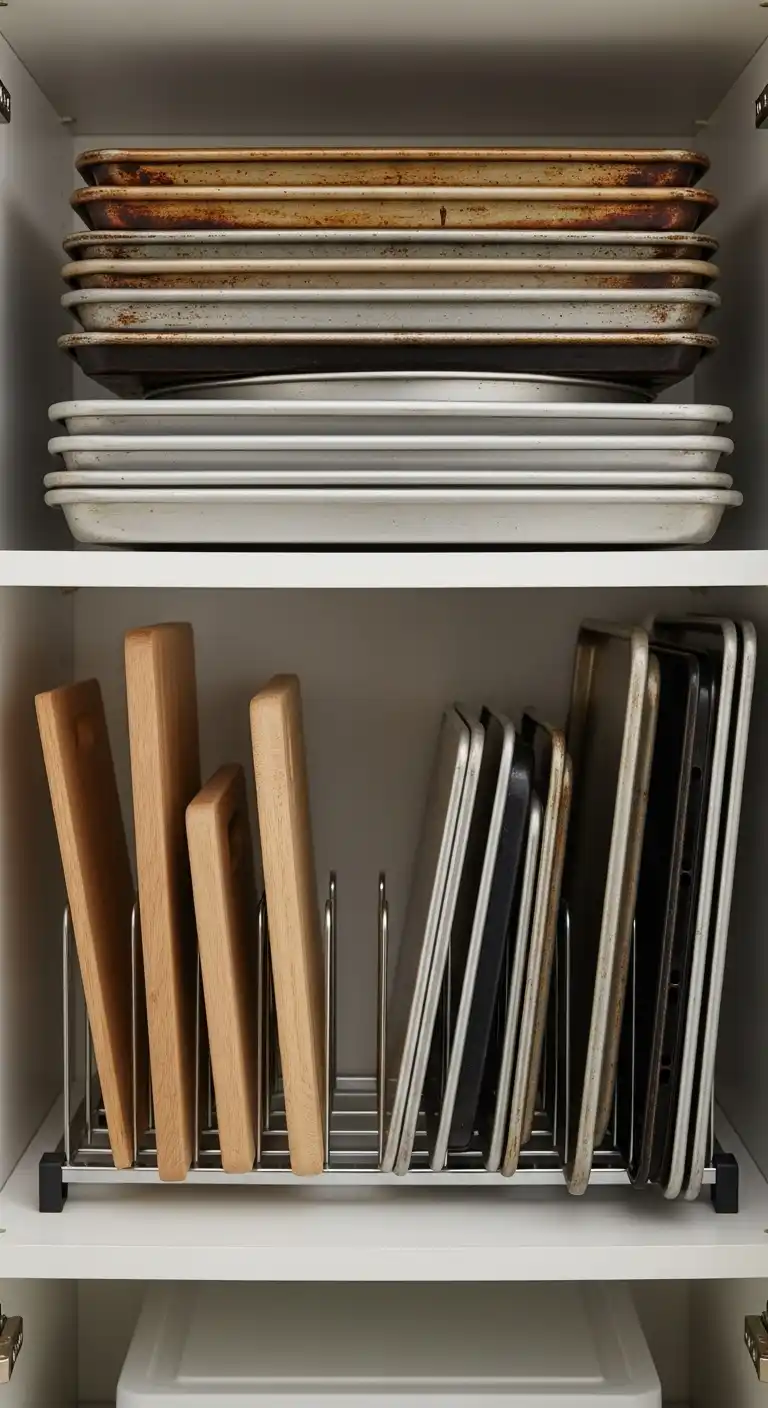
Stacking trays, pans, and cutting boards flat eats up a whole shelf.
You also have to move the top ones just to grab the one you need. That’s annoying and messy.
The fix? Store them upright. Use a vertical rack, like the kind meant for files or folders. Slide each tray or board into its own slot.
Now you can pull out exactly what you need without shifting the rest.
Here’s how to do it:
- Buy a metal or wooden rack designed for pans.
- Place it on a lower shelf where heavy trays are easy to grab.
- Sort by size—small cutting boards in one row, baking sheets in another.
This change feels small, but it clears space fast.
Time: 10 minutes.
Cost: Low ($15–30 for a rack).
Quick win: Saves a half shelf and makes baking gear easy to grab.
7) Add Hooks Under Shelves for Extra Hanging Storage
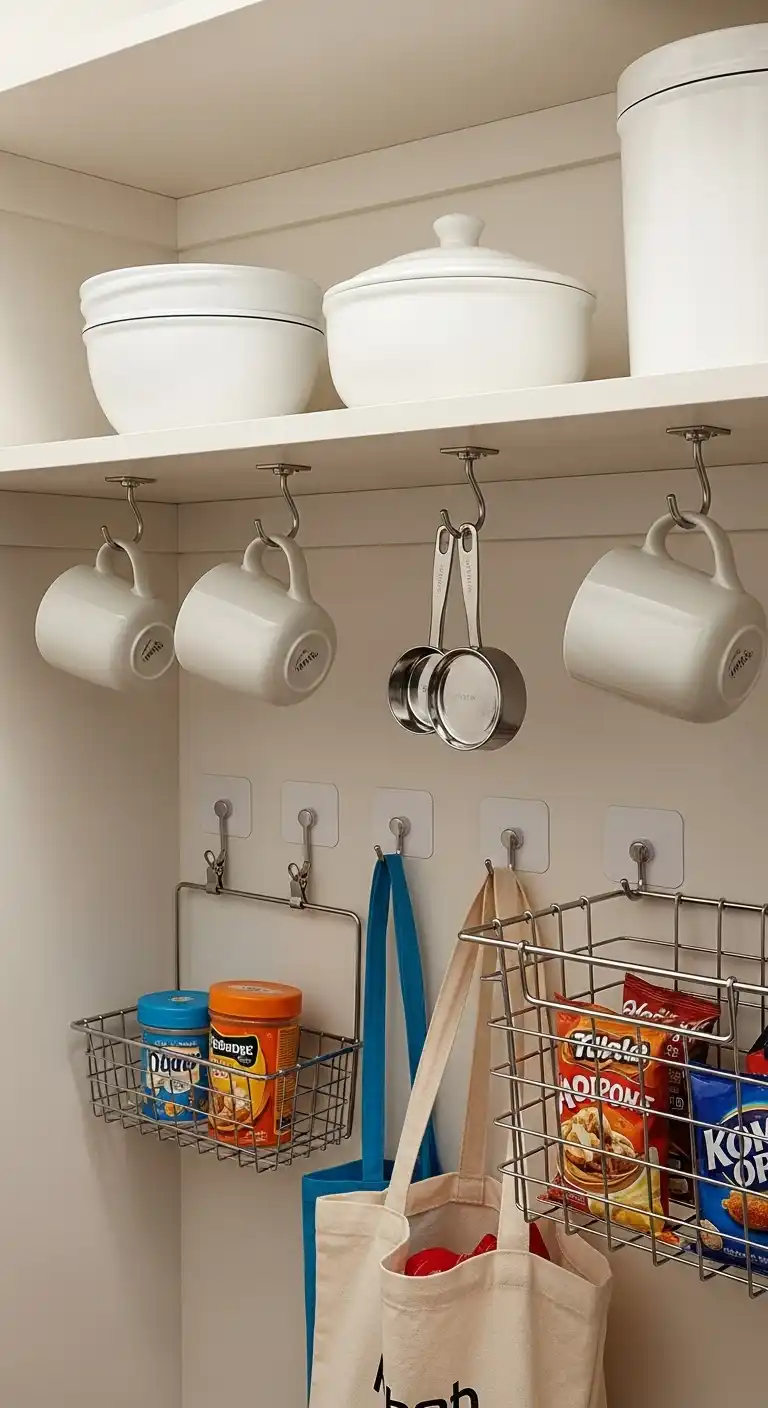
Look under your pantry shelves. That empty space can do more work.
Small hooks screwed into the bottom of a shelf turn it into bonus storage.
You can hang mugs, measuring cups, or reusable grocery bags. If you want, you can even clip on small wire baskets for snacks.
Tips to do it right:
- Space hooks 2–3 inches apart so items don’t bump.
- Use adhesive hooks if you rent and can’t drill.
- Keep heavier items, like mugs, closer to the shelf supports.
It’s a cheap trick that adds storage where you didn’t expect it.
Time: 10–20 minutes.
Cost: Very low ($5–15).
Quick win: Turns “dead air” into usable space for small items.
8) Use the Back of the Pantry Door for Extra Shelves

Your pantry door is sitting flat and empty. That space could be storage.
An over-the-door rack gives you 3–6 shelves instantly. Use them for spices, condiments, jars, or even cleaning spray bottles.
It’s like adding a mini pantry without remodeling.
Tips to do it right:
- Choose a rack with adjustable shelves so tall bottles fit.
- Measure your door first to avoid a poor fit.
- Store light items at the top and heavier ones at the bottom.
Time: 15–30 minutes
Cost: $20–40
Quick win: Creates bonus shelves where there were none.
9) Hang Baskets or Pouches on the Door
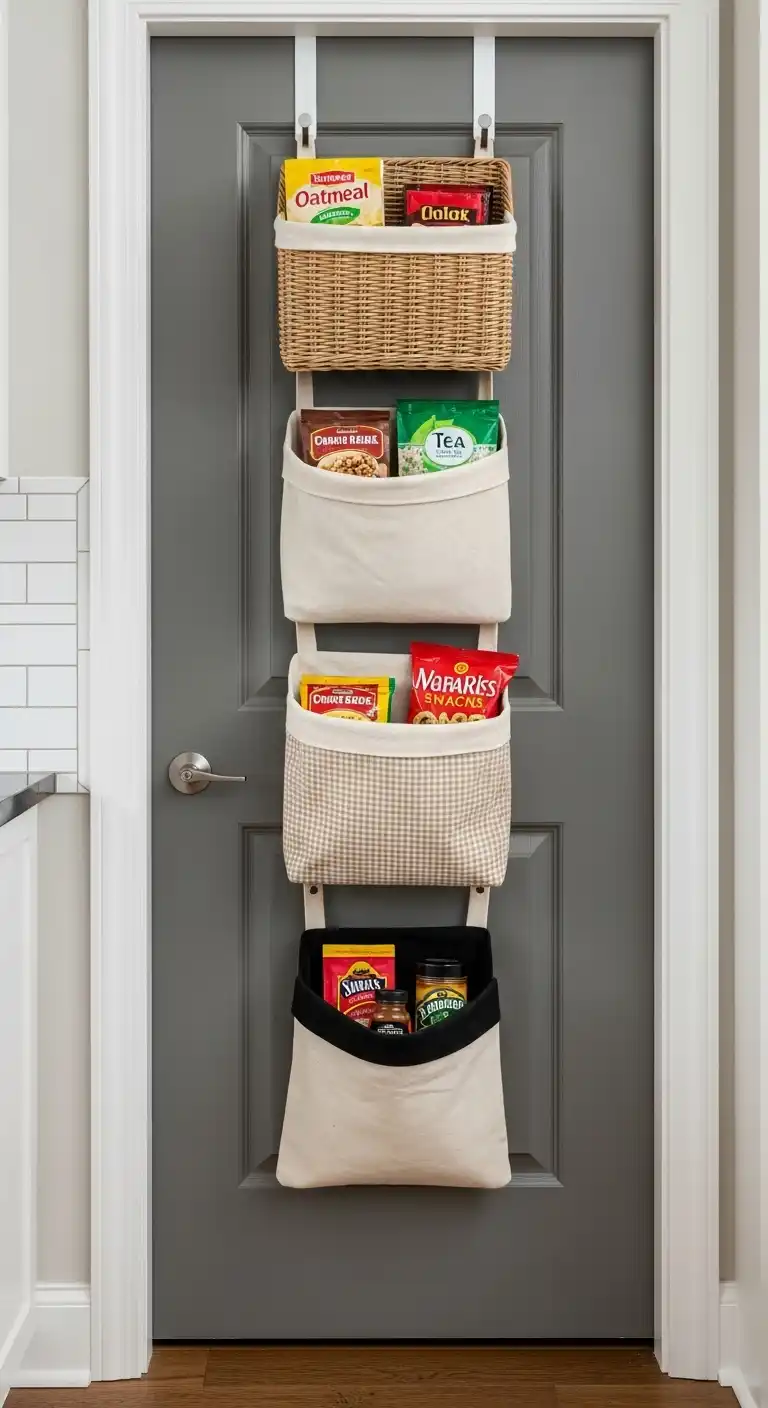
Small packets scatter and vanish in a narrow pantry. Think oatmeal, tea bags, or seasoning mixes.
Hanging baskets or fabric pouches solve that. Hook them to the pantry door and keep small snacks and packets in one spot.
Tips to do it right:
- Use lightweight baskets or cloth pouches so the door isn’t too heavy.
- Assign one basket per category—tea, snacks, sauces.
- Wash fabric pouches once in a while to keep them clean.
Time: 10–15 minutes
Cost: $10–25
Quick win: Keeps small items from getting lost in piles.
10) Install Hooks for Bags and Aprons

Reusable bags and aprons eat up valuable shelf space. But they don’t need a shelf.
Install a few hooks on the inside of your pantry door. Hang your bags flat and aprons neatly. Shelves stay clear for food.
Tips to do it right:
- Pick strong hooks that can handle bag weight.
- Place them low enough that kids can grab their own snack bags.
- Adhesive hooks work if you don’t want to drill.
Time: 5–10 minutes
Cost: $5–15
Quick win: Clears clutter from shelves by moving non-food items out of the way.
11) Slide in a Slim Rolling Cart Beside the Pantry
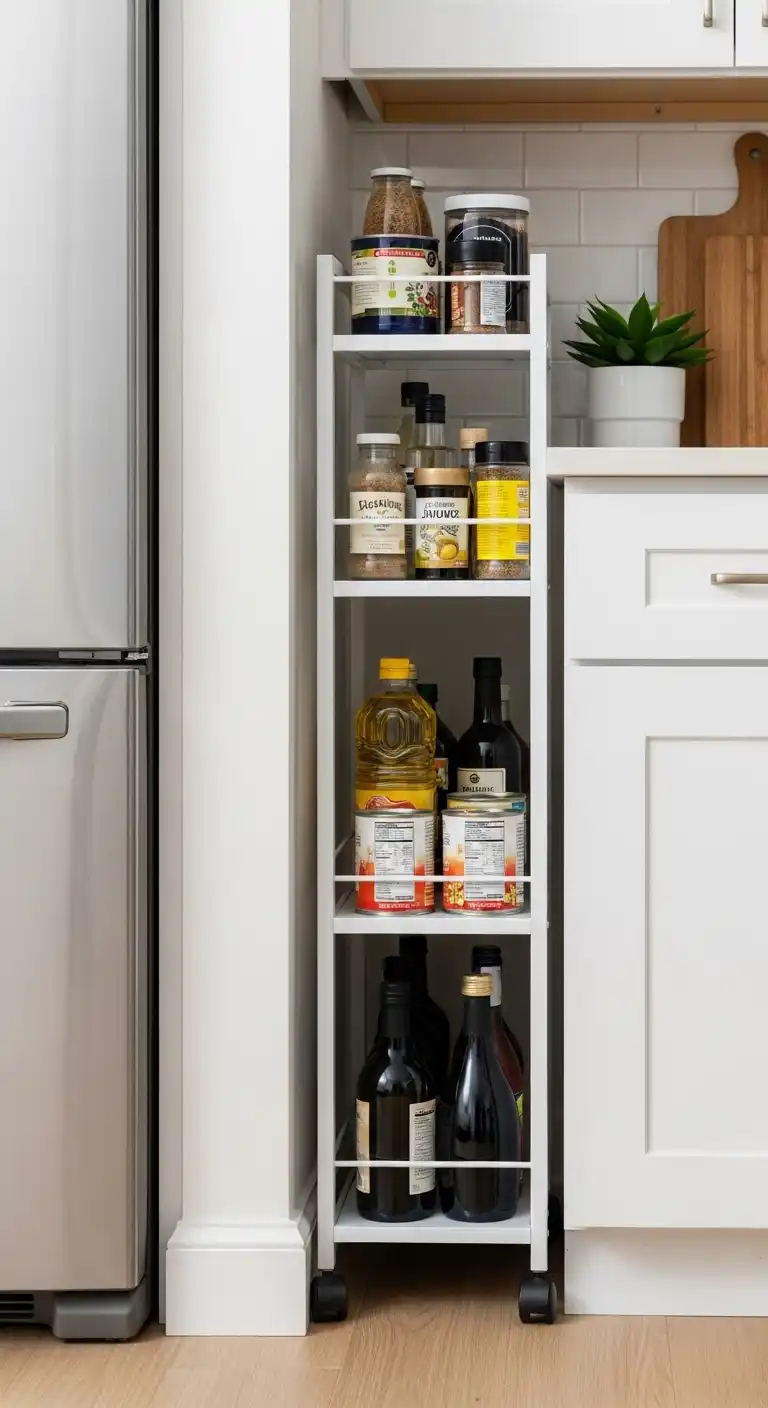
A narrow gap beside your fridge or pantry may look useless. It’s not.
A slim rolling cart fits right in. Store canned goods, bottles of oil, or spices. Roll it out when you need something, then tuck it back out of sight.
Tips to do it right:
- Measure the space first so you buy the right width.
- Look for carts with side rails so items don’t fall off.
- Store heavier bottles on the bottom shelf for stability.
Time: 20–30 minutes
Cost: $30–60
Quick win: Turns an unused gap into a hidden storage station.
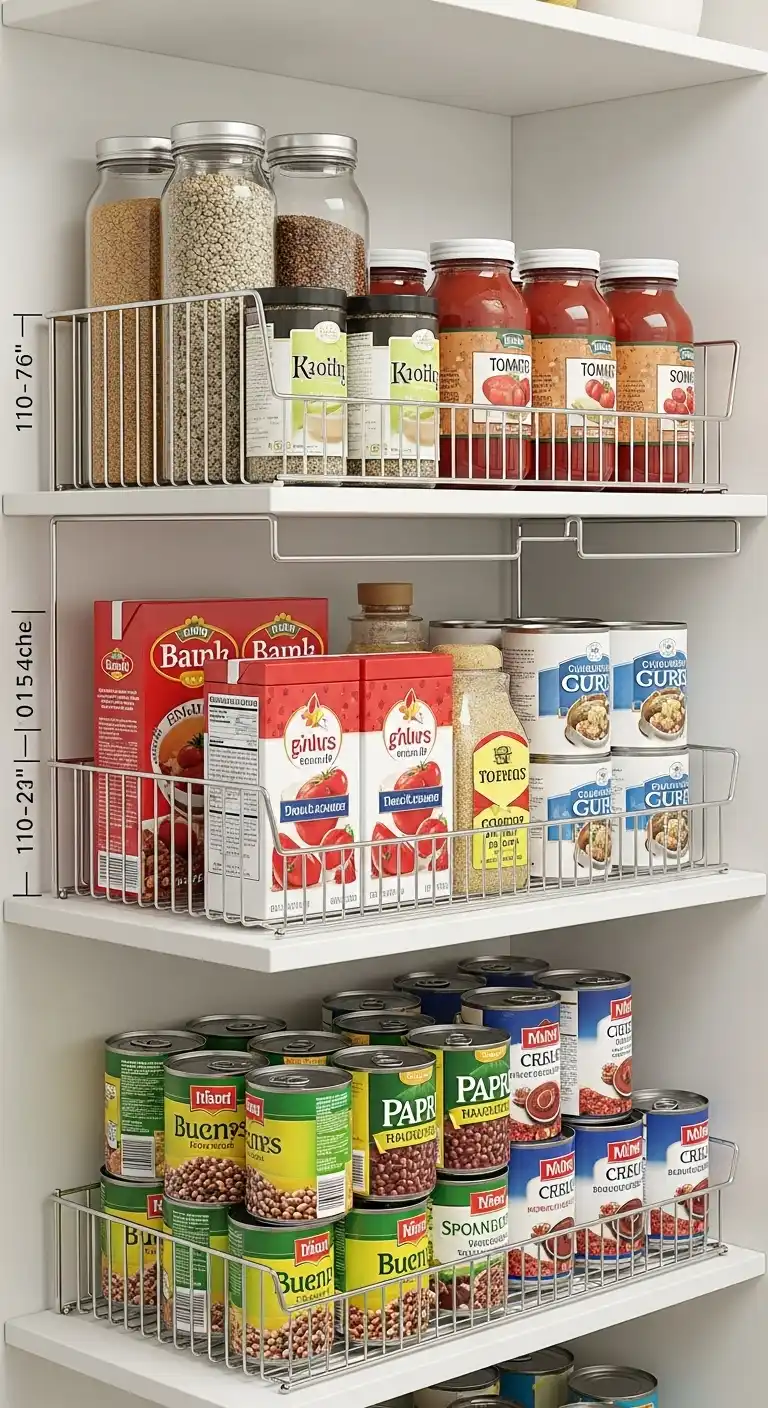
12) Fix Deep Shelves with Pull-Out Wire Baskets
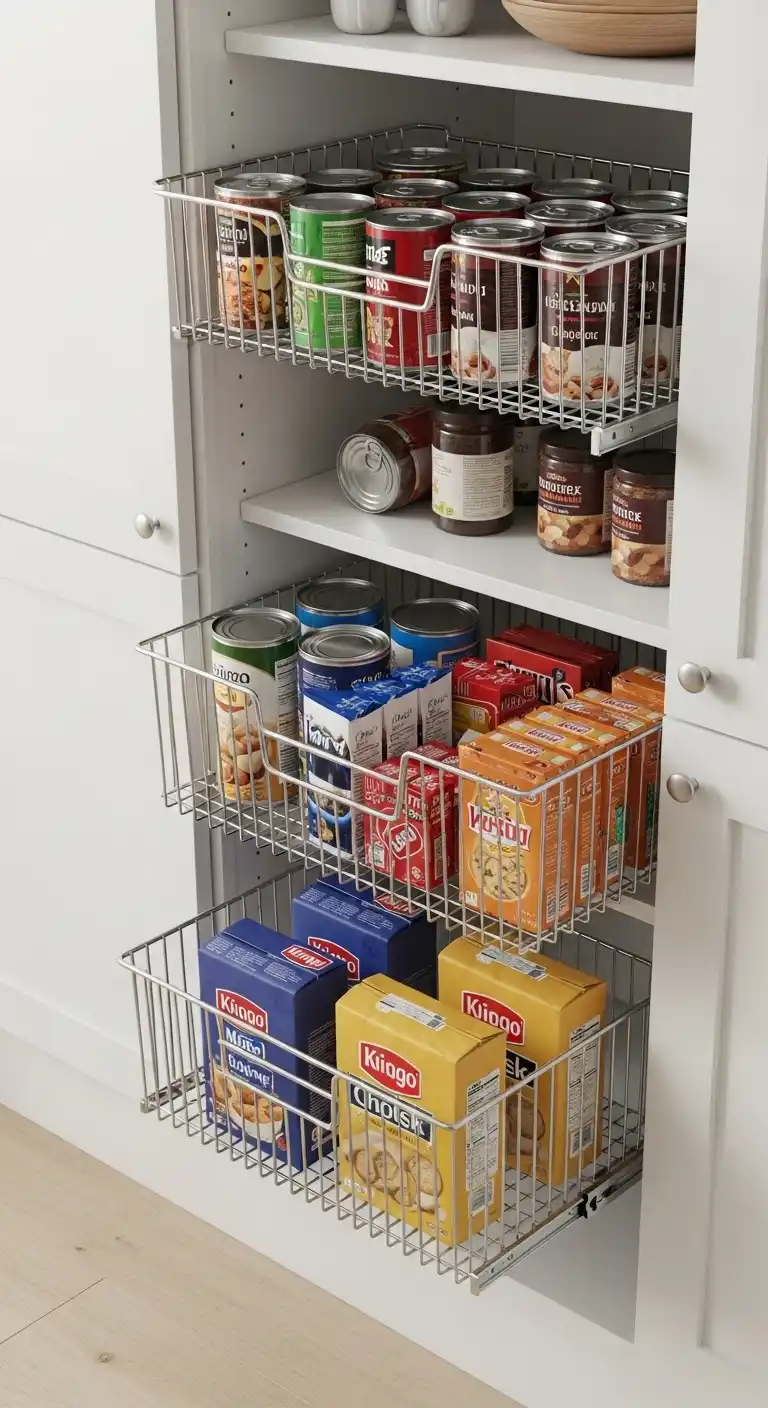
Deep pantry shelves swallow items. You push things to the back, then forget they exist. Weeks later, you find expired cans or crushed snacks.
Pull-out wire baskets solve this. They slide forward like drawers so you can see everything at once. No more digging around or wasting food.
Tips to do it right:
- Measure your shelf depth before buying baskets.
- Go for smooth sliders so they don’t stick when full.
- Use baskets for snacks, pasta, or bagged goods that shift easily.
Time: 20–30 minutes
Cost: $25–60
Quick win: Turns hidden corners into easy-to-reach storage.
13) Save Space with Slide-Out Spice Racks
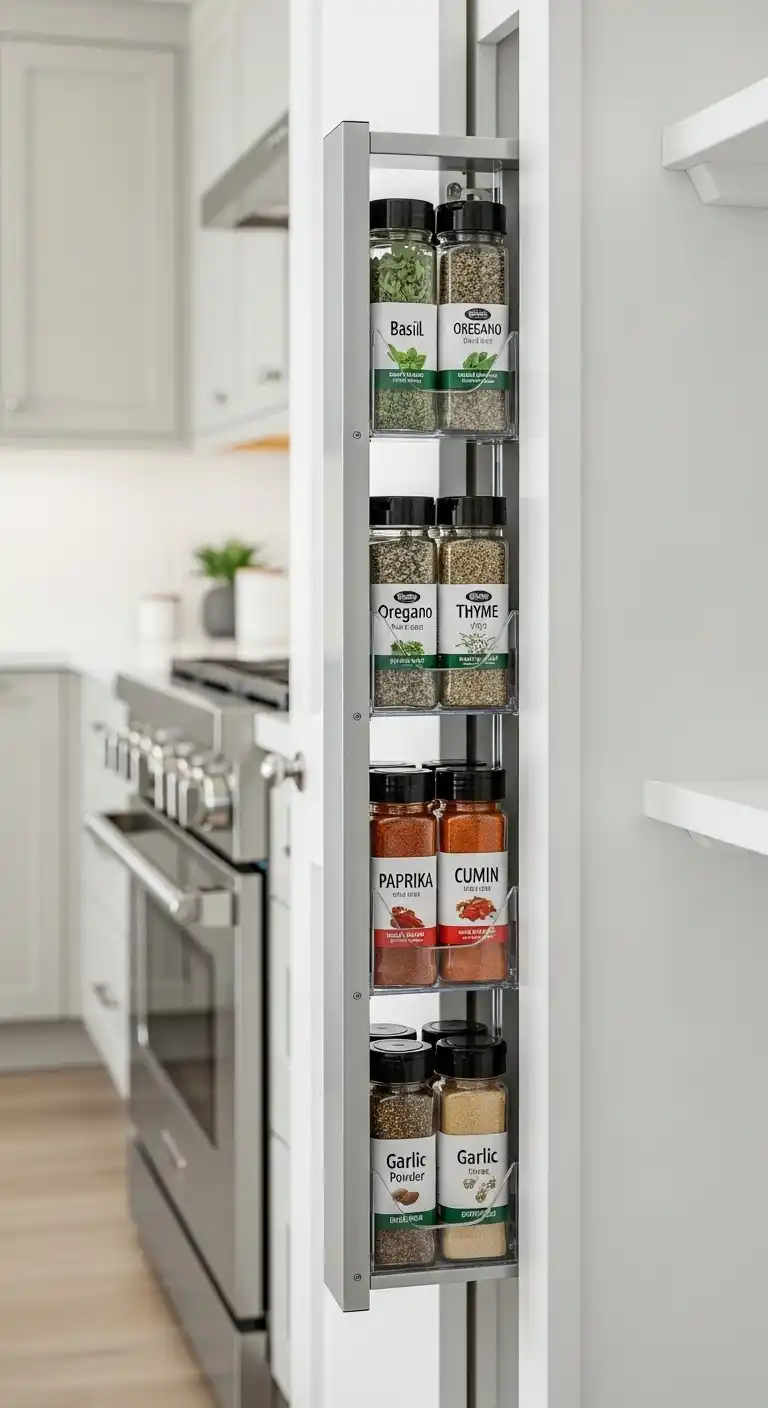
Spices often vanish in a narrow pantry. They’re small, they roll around, and they always end up in the wrong spot.
A slim slide-out spice rack fixes that. It tucks into tiny gaps where nothing else fits. Pull it out, and every jar is right in front of you.
Tips to do it right:
- Keep it near your stove if possible for quick cooking access.
- Group spices by type—baking, everyday cooking, specialty.
- Don’t overload; lighter racks last longer.
Time: 15–20 minutes
Cost: $20–40
Quick win: Keeps every spice visible so you stop buying duplicates.
14) Store Heavy Bags in Rolling Drawers
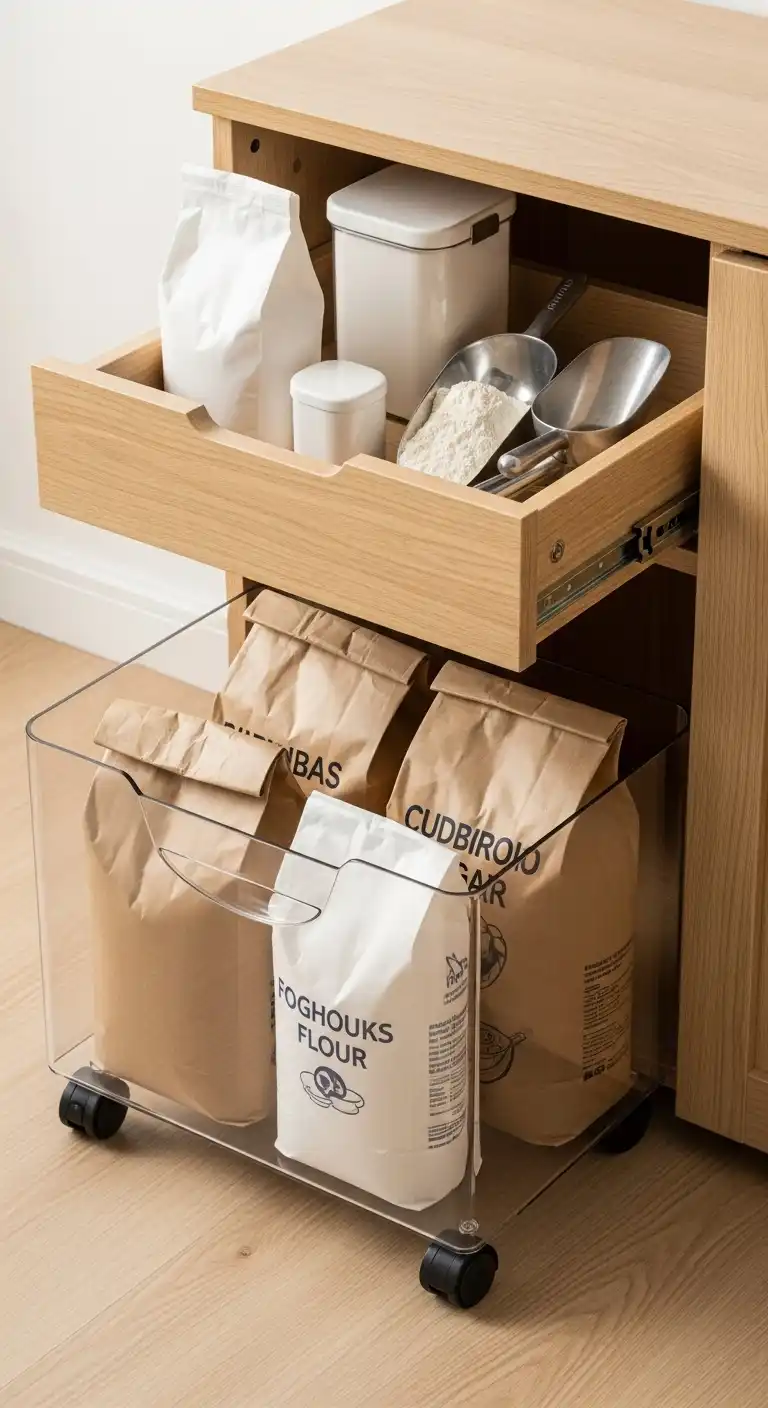
Big bags of flour, sugar, or rice are tough to handle. They take up too much shelf space and feel awkward to lift.
Rolling drawers make them easy. Slide the drawer out, scoop what you need, and push it back in. No straining, no mess.
Tips to do it right:
- Choose drawers with sturdy wheels for heavy loads.
- Store the heaviest items on the lowest drawer.
- Line drawers with a mat so bags don’t rip or tear.
Time: 20–30 minutes
Cost: $30–70
Quick win: Makes heavy pantry items easy to reach without hurting your back.
15) Stack Clear Bins to Control the Chaos

Loose snacks, pasta packets, and random bags pile up fast in a small pantry.
Before you know it, the shelf looks messy and you can’t find what you need.
Clear bins fix that problem. Group chips in one, pasta in another, and stack them to use every inch of vertical space.
Since they’re see-through, you don’t have to dig.
Tips to do it right:
- Pick square or rectangle bins—they stack better than round ones.
- Keep daily-use items in the easiest-to-reach bin.
- Leave a little “grab space” so bins slide out smoothly.
Time: 10–15 minutes
Cost: $20–50
Quick win: Turns messy piles into neat, stackable sections you can actually see.
16) Use Airtight Containers for Dry Goods
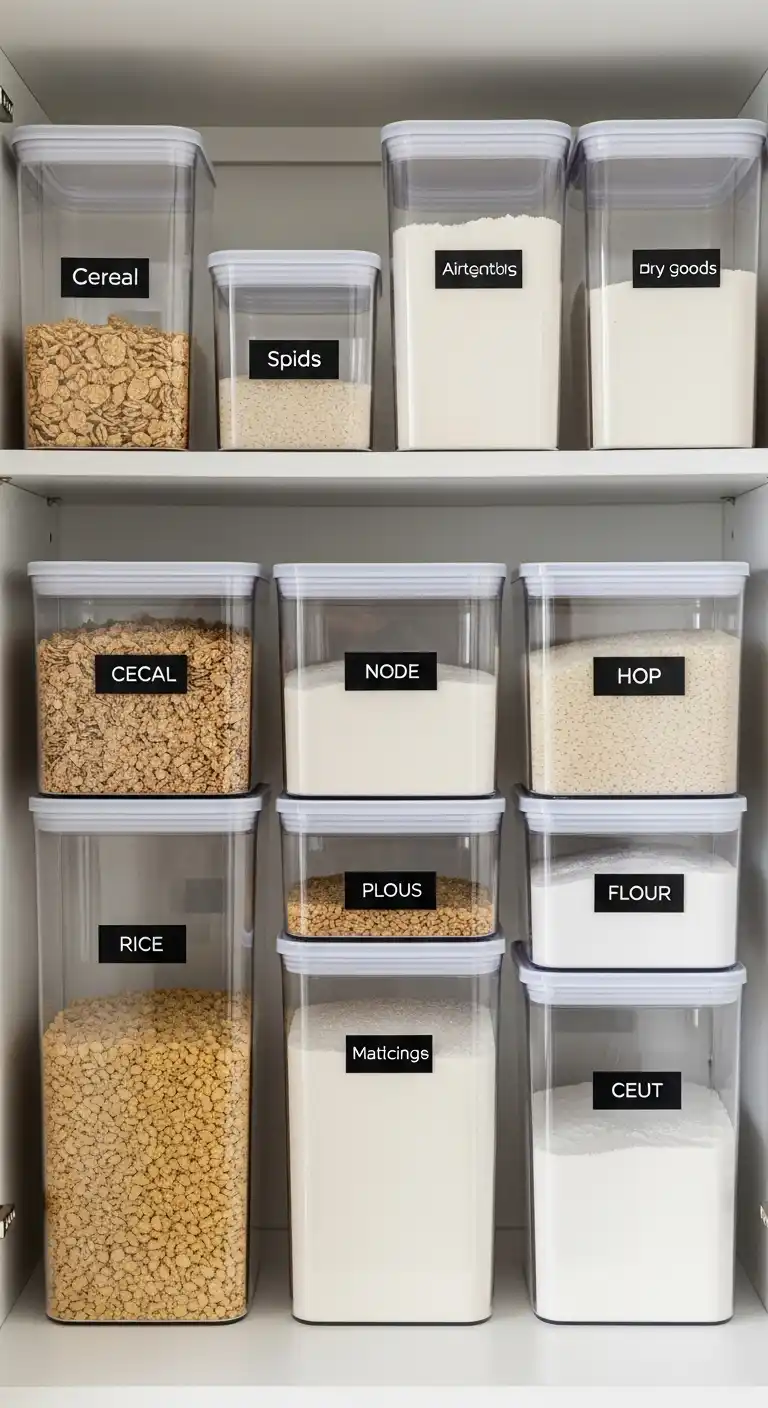
Cereal, rice, and flour don’t stay fresh in flimsy bags. They spill, go stale, or attract pests.
Airtight containers fix that. They keep food fresh and make it easy to see when you’re running low.
Square or rectangle containers work best in tight pantries since they fit like puzzle pieces.
Tips to do it right:
- Label each container so there’s no guessing.
- Use matching sets for a clean look and easier stacking.
- Don’t overfill—leave a little room to pour without spills.
Time: 15–20 minutes
Cost: $30–70
Quick win: Keeps food fresher and frees up space by ditching messy bags.
17) Try Tiered Can Racks for Easy Rotation
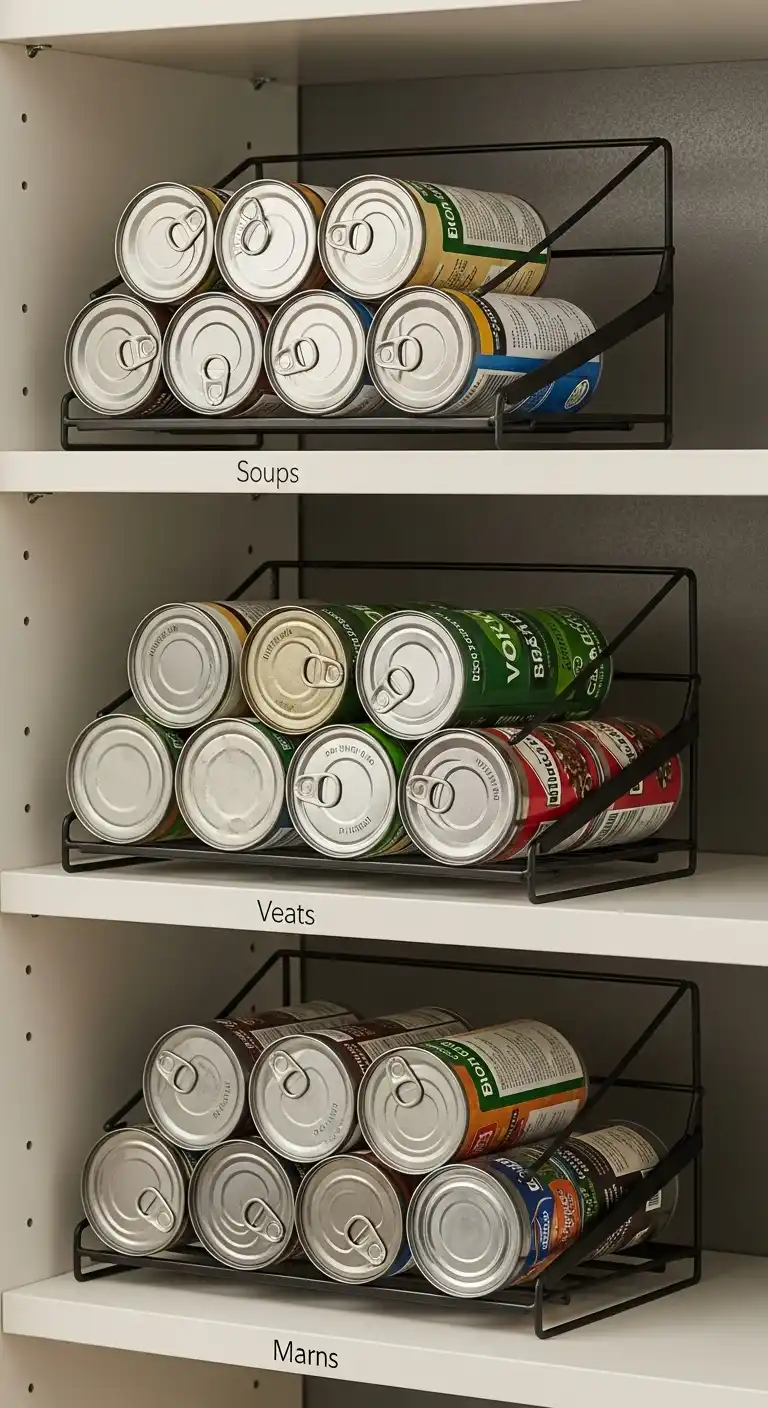
Cans love to roll to the back of shelves. Out of sight means forgotten—and wasted.
A tiered can rack solves this. It angles cans forward, so the oldest ones stay in front and get used first.
That way, you actually follow the “first in, first out” rule.
Tips to do it right:
- Group cans by type: soups, veggies, beans.
- Don’t overload—follow the rack’s weight limit.
- Keep racks on lower shelves for safer lifting.
Time: 15 minutes
Cost: $20–40
Quick win: Makes canned goods visible, organized, and easy to rotate.
18) Label Everything to Save Time
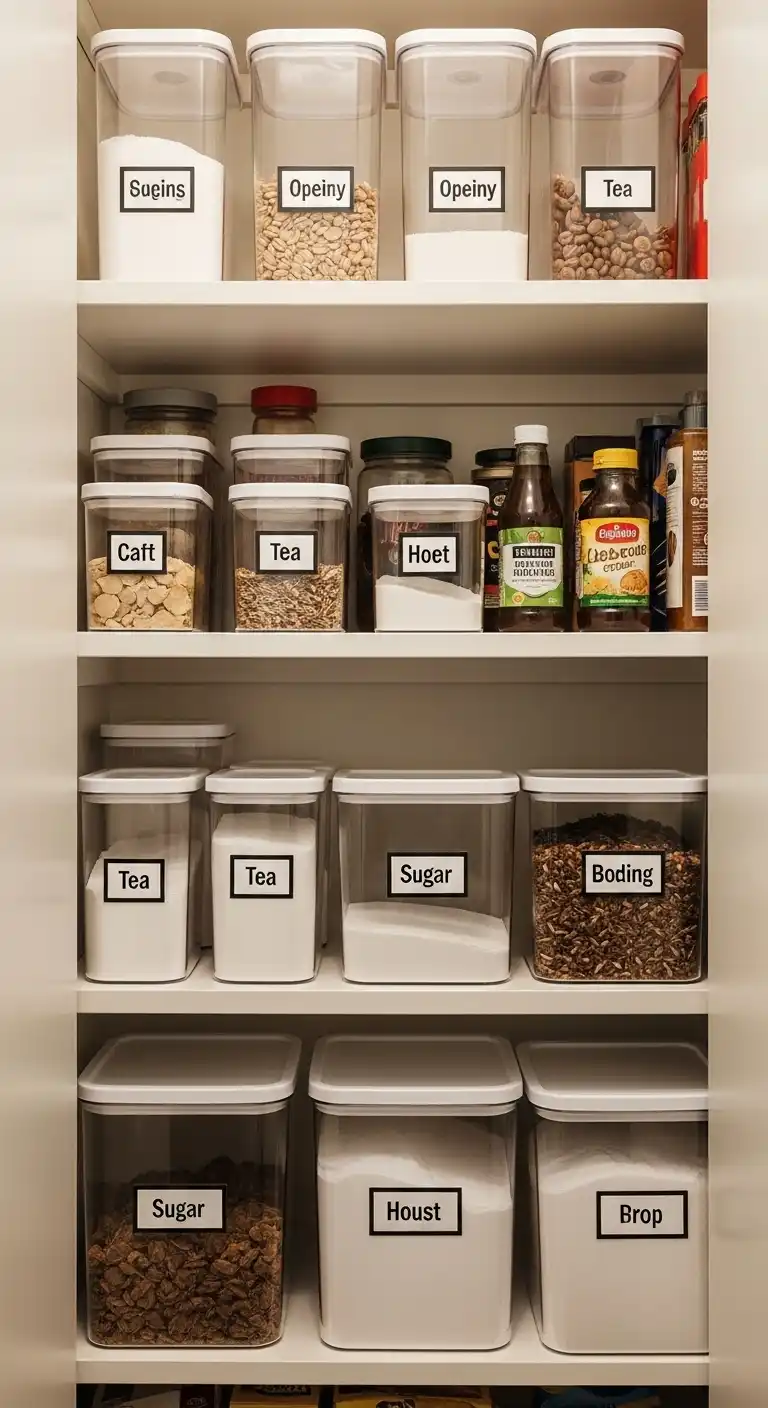
A narrow pantry gets messy fast. You end up opening three bins before finding sugar or tea.
Labels stop that. Whether you use a label maker or simple stickers, clear names mean less searching and faster cooking.
Tips to do it right:
- Use bold, easy-to-read fonts.
- Label both the container and the lid if items get stacked.
- Update labels when you swap foods to avoid mix-ups.
Time: 20–30 minutes
Cost: $10–25
Quick win: Cuts down on guesswork and keeps your pantry system working long-term.
19) Repurpose a Closet or Nook into a Pantry
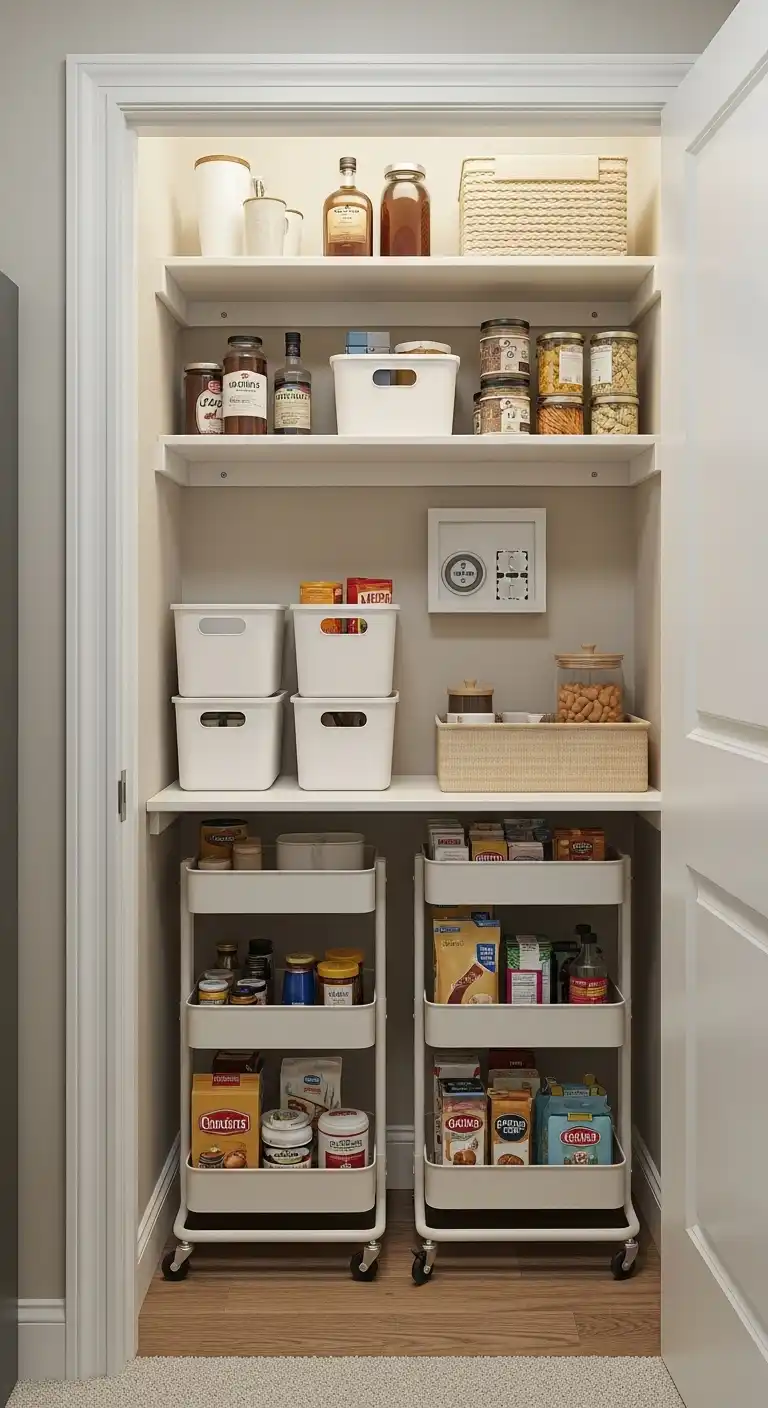
No pantry at all? That’s stressful when food starts spilling into random cabinets.
You can fix it by turning a hallway closet, laundry nook, or even a tall cabinet into a backup pantry.
Add shelves, rolling carts, or stackable bins, and you suddenly have organized storage where you had none.
Tips to do it right:
- Measure first so bins and shelves fit without wasting space.
- Use adjustable shelving if you want flexibility.
- Keep heavy items low and lighter items up top.
Time: 1–2 hours
Cost: $50–150
Quick win: Creates a pantry from “dead space” you weren’t even using.
20) Use the Side of Cabinets or Islands for Storage
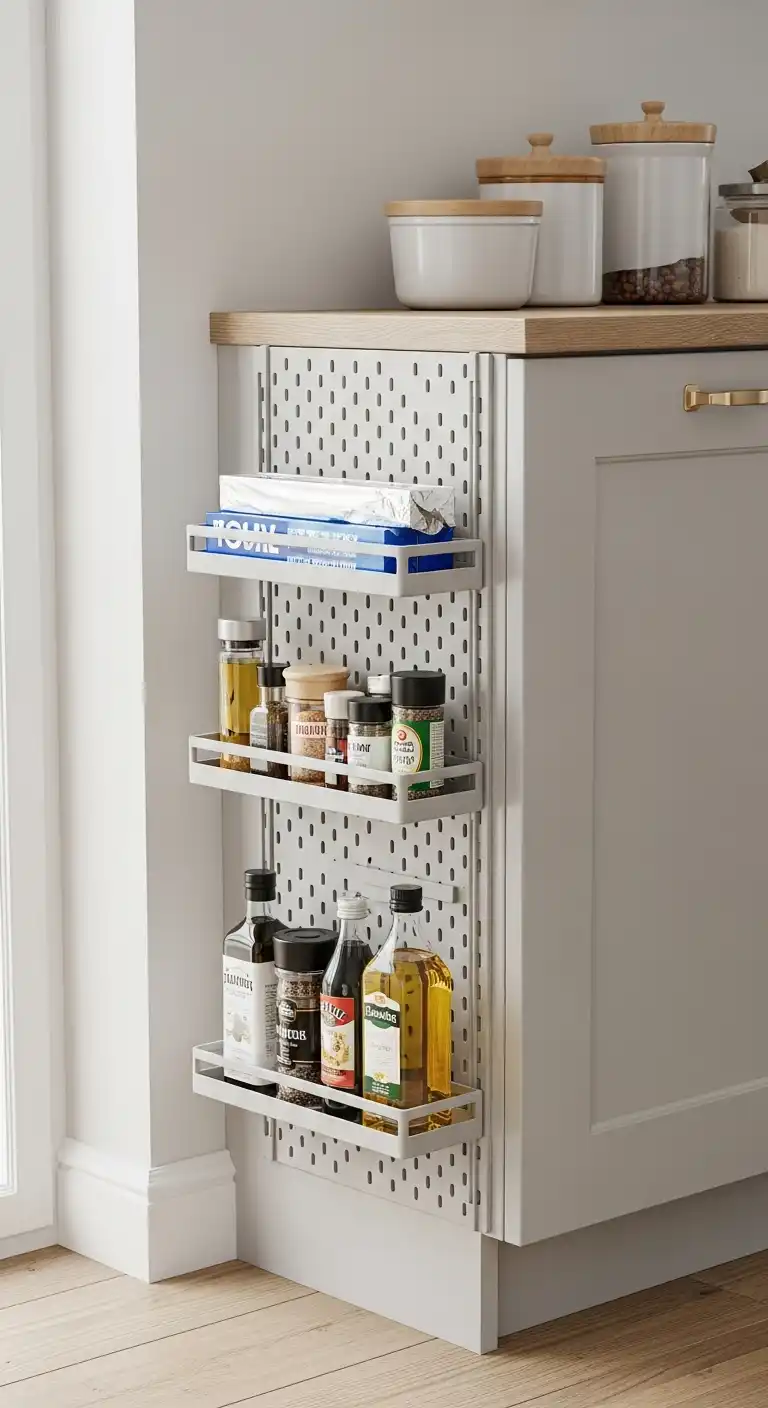
Running out of pantry space is common. But the side of your cabinets or kitchen island often sits empty.
Mount slim racks, pegboards, or narrow shelves there. It’s a sneaky way to stash spices, foil, or cooking oils without touching your pantry.
Tips to do it right:
- Choose shallow racks so they don’t stick out too far.
- Store light items so screws don’t loosen over time.
- Match rack color to your cabinets for a cleaner look.
Time: 20–30 minutes
Cost: $15–40
Quick win: Adds extra storage without remodeling your pantry.
21) Add Lighting to Make the Pantry Feel Bigger
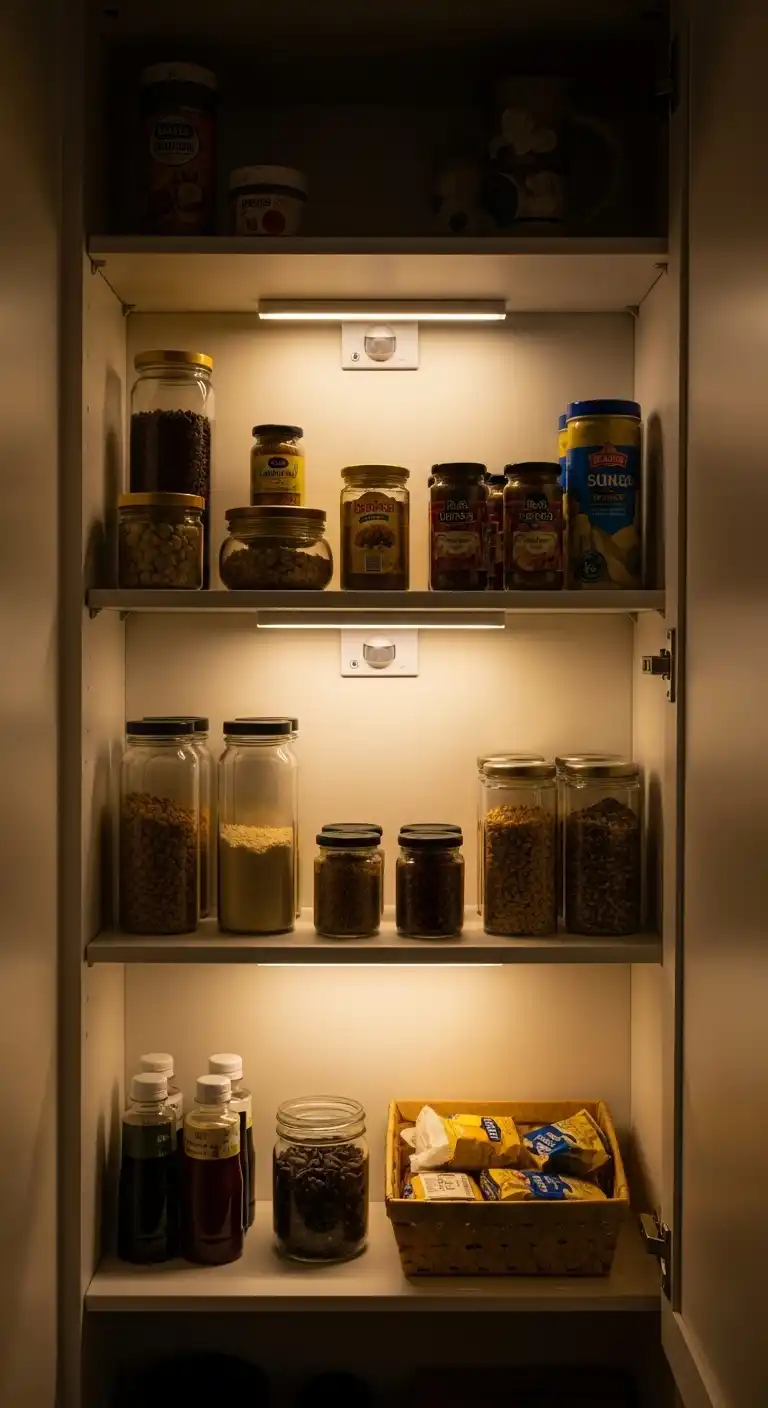
Narrow pantries often feel dark. When you can’t see the back of a shelf, things get lost.
Stick-on LED lights or motion-sensor strips fix that. A bright pantry not only looks cleaner, but you’ll also grab what you need faster.
Tips to do it right:
- Place lights at the front edge so they shine across shelves.
- Use battery-operated LEDs if you don’t want wiring.
- Go with warm light for a cozy feel, cool light for a brighter look.
Time: 15–20 minutes
Cost: $20–50
Quick win: Brightens the space and makes it easier to keep organized.
Conclusion
A narrow pantry doesn’t have to be a headache.
With the right tricks—like adding shelves to the ceiling, using the door for storage, or rolling carts in tight gaps—you can fit much more than you thought possible.
Small changes make a big impact. Pick one or two ideas from this list and try them today.
Even something simple, like a can rack or clear bins, can free up space and cut the chaos.
The best part? Once your pantry works for you, cooking and storing food becomes easier and less stressful.
Now it’s your turn: which of these narrow pantry ideas will you try first?