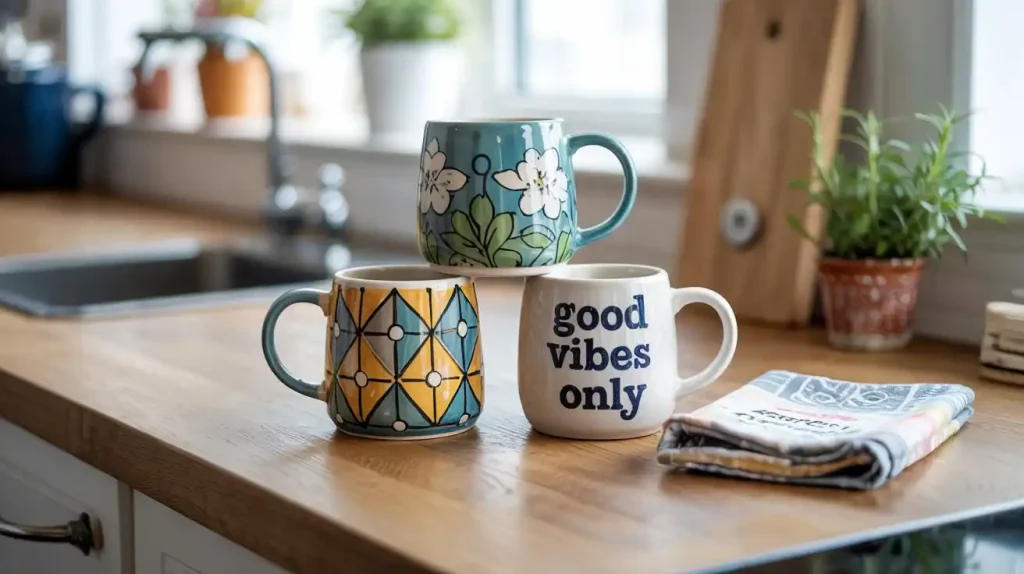
DIY Hand Painted Ceramic Mugs: How to Make Your Own Designs
Add a personal touch to your kitchen or create a thoughtful gift with these DIY hand painted ceramic mugs.
This DIY project uses non-toxic ceramic paint to transform plain white mugs into unique, dishwasher-safe pieces featuring designs like geometric patterns or inspirational quotes.
Perfect for beginners, this craft is simple, budget-friendly, and allows for endless creativity.

Materials Needed
- 2-4 plain white ceramic mugs (smooth surface, no glaze imperfections)
- Non-toxic ceramic paint (water-based, dishwasher-safe after baking)
- Fine-tipped paintbrushes (various sizes for detail work)
- Pencil with eraser (for sketching designs)
- Rubbing alcohol and cotton pads (for cleaning mugs)
- Painter’s tape (optional, for creating clean lines)
- Paper towels or rags (for cleanup)
- Oven-safe tray or baking sheet
- Sketch paper and pen (for planning designs)
- Stencils or templates (optional, for precise patterns)
- Clear ceramic sealant (optional, for extra durability)
Step-by-Step Instructions: DIY Hand Painted Ceramic Mugs
Follow this step-by-step guide to make your own custom mugs that blend practicality with charm.
🎄 Christmas & Year-End Amazon Deals !
Don’t miss out on the best discounts and top-rated products available right now!
*As an Amazon Associate, I earn from qualifying purchases.
Step 1: Plan Your Design
Before painting, decide on the design for your mugs. Popular options include geometric shapes (triangles, stripes, dots), floral patterns, or short inspirational quotes like “Rise & Grind” or “Stay Cozy.”
Sketch your ideas on paper to visualize the layout, keeping the mug’s curved surface in mind. If you’re new to painting, consider using stencils for clean shapes or practicing simple patterns like polka dots or chevrons.
Think about color schemes that match your kitchen or the recipient’s style. For example, use pastel blues and pinks for a soft look or bold black and gold for a modern vibe. Keep designs balanced, focusing on the mug’s front or handle area for maximum impact.
Step 2: Prepare the Mugs
Clean each mug thoroughly to ensure the paint adheres properly. Wipe the surface with a cotton pad soaked in rubbing alcohol to remove oils, dust, or fingerprints, then let it dry completely.
Avoid touching the painting area to keep it grease-free. If your design requires straight lines or specific sections, apply painter’s tape to mask off areas for crisp edges.
Inspect the mugs for any imperfections, as uneven surfaces can affect paint application. Choose mugs with smooth, glossy finishes for the best results, as matte or textured surfaces may not hold paint as well.
Step 3: Sketch the Design
Using a pencil, lightly sketch your design directly onto the mug’s surface. The pencil marks will guide your painting and can be erased or wiped off if you make mistakes.
Keep the sketch simple, focusing on outlines or key shapes, as the paint will cover most marks. If using a quote, write the text carefully, ensuring it fits the mug’s curve and is legible.
For precision, use a stencil or trace a printed template by placing it against the mug and pressing lightly. If you’re freehanding, practice on paper first to build confidence. Don’t press too hard with the pencil to avoid scratching the ceramic.
Step 4: Paint the Design
Shake or stir your ceramic paint according to the package instructions, as some paints require mixing for even color. Using fine-tipped paintbrushes, apply the paint in thin, even layers, following your pencil sketch.
Start with lighter colors as a base, then add darker or bolder colors for details. Work slowly to avoid smudging, and keep a paper towel handy to wipe away mistakes while the paint is wet.
For intricate designs, use smaller brushes for precision. If painting a quote, consider a fine-tip paint pen for clean lettering. Allow each color to dry before adding another to prevent blending, checking the paint’s drying time (usually 10-20 minutes per layer).
Step 5: Correct and Refine
Once the paint is dry, inspect your design for any uneven lines or mistakes. Use a damp cotton swab or a small brush dipped in rubbing alcohol to carefully remove errors without disturbing the rest of the design.
If needed, add additional layers of paint to enhance vibrancy or cover pencil marks, ensuring each layer dries fully.
🎄 Christmas & Year-End Amazon Deals !
Don’t miss out on the best discounts and top-rated products available right now!
*As an Amazon Associate, I earn from qualifying purchases.
Step back to evaluate the overall look. Add small details, like dots or outlines, to enhance the design, but avoid overcomplicating it. Simplicity often makes the most striking mugs, especially for everyday use.
Step 6: Bake the Mugs
To set the paint and make the mugs dishwasher-safe, bake them according to the ceramic paint’s instructions (typically provided on the bottle).
Place the mugs on an oven-safe tray or baking sheet, ensuring they don’t touch each other. Preheat the oven to the recommended temperature (usually 300-350°F or 150-175°C) and bake for 30-40 minutes, or as specified.
Let the mugs cool completely in the oven to prevent cracking due to sudden temperature changes. Once cooled, check the paint for durability by gently scratching it with a fingernail; it should feel smooth and permanent.
If desired, apply a clear ceramic sealant for extra protection, following its baking instructions.
Step 7: Final Touches and Testing
Inspect the mugs for any smudges or imperfections, wiping them gently with a damp cloth if needed.
Test the mugs by hand-washing one to ensure the paint holds up (though baked paint should be dishwasher-safe). If you used a quote or intricate design, confirm it’s still legible and visually balanced.
Personalize further by adding a small painted detail inside the mug’s rim or near the handle, if desired. Package the mugs carefully if gifting, using tissue paper or a decorative box to highlight their handmade charm.
Discover more creative ideas and transform your kitchen with our “25 DIY Kitchen Craft Projects” – check out the full list now!
Tips for Success
- Choose Quality Paint: Use non-toxic, water-based ceramic paint labeled as dishwasher-safe after baking. Brands like Pebeo or FolkArt Enamel are reliable choices.
- Practice First: Test your design on a spare mug or ceramic tile to perfect your technique before painting the final pieces.
- Keep It Simple: Bold, minimal designs are easier to execute and look professional, especially for beginners.
- Handle with Care: Avoid painting the mug’s rim or areas that touch the mouth, as heavy use may wear down the paint over time.
- Gift Idea: Pair the mugs with a small bag of coffee or tea for a thoughtful, handmade gift set.
Why You’ll Love This Project
Hand-painted ceramic mugs are a delightful way to express creativity while adding functional art to your kitchen. This project is accessible for all skill levels, requiring minimal supplies and offering endless design possibilities.
The result is a set of durable, dishwasher-safe mugs that elevate your daily coffee or tea routine or make heartfelt gifts for friends and family. Plus, the process is relaxing and rewarding, turning ordinary mugs into personalized keepsakes.
Get started today and craft mugs that reflect your unique style. Whether you’re sipping from them yourself or sharing them with loved ones, these hand-painted creations are sure to bring joy to every use.
🎄 Christmas & Year-End Amazon Deals !
Don’t miss out on the best discounts and top-rated products available right now!
*As an Amazon Associate, I earn from qualifying purchases.