27 RV Kitchen Storage Ideas That Actually Free Up Space

Every camper kitchen fights the same battle: too many pots, plates, and gadgets crammed into cabinets built for half of them. The fix usually isn’t a bigger rig, it’s smarter storage that fits the space you already have.
These 27 RV kitchen storage ideas come straight from real campers and vanlifers who solved the same problem you’re facing, from stacked pull-out drawers that replace one deep cabinet, to magnetic knife strips, hidden fold-down shelves, and pegboard panels that hold everything from soap to spices.
Some of these ideas take an afternoon with a screwdriver. Others are as simple as hanging mugs from a rod or setting a cutting board over a cold stovetop.
What they all share is a focus on making every inch count, the windowsill, the back of a cabinet door, the sliver of space next to the trash bin.
Whether you’re outfitting a new build or just tired of digging through the same overstuffed drawer, there’s a storage idea here worth stealing for your own galley.
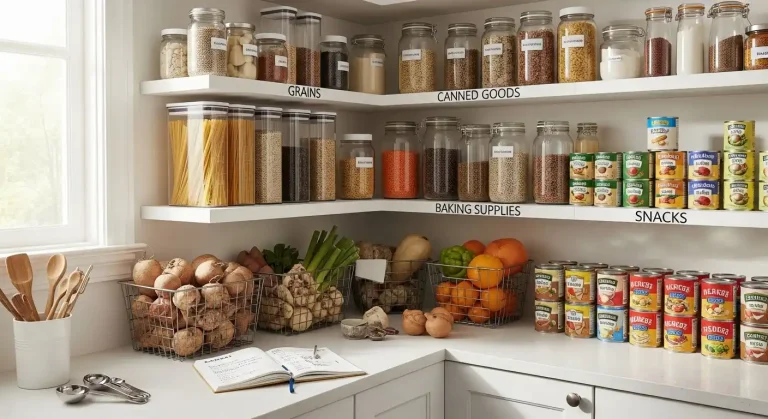
1. Use the Windowsill Above the Sink as a Second Pantry Shelf
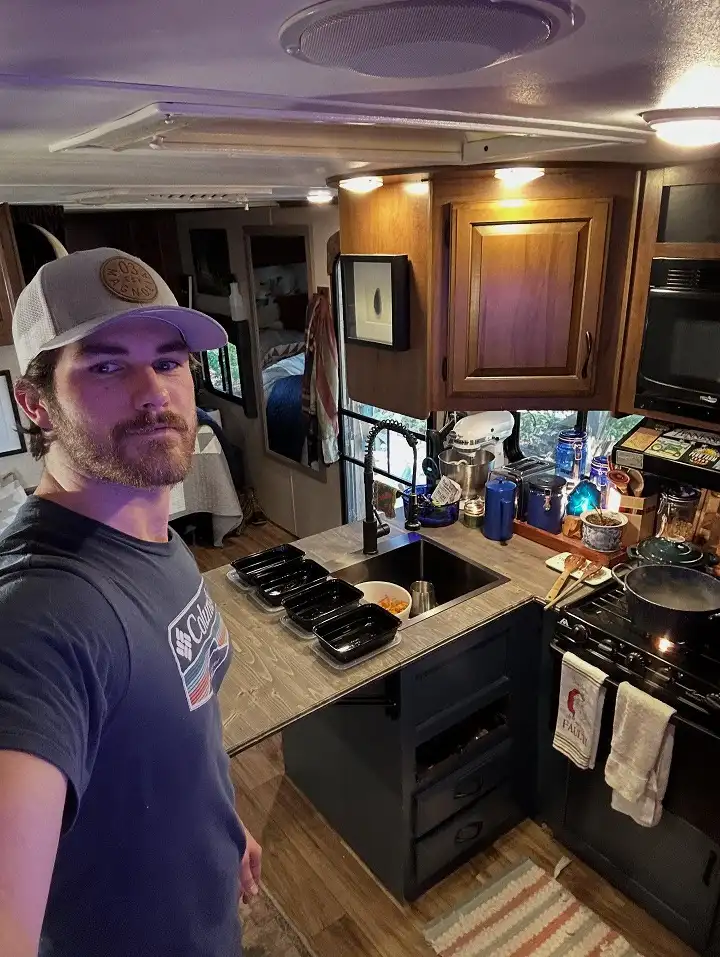
Counter space in a galley this size is worth protecting, so this kitchen puts the windowsill to work instead of leaving it empty.
Glass jars and canisters line up along the glass, catching daylight and staying visible without eating into a single inch of cabinet.
Below the sill, three stacked drawers handle everything that doesn’t need to be seen, pots, lids, and the stand mixer’s attachments all sit flat instead of nesting awkwardly in one deep cabinet.
Small divided trays wait ready on the counter for prepped ingredients, so mid-recipe chopping doesn’t turn into a hunt for a bowl.
A sunny sill holds more than you’d think. Save it for jars you actually reach for daily, not the ones you’ll forget are there.
2. Let a Built-In Plate Rack Do the Bracing for You
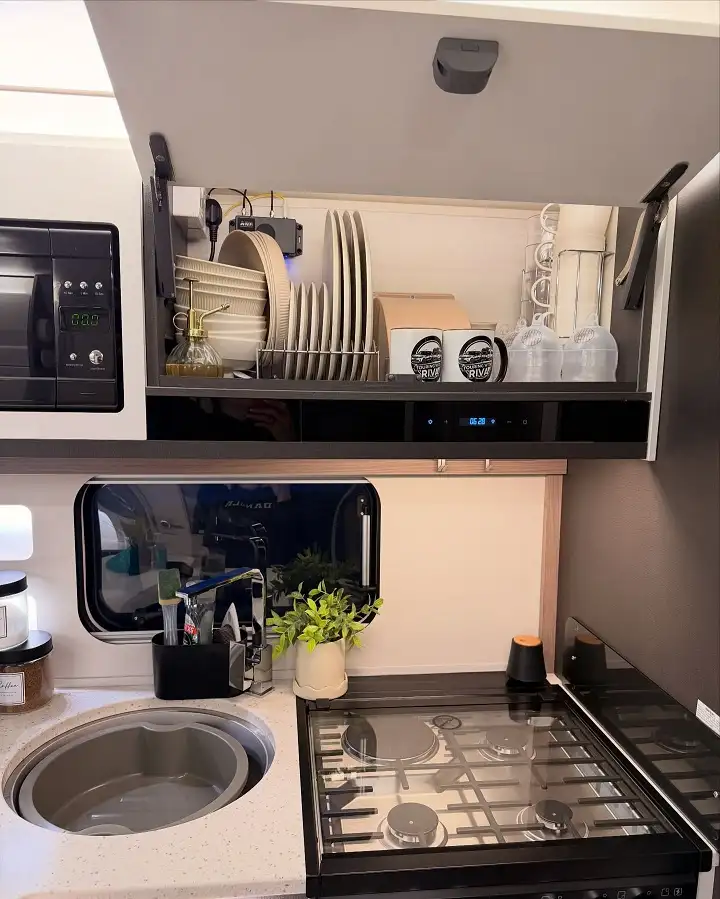
Overhead cabinets take the hardest hit on a bumpy road, and this one solves it with a wire divider rack instead of loose stacking.
Plates stand up in their own slots, bowls nest in a separate row, and mugs and travel cups slide into a tray on the other side.
Loose stacking works fine parked in a driveway, but a rack like this means nothing shifts, chips, or slides forward the second you hit a pothole.
It costs less than most people expect and takes an afternoon to fit into an existing cabinet, no rebuild required.
3. Hang a Rail Instead of Opening Another Drawer
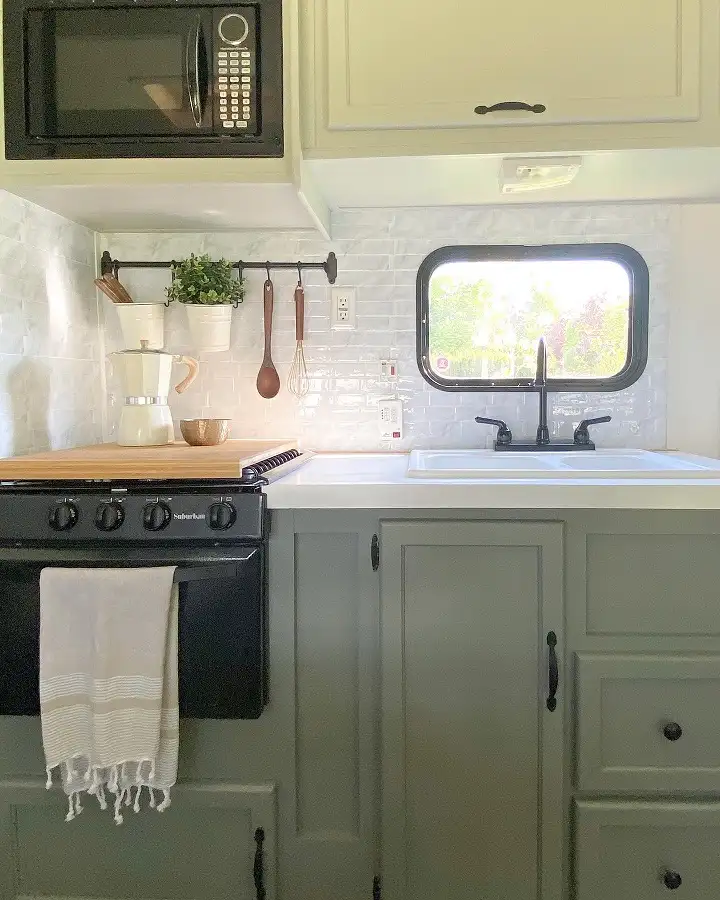
Sage cabinets and subway tile give this galley a cottage feel, but the real fix hides under the upper cabinet.
A short rail with a few S-hooks holds a whisk, a wooden spoon, and a small potted plant, all without asking for a single inch of drawer space.
The cutting board propped against the stove does double duty too, it protects the burners when they’re off and adds a spot to set the moka pot down.
Small moves like these matter more in a galley this size than one more organizer bin ever would.
4. Flank the Range With Pull-Out Drawers on Both Sides
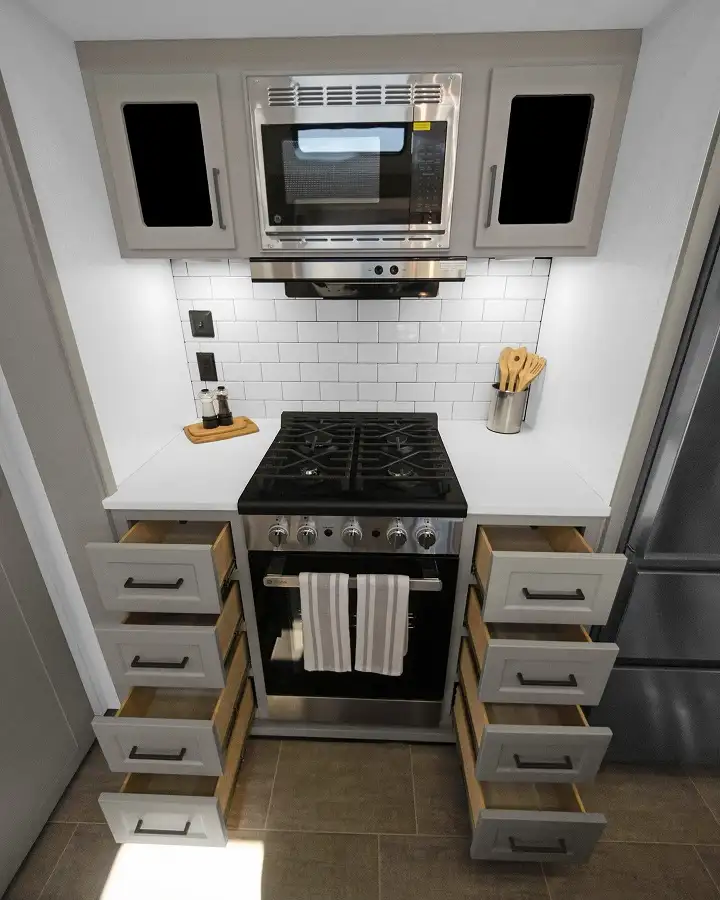
Two matching drawer stacks flank this range, and neither side depends on a single deep cabinet door that hides everything at the back.
Each drawer pulls out flat, so pots, bakeware, and utensils stay visible instead of getting buried.
This is a bigger project than most storage swaps on this list, closer to a remodel than a weekend fix, but it’s worth including because it shows what’s possible when the layout gets built around storage first instead of squeezing storage in after the fact.
5. Get Knives Off the Counter With a Magnetic Strip
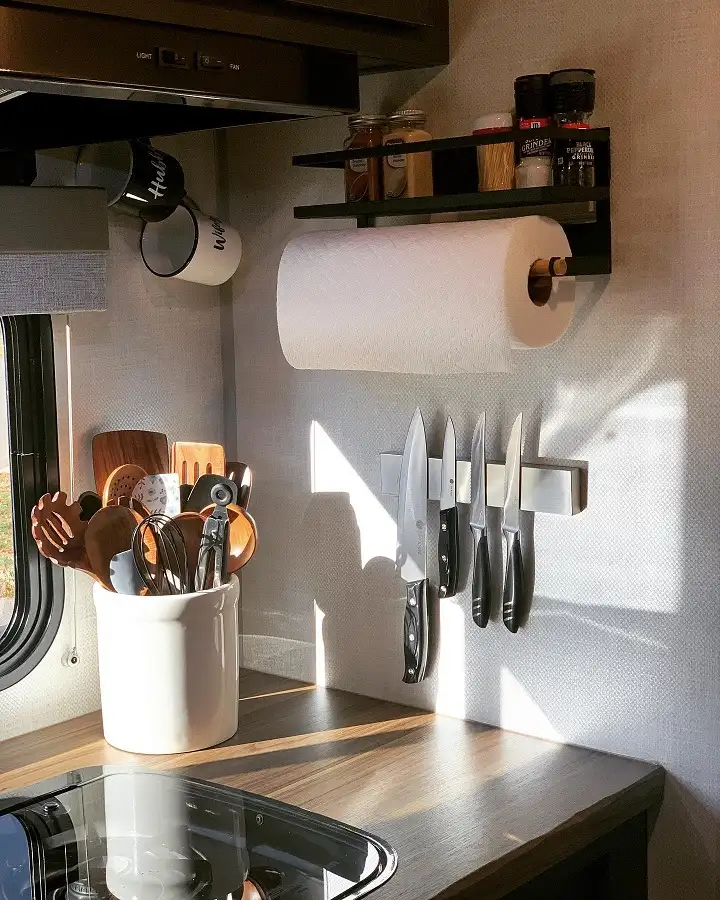
A magnetic strip does what a knife block never could in a rig this size.
It holds four or five knives flat against the wall, out of a drawer where blades dull faster from knocking into other tools, and off a counter where they’re one bump away from the floor.
The shelf above the paper towel holder is doing quiet work too, spices and a pepper grinder stay right at eye level instead of buried in a cabinet you’d have to dig through mid recipe.
Mount a magnetic strip above the counter for knives.
Add a slim wall shelf for spices and paper towels.
Leaving knives loose in a drawer where blades knock together.
Piling spice jars in a cabinet you can’t see into.
6. Give Every Dry Good Its Own Jar and a Fixed Shelf
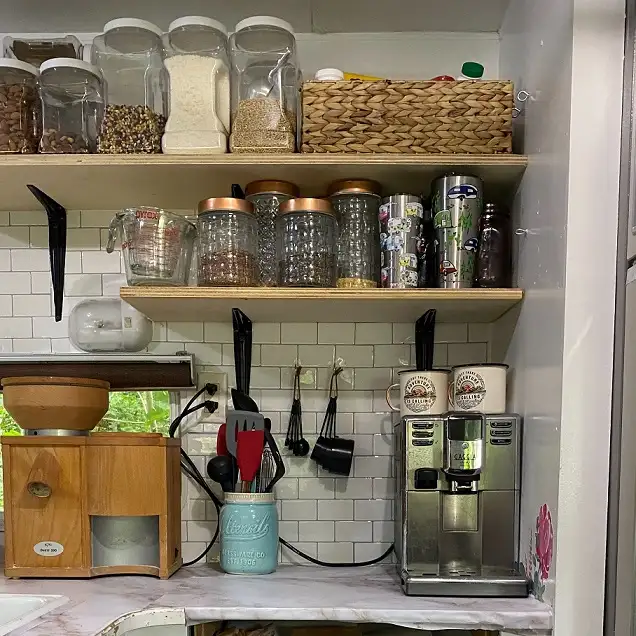
Bulk dry goods take over a pantry fast, so this kitchen keeps every jar labeled and lined up on open shelving instead of shoved into a cabinet three deep.
Rice, oats, and grains sit up top where they’re easy to grab, coffee gear and mugs cluster near the machine, and hanging utensils under the shelf stay out of a drawer entirely.
Open shelving isn’t for everyone, it only works if you’re willing to keep it tidy, but for someone who cooks often on the road it turns “where did I put that” into a five second glance.
7. Tuck a Coffee Station Into the Dead Corner by the Window
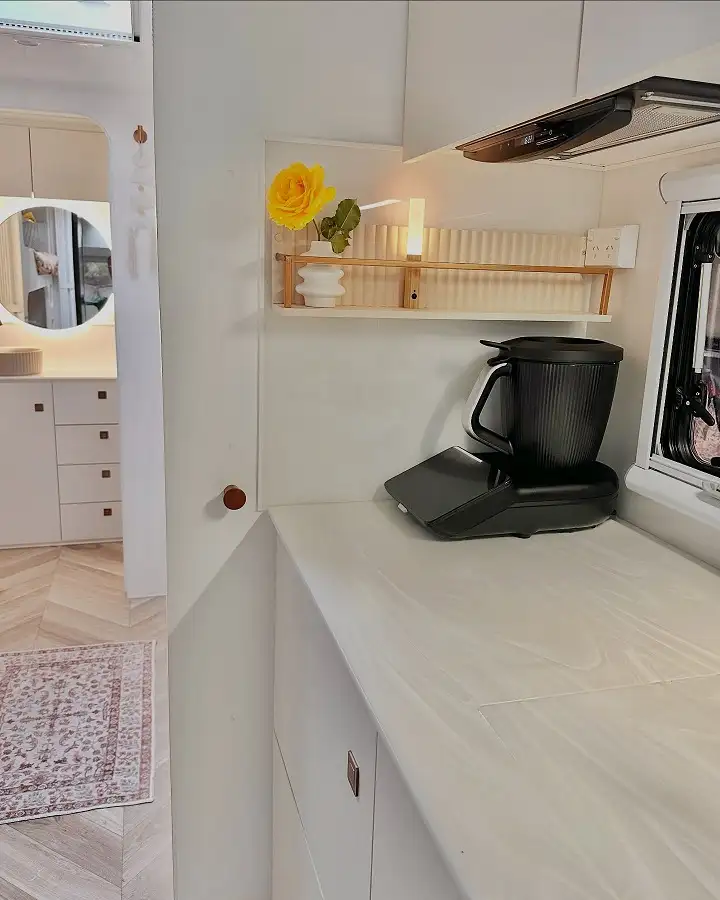
Corners get wasted in most campers, but this one earns its keep as a coffee station.
A slim floating shelf holds a single stem of flowers and a small light, and the coffee maker parks right below it on a stretch of counter that would otherwise sit empty between the window and the walkway.
The white and marbled finish keeps the whole nook from feeling like an appliance island, it reads more like a styled corner than a coffee bar bolted on as an afterthought.
Walk your own layout looking for dead corners before you buy any organizer. A shelf that costs almost nothing can turn wasted space into a whole coffee station.
8. Divide the Cutlery Drawer So Tools Don’t Tangle With Forks
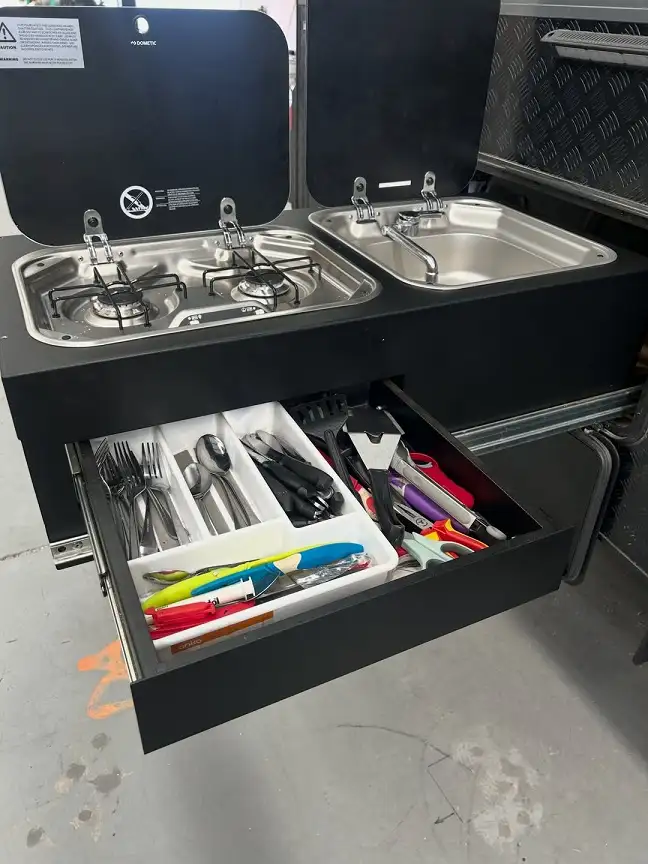
Forks, knives, and a multi-tool used to share the same drawer here, until a divided tray sorted them out.
Now the everyday flatware sits in its own lane, kitchen shears and a paring knife get a lane of their own, and pliers, a wrench, and scissors share a third section instead of scratching up the good silverware.
This kind of tray drops into almost any drawer without tools or a template, and it works just as well over a sink and stove combo like this outdoor unit as it does inside a full RV galley.
9. Add a Drop-Down Shelf That Disappears When You Don’t Need It
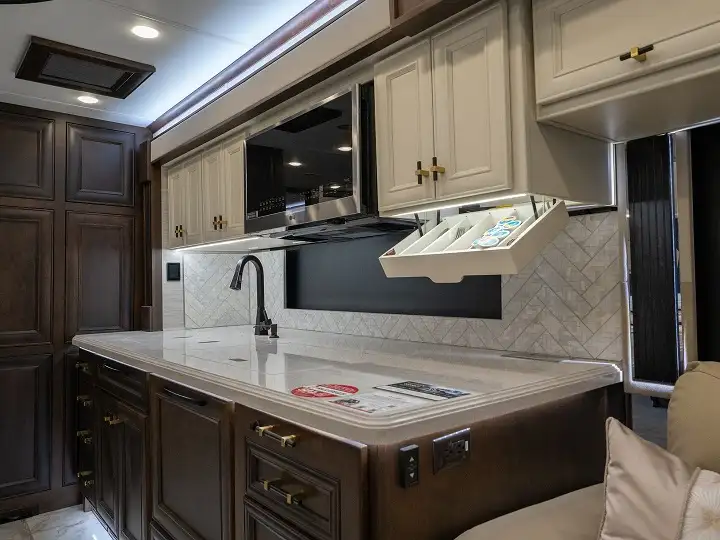
Some of the best RV storage disappears when you’re not using it.
Tucked under the upper cabinet by the sink, this tray folds flat against the wall and drops down to hold small dishes and everyday items right when they’re needed, then tucks away again to keep the counter and the herringbone tile backsplash clear.
In a galley finished this well, a fixed open shelf would break the look.
A hidden fold-down does the same job without competing with the wood cabinetry or the marble counters for attention.
Storage that folds away when it’s empty never crowds a finished kitchen, even a small one.
10. Let a Divided Rack Keep Dishes From Rattling on Travel Days
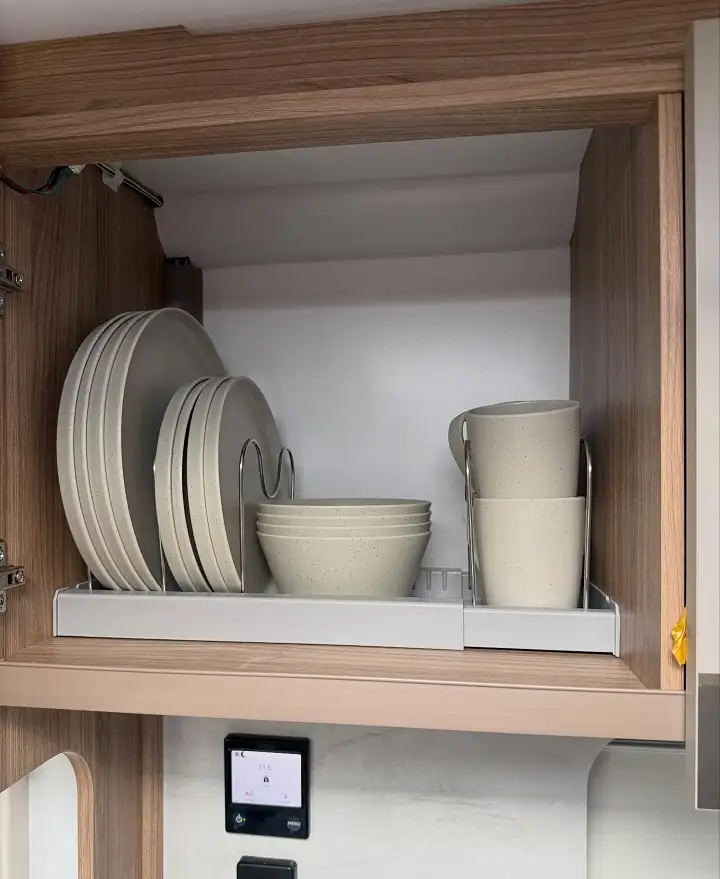
Plates slide, mugs chip, and cups tip over on rough roads, unless a divided rack holds them in place.
This cabinet keeps plates standing upright in their own slot, bowls stacked in a row next to them, and cups slotted into a separate holder so nothing touches or shifts once the rig starts moving.
- Plates stand on edge instead of stacking flat and sliding around
- Bowls nest together in a fixed row so they can’t tip
- Cups and mugs slot upright, keeping handles from snapping off mid drive
Continuing the numbering from 10. Entries 11 through 27 below, file names noted above each heading.
11. Swap One Deep Cabinet for a Stack of Slim Drawers
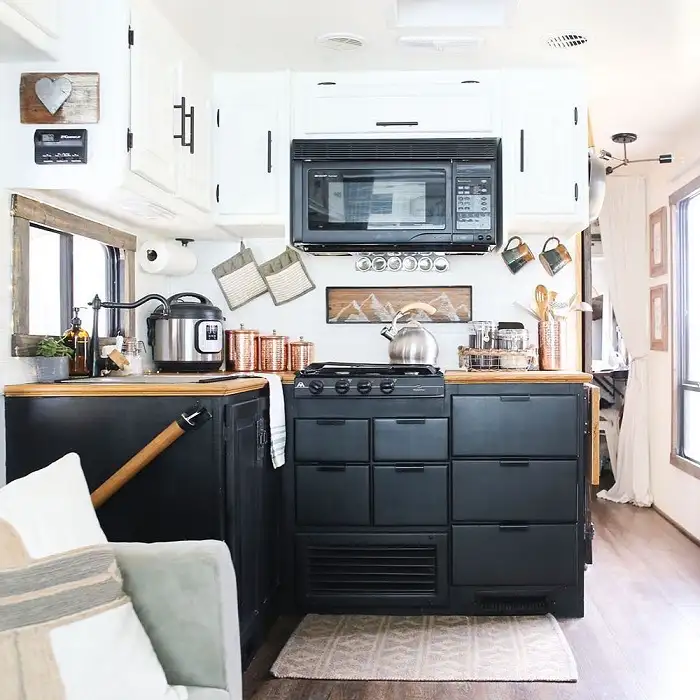
Swap a single deep cabinet for several shallow drawers and every item gets its own reachable spot instead of a pile you dig through.
- Small pots and pans slide into the top drawers without stacking on each other
- Baking sheets and cutting boards lie flat in the bottom drawers instead of wedging into a cabinet
- The wood counter overhang keeps the kettle and small appliances handy but out of the main work area
The copper canisters lined up by the stove keep flour and sugar visible, and the hooks near the microwave hold pot holders and mugs so nothing takes up drawer space just to sit within reach.
Shallow drawers under the stove hold pans flat instead of nested and hard to pull out.
Pot holders and mugs hang in reach instead of taking up a drawer.
Matching canisters keep dry goods visible and off a shelf you’d otherwise forget about.
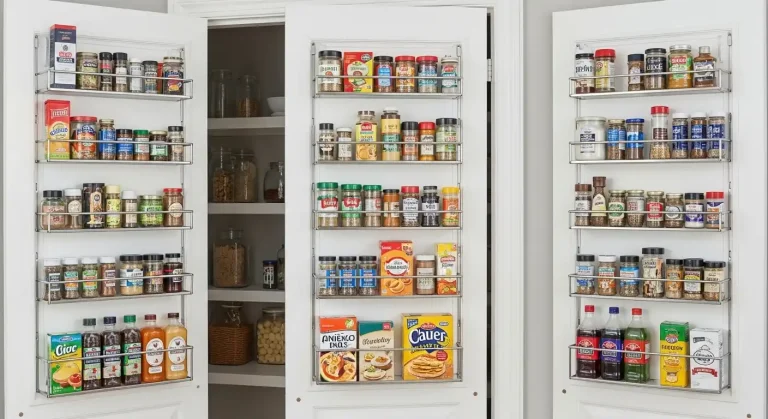
12. Mount a Spice Rack to the Back of a Cabinet Door
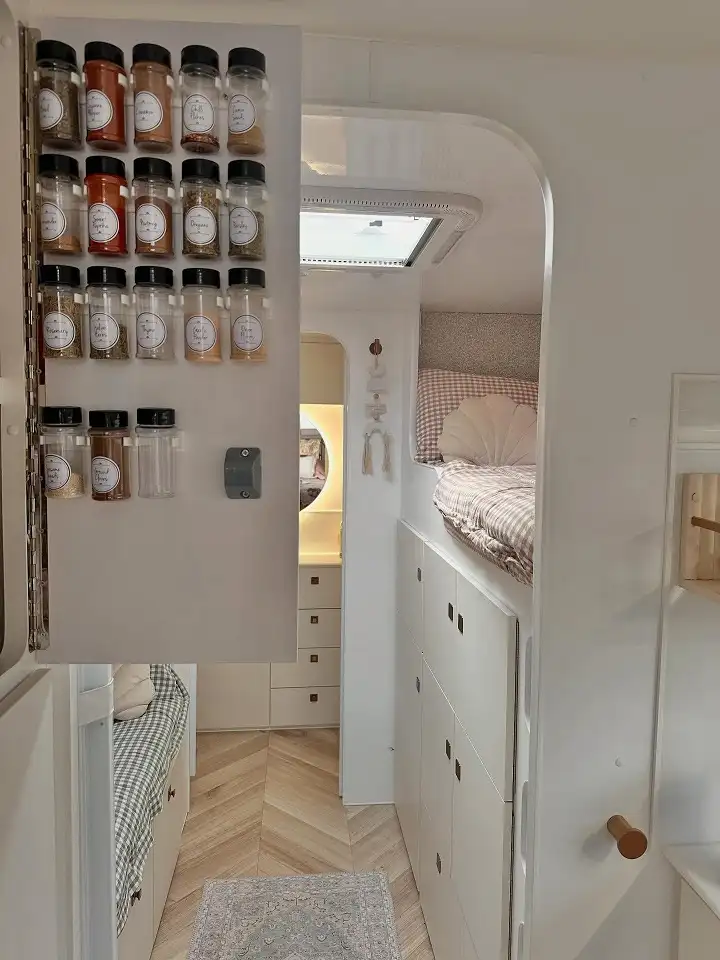
Doors are flat, vertical, and almost always wasted.
Here, a shallow rack screwed to the inside of a hallway cabinet door holds a full spice collection standing upright, sorted into rows by type, without touching a single inch of shelf.
It works because the rack sits flush enough not to hit anything when the door swings shut, and because every jar gets a label facing out.
No digging through a drawer of jars lying on their sides trying to read the tops.
13. Add a Narrow Floating Ledge Under the Cabinets for the Small Stuff
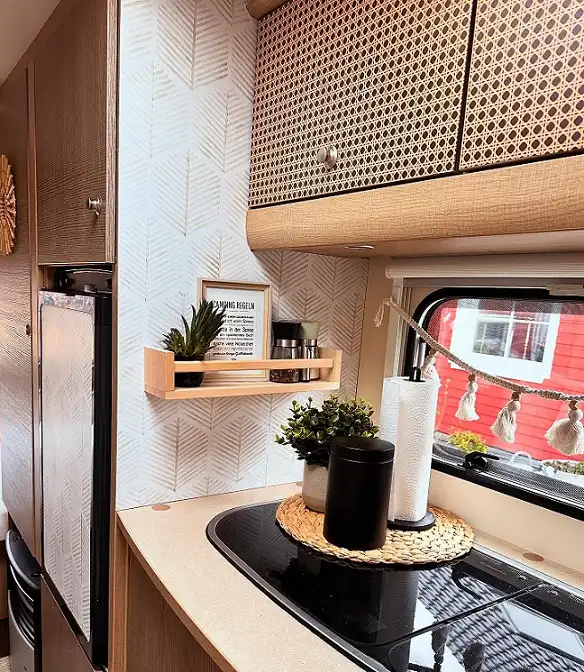
A shelf doesn’t need depth to earn its place.
This one is barely wide enough for a framed sign, a small pepper mill, and a tiny potted plant, tucked right below the overhead cabinet where those items would otherwise camp out on the counter.
If it sits on the counter every single day, it probably belongs on a ledge instead.
14. Stand Cutting Boards on Edge in the Slim Gap Beside the Window
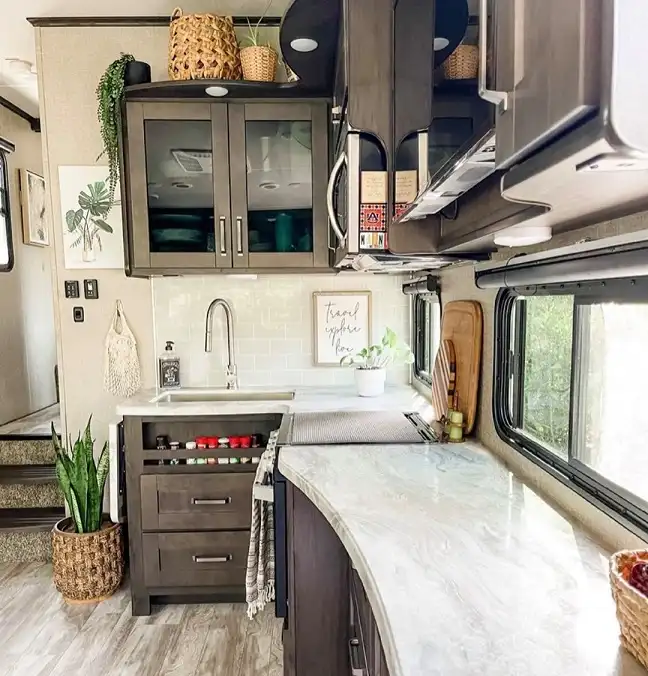
That narrow strip of wall between a window and a cabinet looks too skinny to matter, until you slide a few cutting boards into it standing up on their edges.
This kitchen also runs a slim spice rack down the cabinet face by the sink, another spot most people leave bare.
15. Build a Drop-Down Kitchen Box for Anything That Doesn’t Live Inside
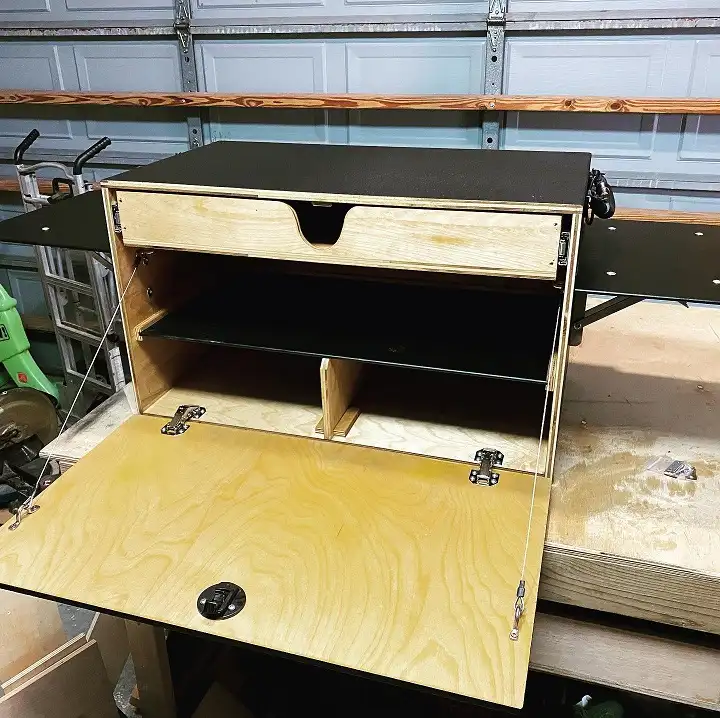
Not every storage fix has to happen inside the rig.
This is a standalone kitchen box, plywood construction with a drop-down front door, a drawer up top, and a divided shelf below for pots and gear that don’t need to ride in the main galley at all.
Folds flat to double as a small work surface once it’s open.
Keeps small tools and utensils flat instead of tossed loose.
Keeps bulkier gear from sliding side to side on rough roads.
16. Mount a Small Caddy for Soap and Sponges Instead of Cramming Them Under the Sink
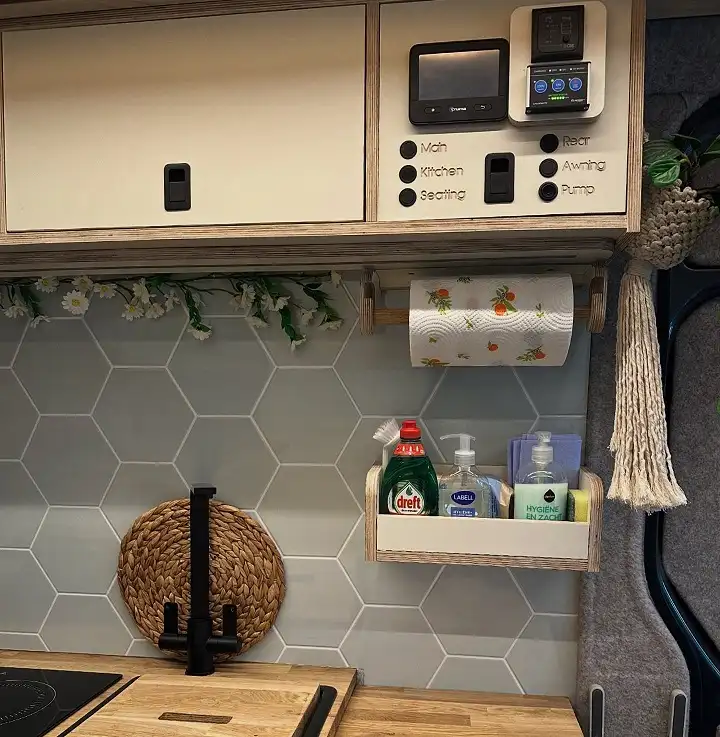
The cabinet under a sink fills up fast with cleaning supplies that would be just as happy on the wall.
Here, a small wood caddy mounted beside the paper towel holder carries dish soap, hand soap, and a sponge, right at the faucet where they’re actually used.
17. Hang Mugs From a Rod Instead of Stacking Them in a Cabinet
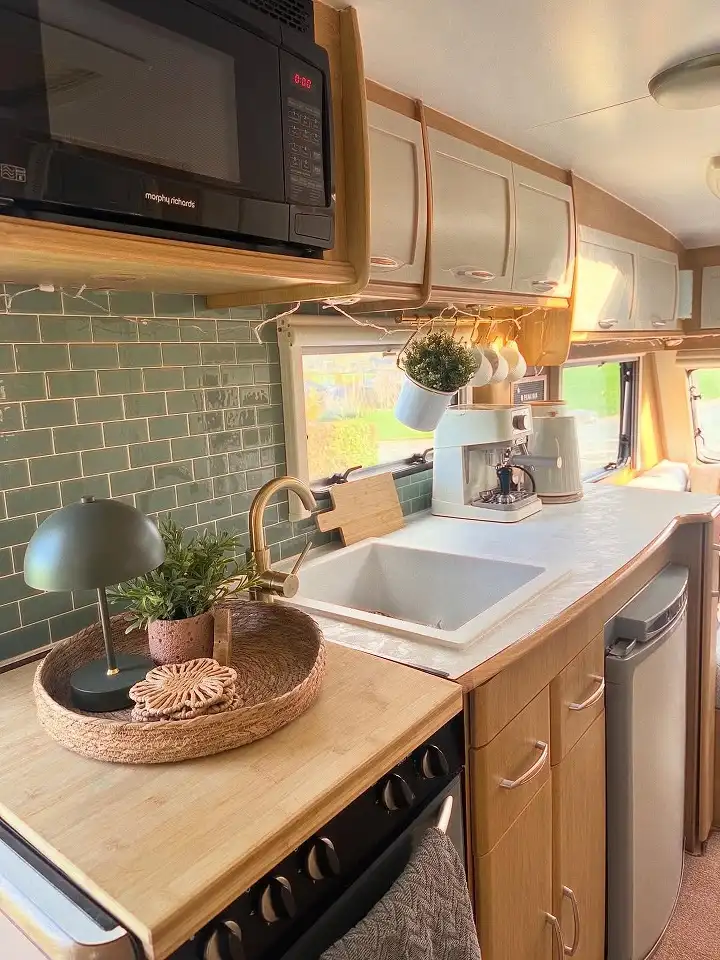
Stacked mugs are the reason cabinet shelves fill up faster than they should.
A short rod under the upper cabinets here holds four mugs by their handles, clearing an entire shelf that used to be dedicated to nothing else.
18. Lay a Cutting Board Over the Stovetop for Instant Extra Counter
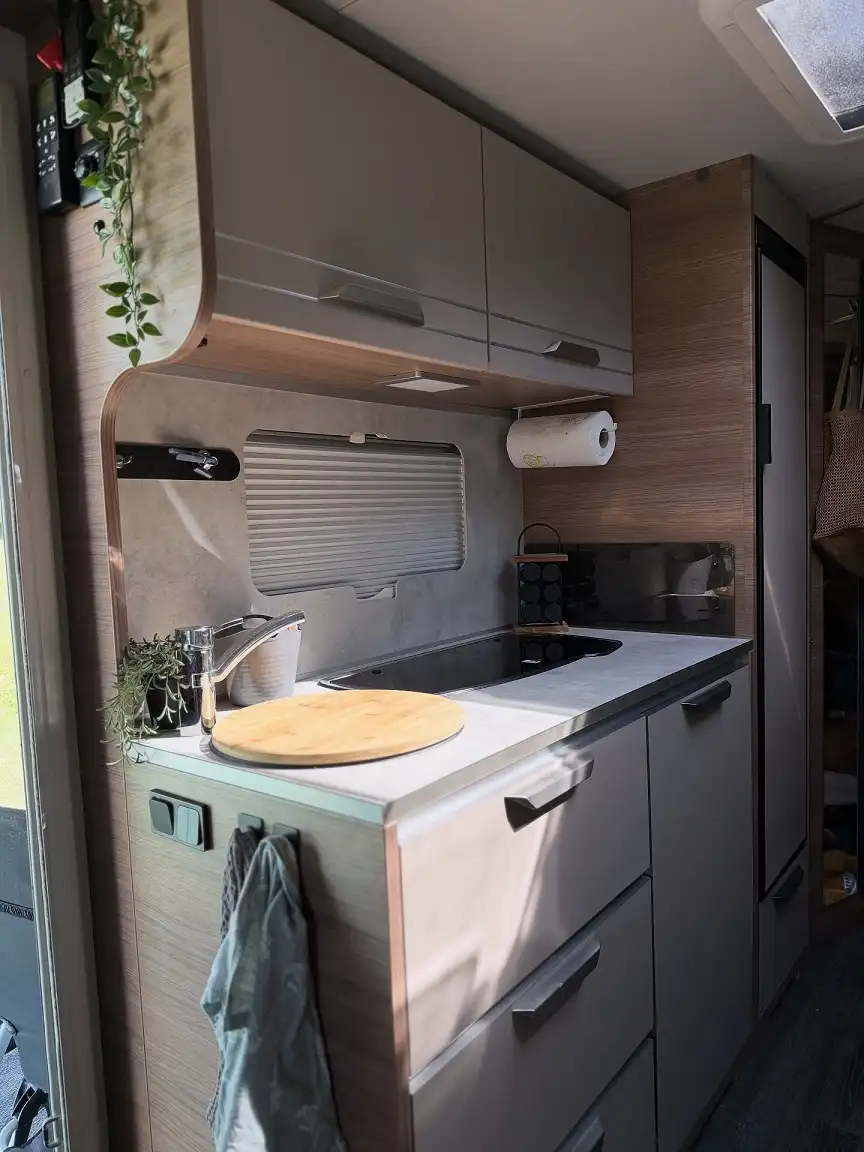
A galley kitchen only has so much counter, and the stovetop is dead space every time it’s off.
Setting a round wooden board over the burners here turns that spot into usable prep area, then lifts away in seconds when it’s time to actually cook.
19. Let One Deep Drawer Hold the Pot, the Plates, and the Towel Together
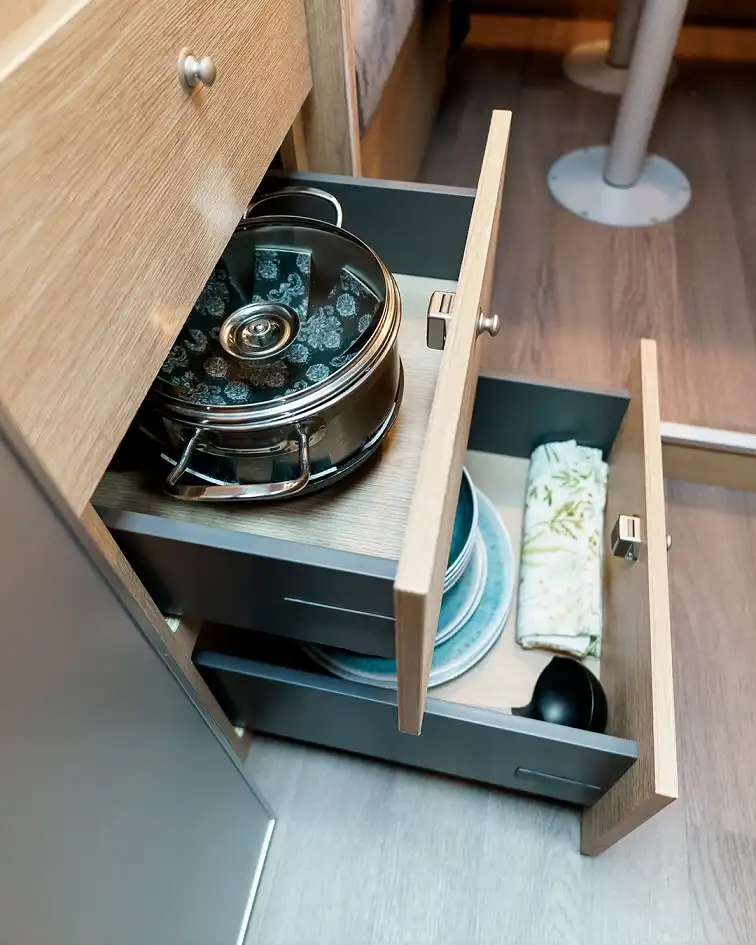
Pull open this drawer and three different categories share the space without crowding each other.
A lidded pot sits up top, a stack of plates rests below it, and a rolled dish towel fills the leftover corner instead of stuffing a linen drawer somewhere else.
20. Hang Aprons and Towels From Hooks So They’re Never Balled Up in a Drawer
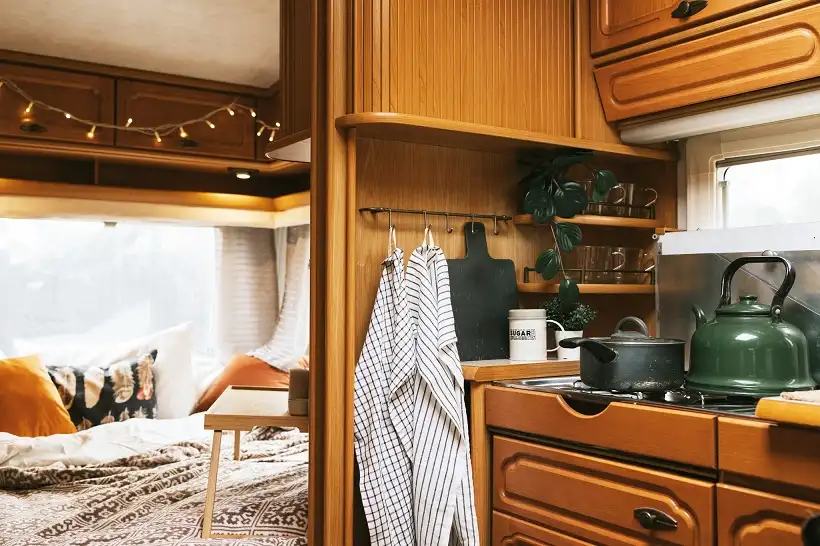
Fabric items are the worst offenders for wasted drawer space, they never fold flat and they always seem to unravel.
This retro-toned galley solves it with a simple hook rail near the stove.
A few screws into the cabinet edge near the stove is all it takes.
Aprons and towels loop straight onto the hooks, no folding required.
A small cutting board hangs on the last hook to air dry upright.
21. Keep Oven Mitts on Hooks Right Beside the Cooktop
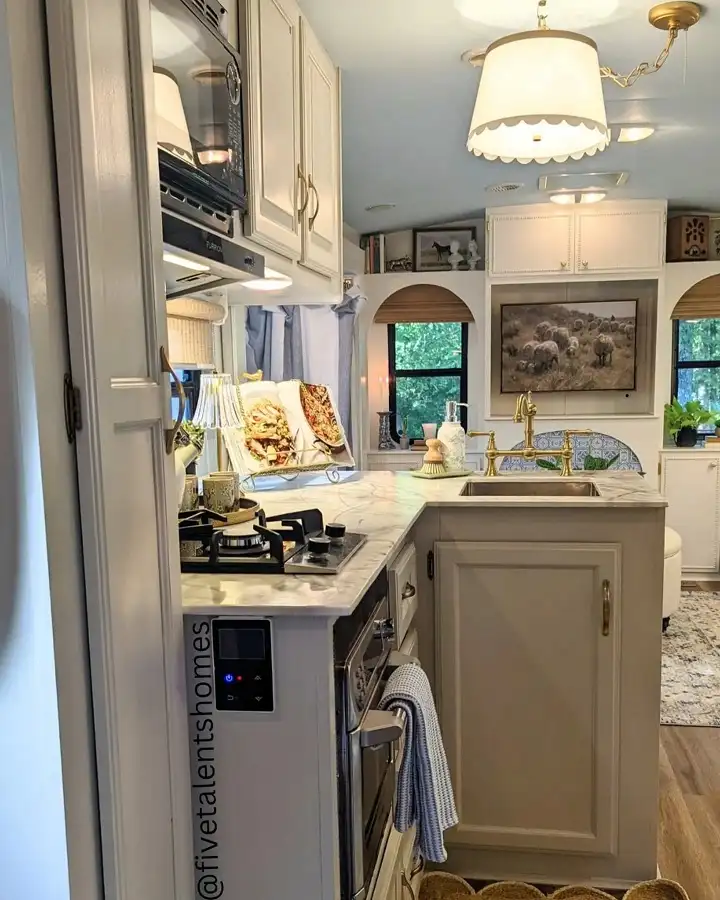
Nobody wants to dig through a drawer while something’s actively burning.
This cottage-style kitchen hangs its oven mitts from small hooks mounted right at the cooktop, exactly where the panic reach happens.
- Oven mitts hang within arm’s reach of the burners, not in a drawer across the galley
- A striped towel loops through the oven handle for quick wipe-downs
- Woven baskets tuck into the open space under the sink island, holding extras without another cabinet
22. Turn an Entire Cabinet Door Into a Spice Wall
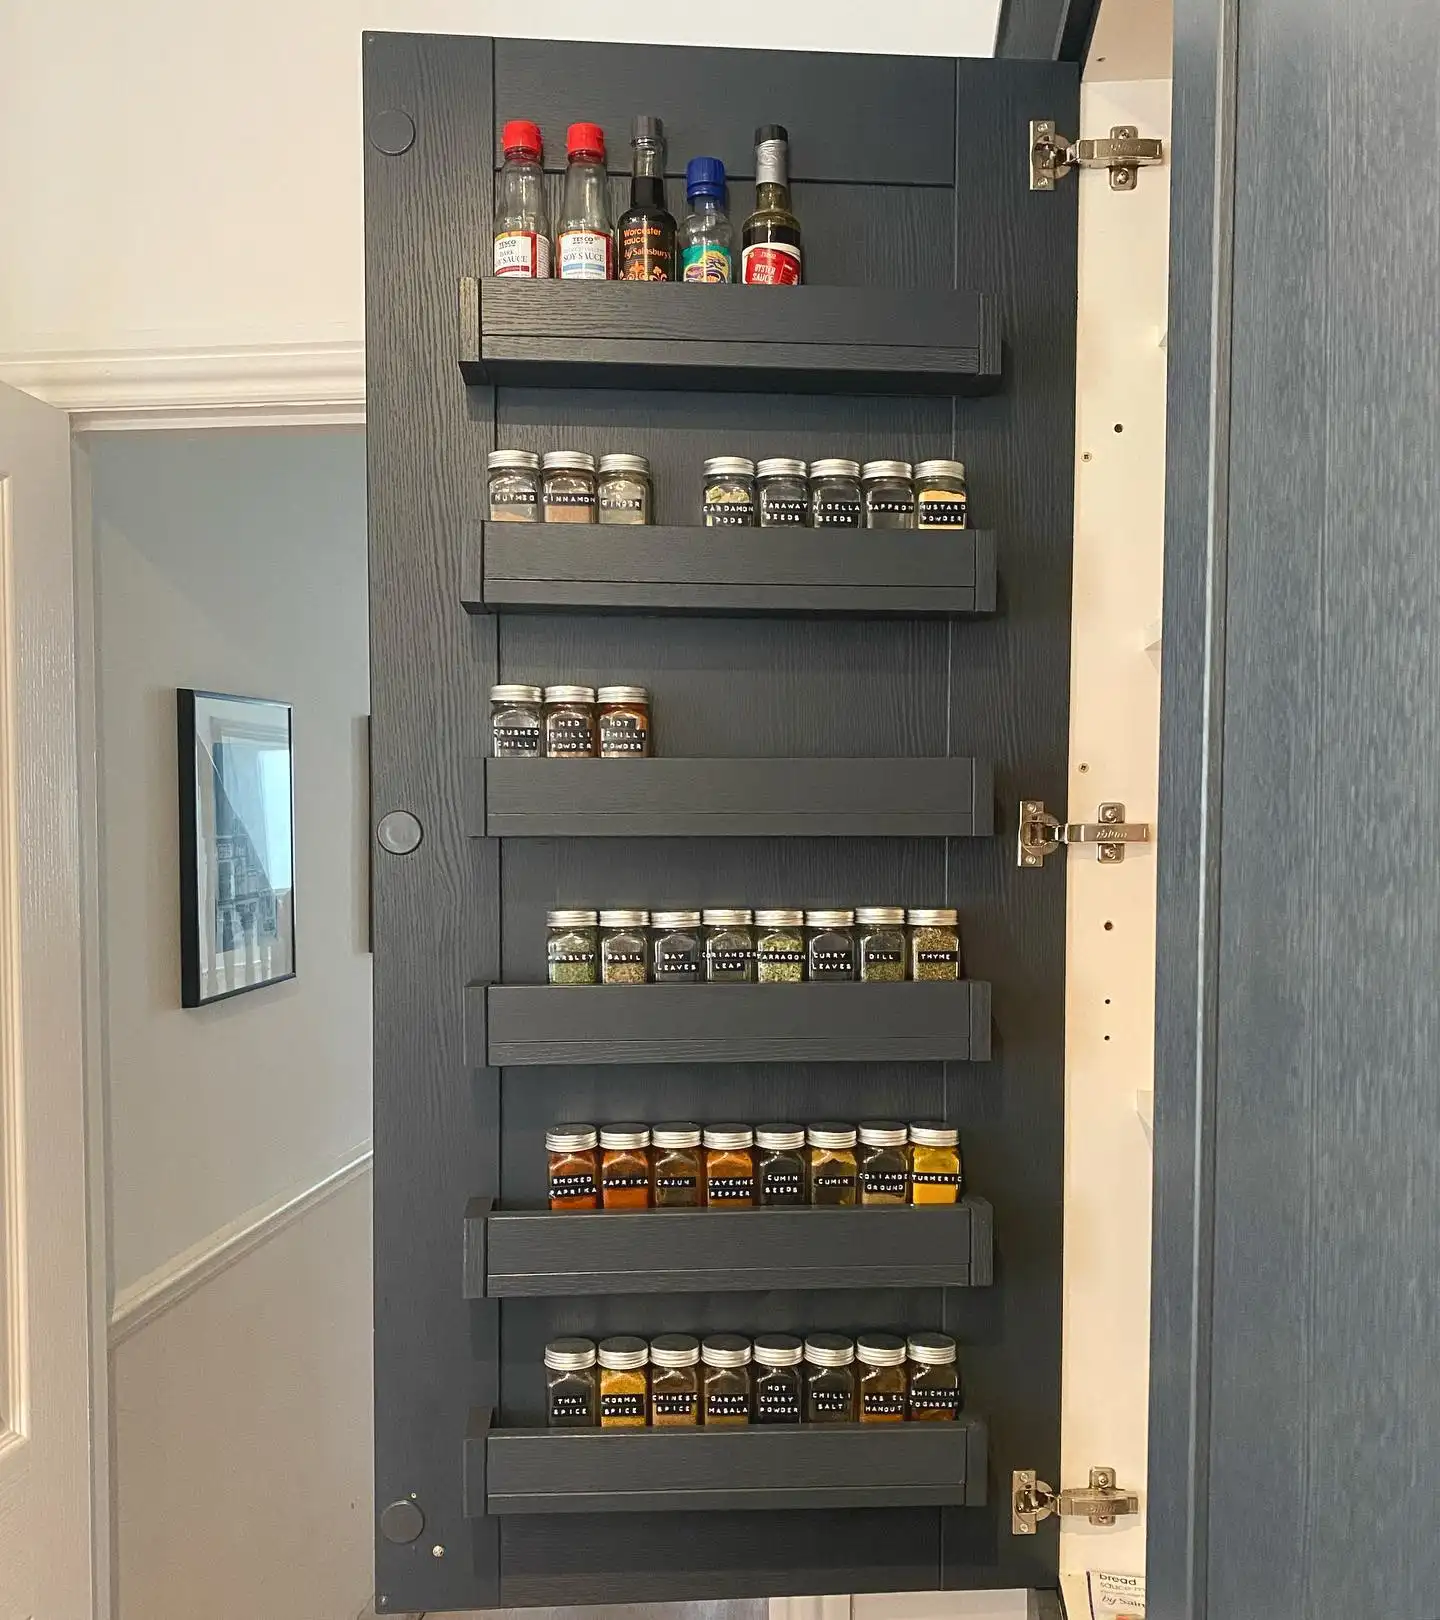
Six shallow lipped shelves line the inside of this door top to bottom, each one holding a full row of labeled jars sorted by type.
Sauces sit up top, whole spices in the middle, blends at the bottom.
A door that used to hold nothing can hold your entire spice collection, sorted and labeled, without touching a single shelf.
23. Install a Pegboard Behind the Sink So Bins Can Move Wherever You Need Them
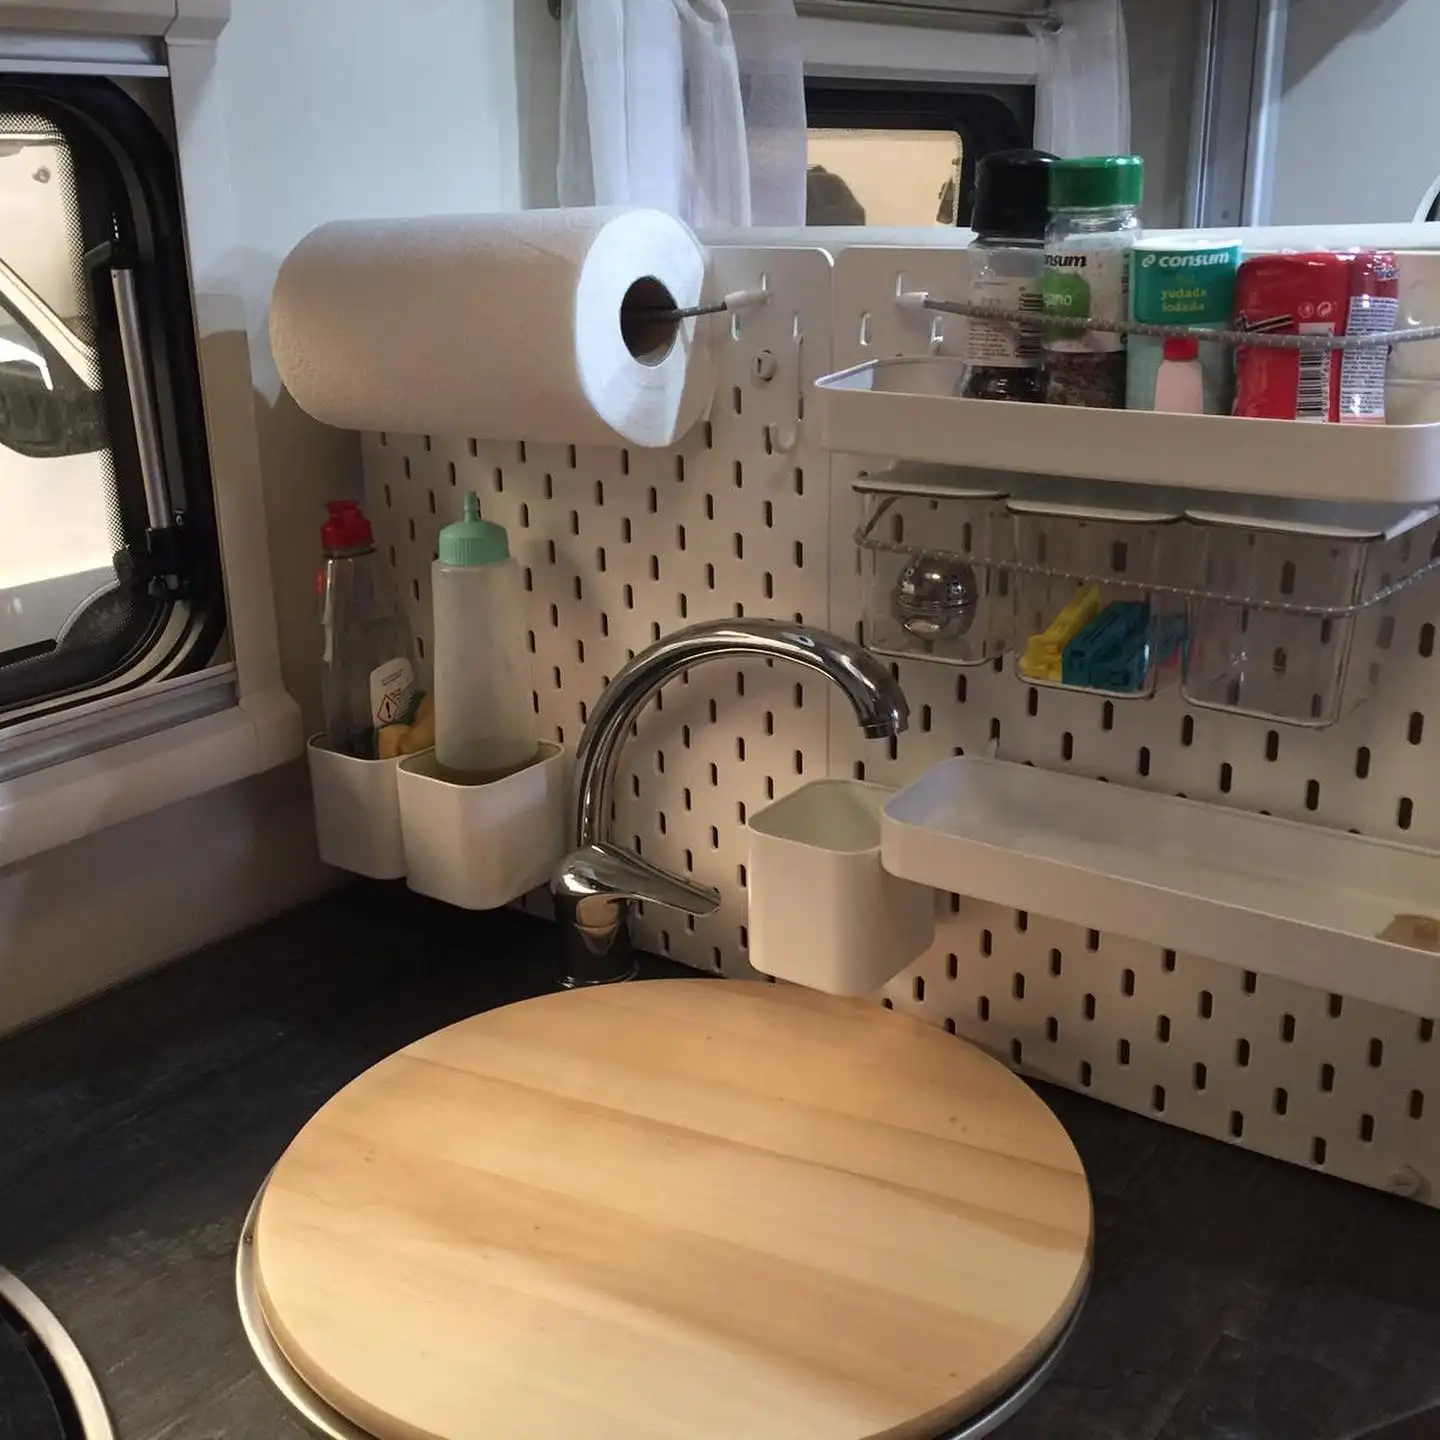
A pegboard panel behind this sink holds small clip-on bins for dish soap, a sponge, and seasoning packets, each one popped into place with no drilling or screws.
When the setup stops working, every bin just unclips and moves.
24. Choose Lift-Up Cabinet Doors So Nothing Swings Into Your Head
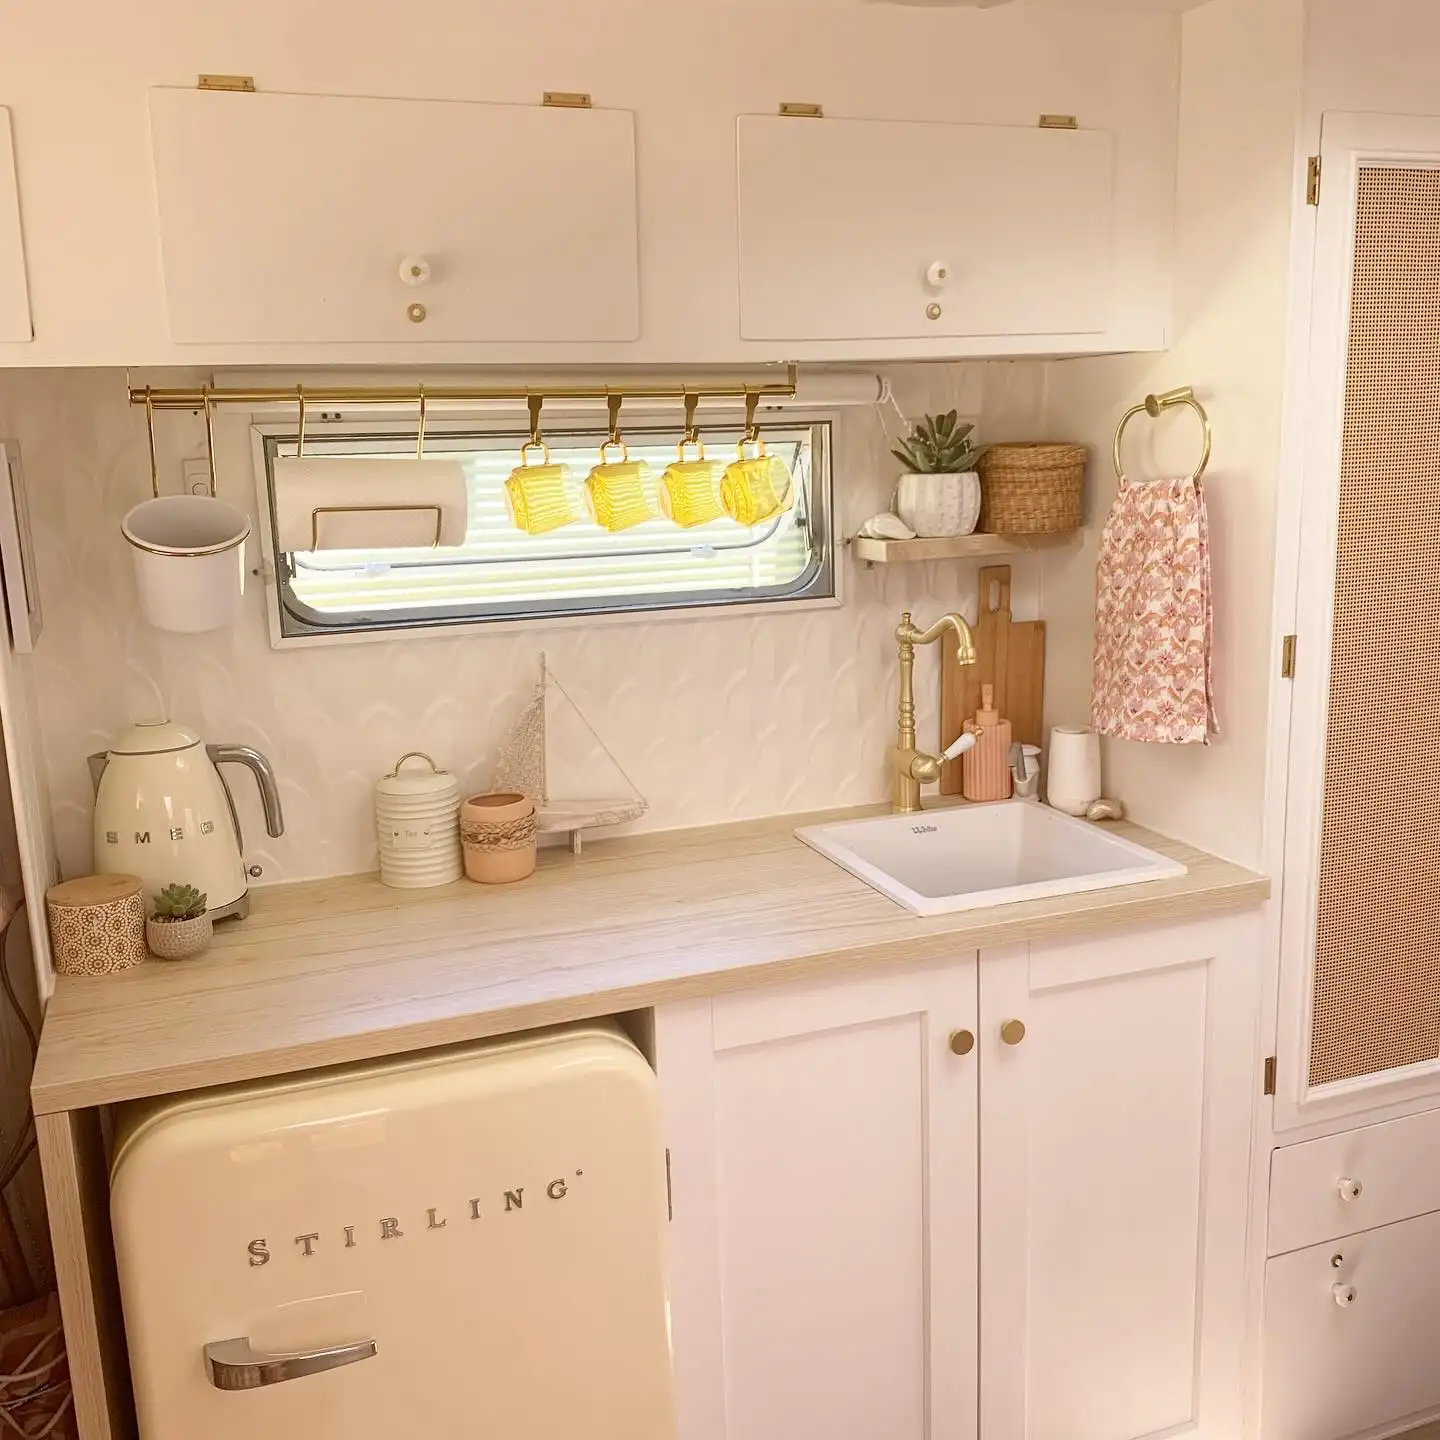
Watch for hardware, not just layout.
These overhead cabinets hinge at the top and lift straight up instead of swinging open sideways, which matters more than it sounds like in a kitchen this narrow.
Side-hinged doors need clear swing room on both sides. In a tight galley that room usually isn’t there, so a bumped head becomes routine.
25. Add a Small Riser Shelf and a Basket to Double a Cabinet’s Capacity
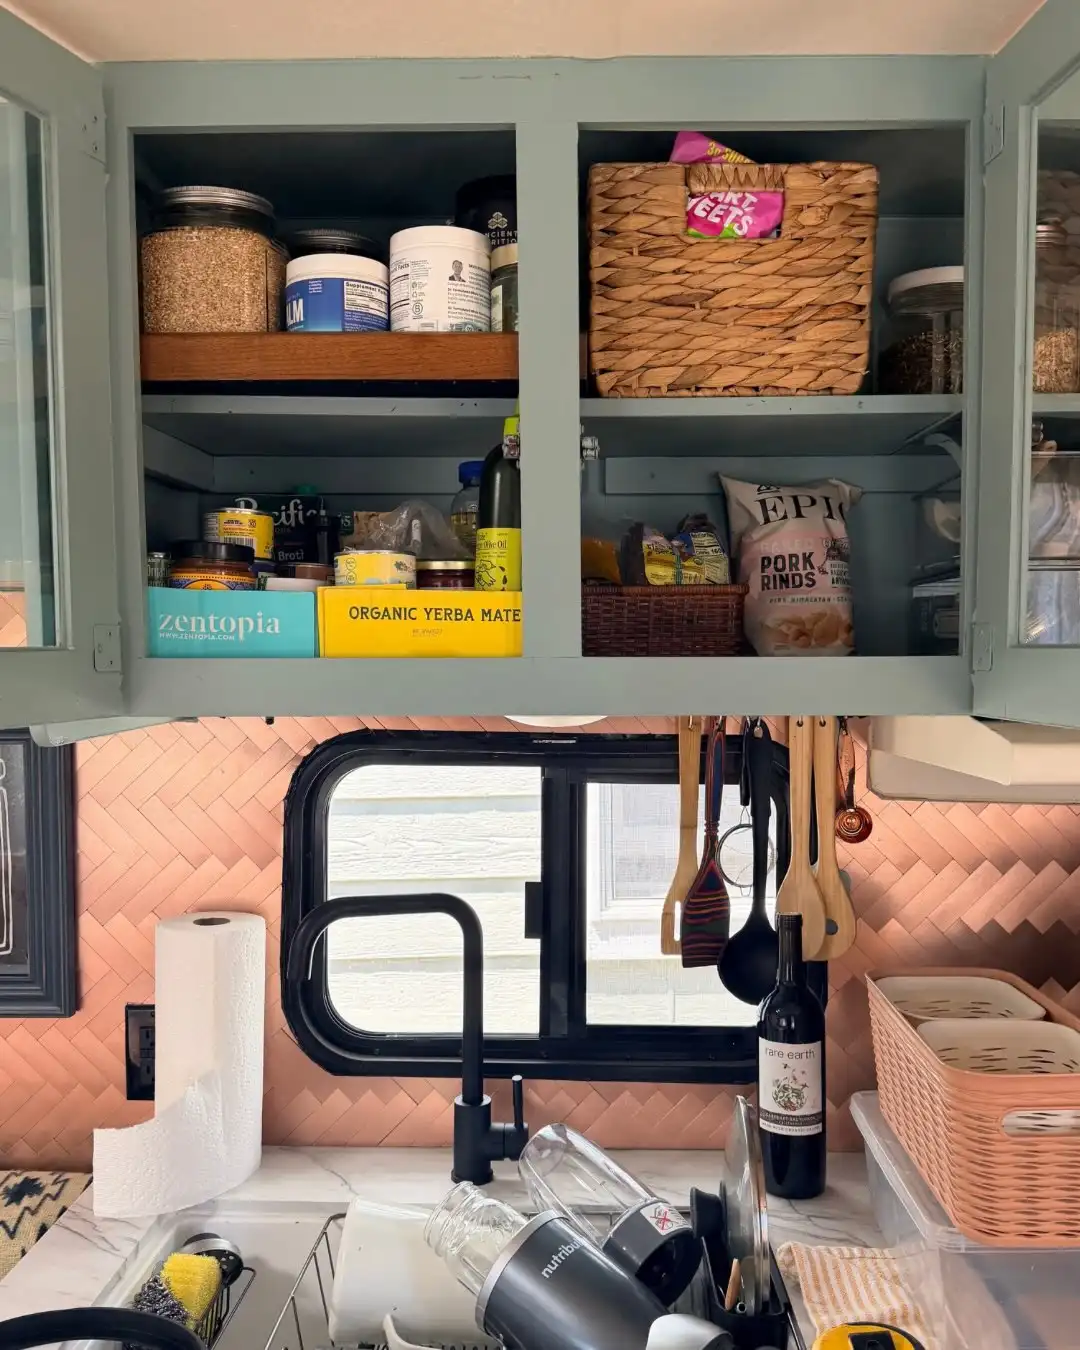
A short wood riser inside this cabinet lifts jars and supplements onto their own level, leaving room underneath for taller cans and bottles that would otherwise fight for the same shelf.
A woven basket on the other side corrals loose snack bags so they stop sliding every time the door opens.
26. Fill the Sliver Beside the Trash Pull-Out With Tiny Stacked Drawers
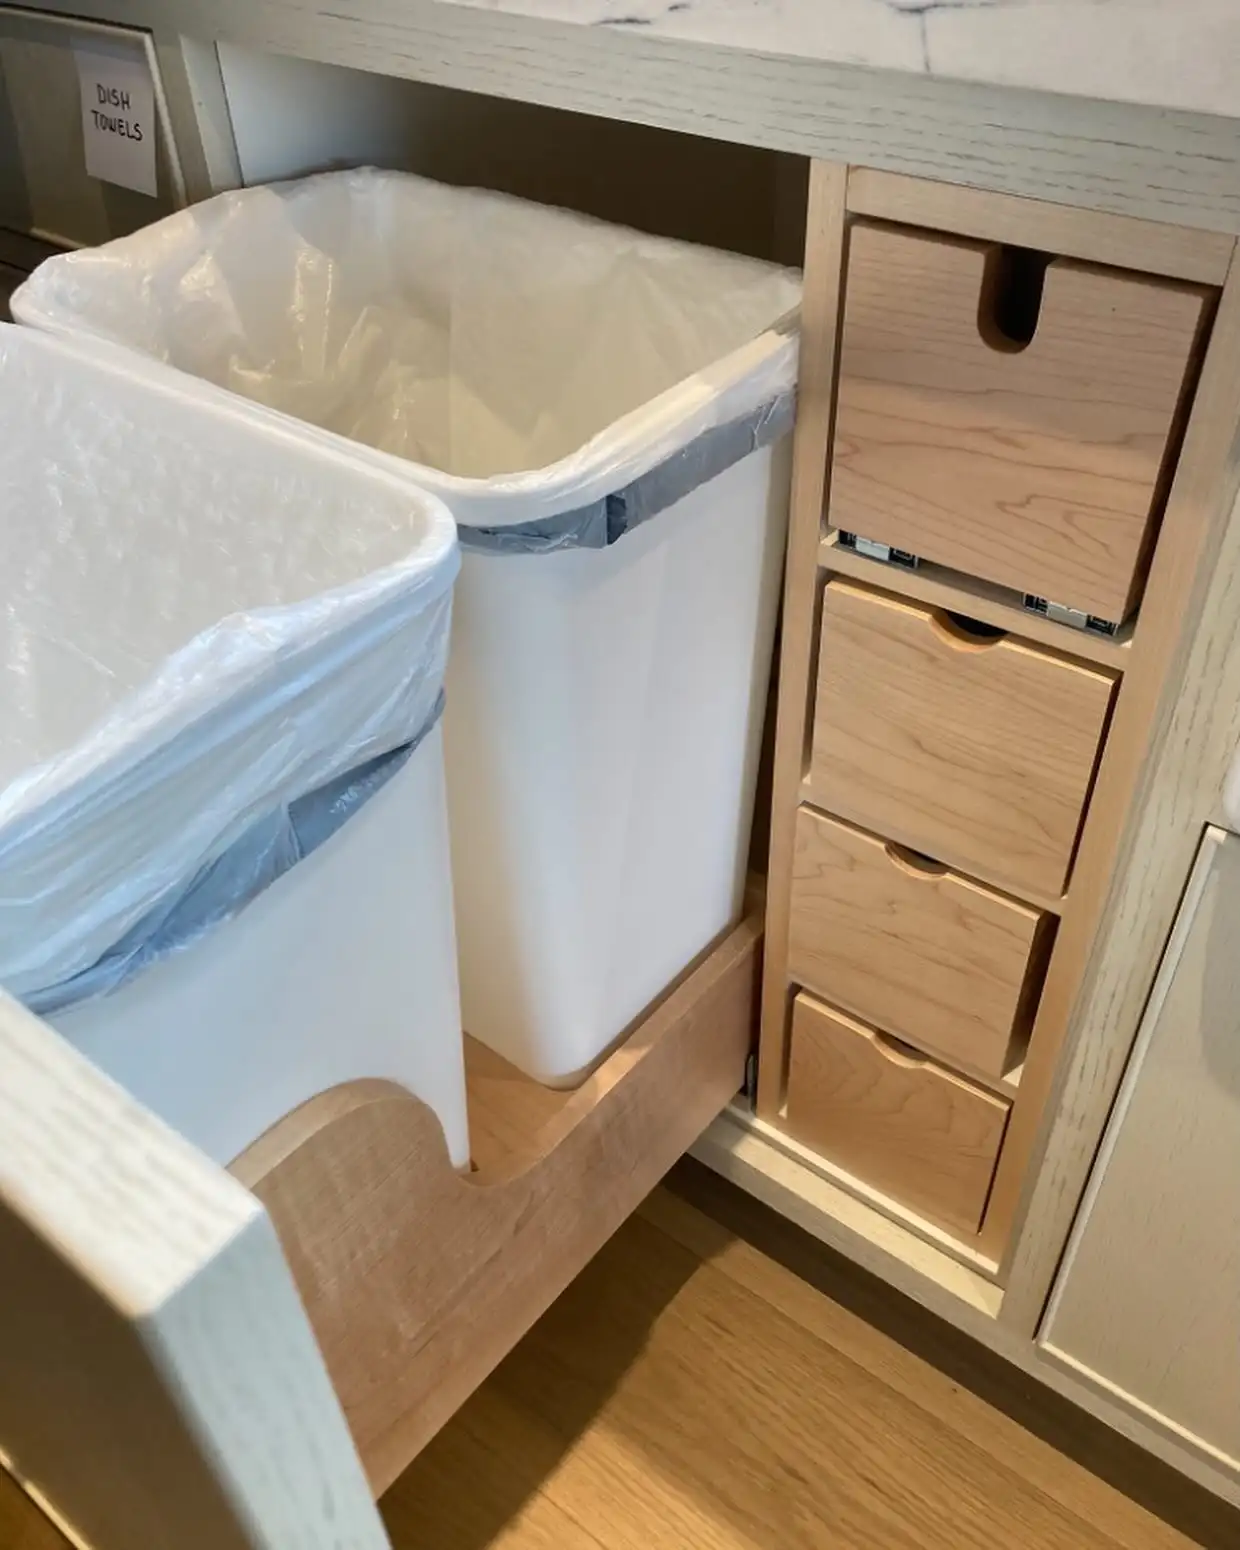
Pull-out trash and recycling bins take up a chunk of cabinet, but the leftover sliver next to them doesn’t have to go to waste.
Four shallow drawers stack into that narrow gap here, each barely deep enough for twist ties, corn holders, or a spare sponge, and every drawer above is labeled so nothing gets misplaced.
| Typical use of this gap | Better use of this gap |
|---|---|
| Left empty or crammed with loose odds and ends. | Four shallow drawers, each with one job. |
| Nothing labeled, easy to lose track of. | Labels on the drawer above, so contents are obvious. |
| Wasted next to the bins either way. | Fully used, right next to the bins. |
27. Cage Loose Items in Open Cabinets With Tension Rods and Netting
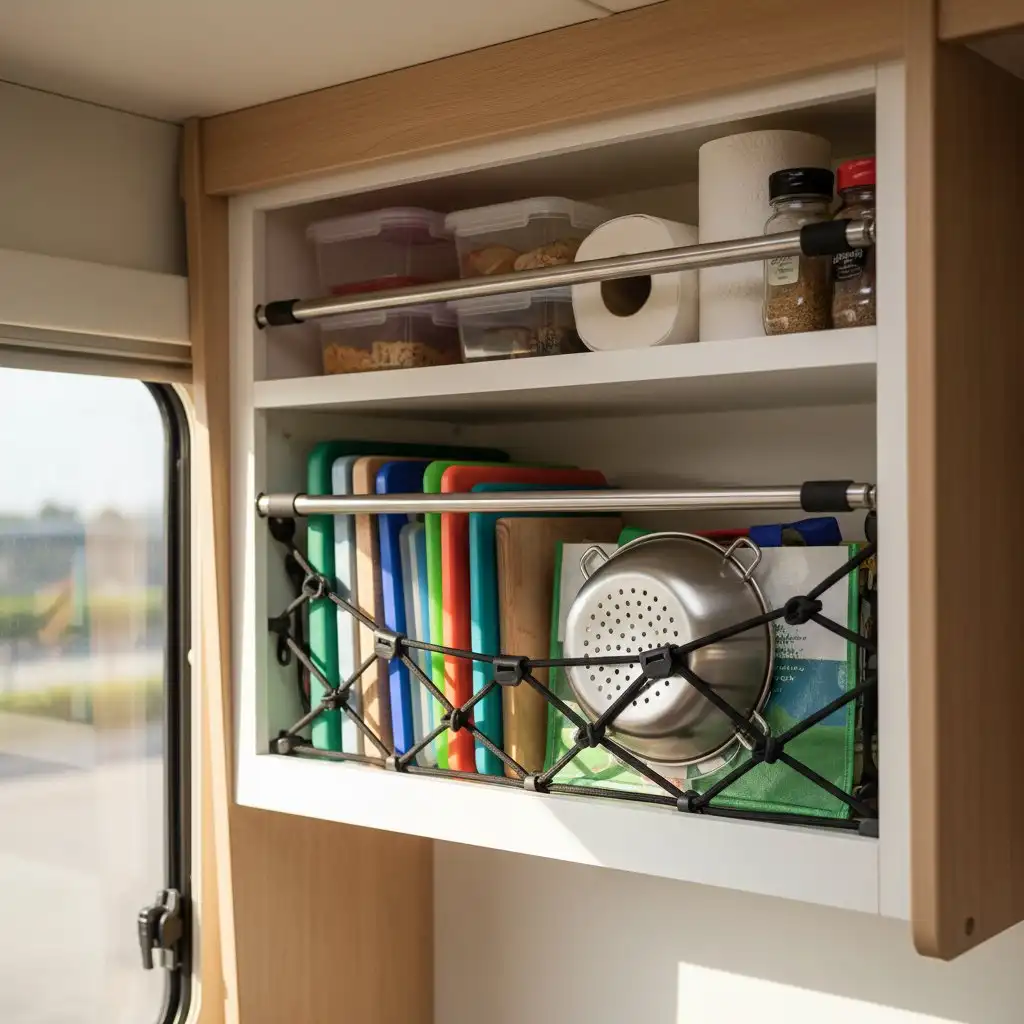
Open shelving looks great parked, and turns into a mess the moment the wheels start moving.
This cabinet solves it with two tension rods holding food containers in place up top, and a stretch of elastic cargo netting keeping cutting boards and a colander pinned flat below.
Run a tension rod across the front of any open shelf holding loose containers.
Stretch cargo netting over flat items like boards and colanders.
Leaving flat items loose on an open shelf with nothing holding them back.
Assuming a shelf lip alone will stop something from sliding off.