16 Fixes for Small Apartment Kitchens With No Counter Space

Small apartment kitchens can feel like a puzzle with missing pieces. You chop on a cutting board balanced over the sink. The toaster fights the coffee maker for the one clear spot. Dinner prep turns into a juggling act before the pan even heats up.
Good news: a tiny kitchen with no counter space still has plenty of room to work with. Walls, cabinet doors, the stovetop, and even the fridge side can all pull their weight.
These 16 fixes show real setups that free up prep space, cut clutter, and make cooking feel calm again. Pick one fix tonight and see how much room appears.
1. Move Dishes to Open Shelves and Prep at a Bistro Table
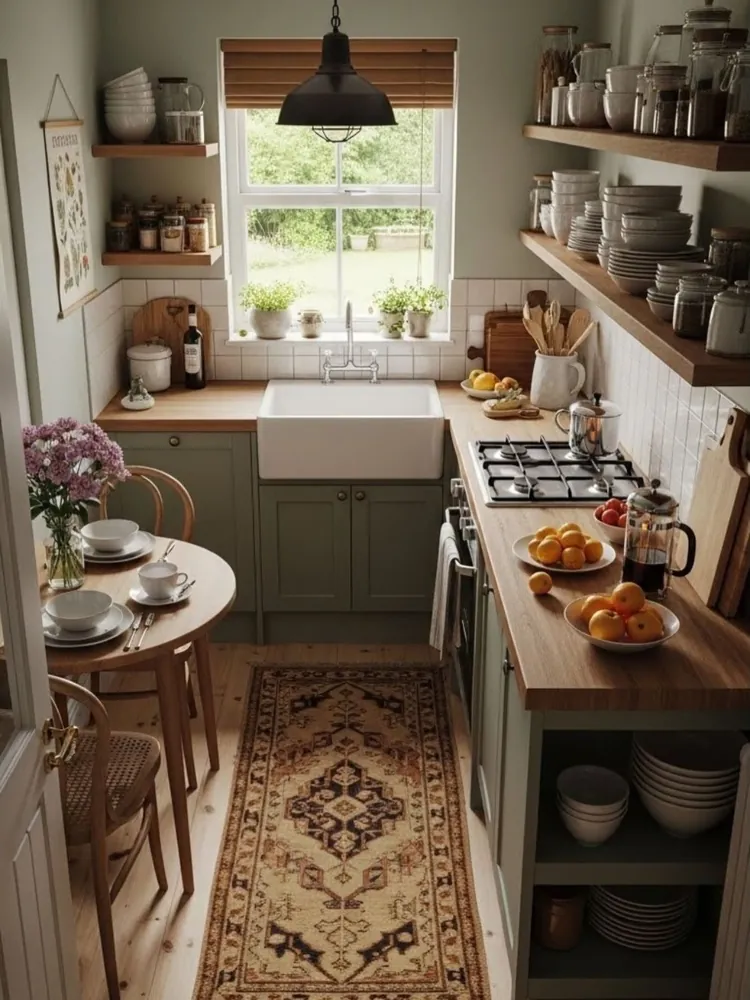
Best for: Galley kitchens with one long wall and a spare corner near the door.
Look up first in this sage green galley. Two runs of open wood shelves carry stacks of white plates, bowls, and glass jars, so the cabinets below never fill up with dishes. That leaves the butcher block counter free for oranges, a French press, and real chopping.
At the far end, a small round wood table with two cane seat chairs does double duty. Breakfast happens there, but it also works as a landing spot when a recipe needs more room. Down low, an open shelf at the end of the run keeps the larger bowls within easy reach.
Upgrade note: Stack plates by size and keep the everyday set on the lowest shelf. Glass jars on top suit dry goods you grab less often, since you can see what is inside without pulling them down.
2. Wrap the Counter Into an L Around the Corner
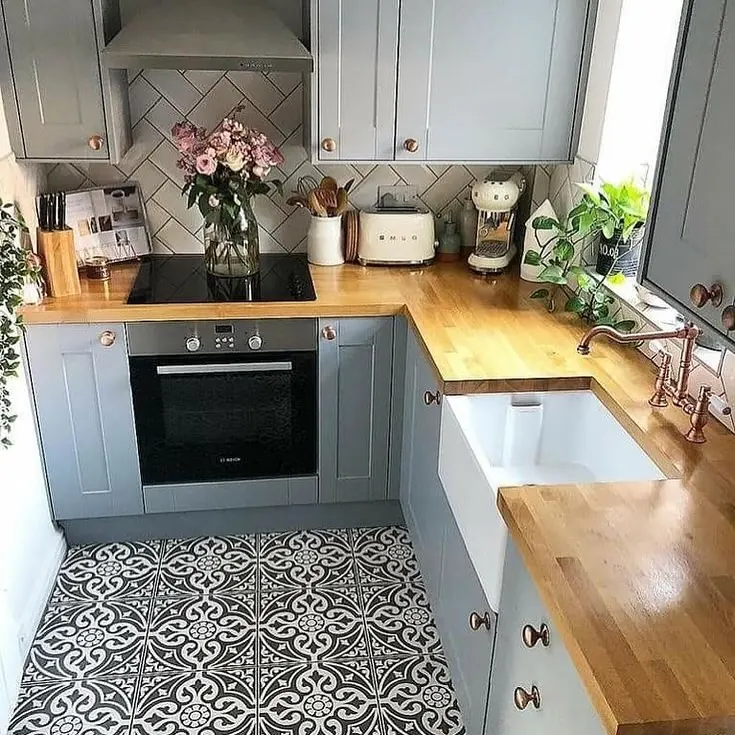
- Base: Butcher block counters run in one L shape from oven to sink.
- Layer: Toaster, coffee machine, and utensil crock line up against the tile wall.
- Accent: Copper knobs and a copper bridge faucet warm up the grey cabinets.
- Finishing touch: Pink roses in a glass vase rest on the flat black cooktop.
Corners are often the most wasted spot in a small apartment kitchen. Here the wood top keeps going around the bend, so the inside corner becomes a deep working zone instead of a dead end. Appliances hug the backsplash in a single row, which keeps the front edge clear for a chopping board.
Counter space tip: A flat cooktop counts as bonus space when it is cold. Set a thick wood board over it for plating or cooling bread, and lift it off before you switch the heat on.
3. Hang Pans on the Wall and Skirt the Open Base
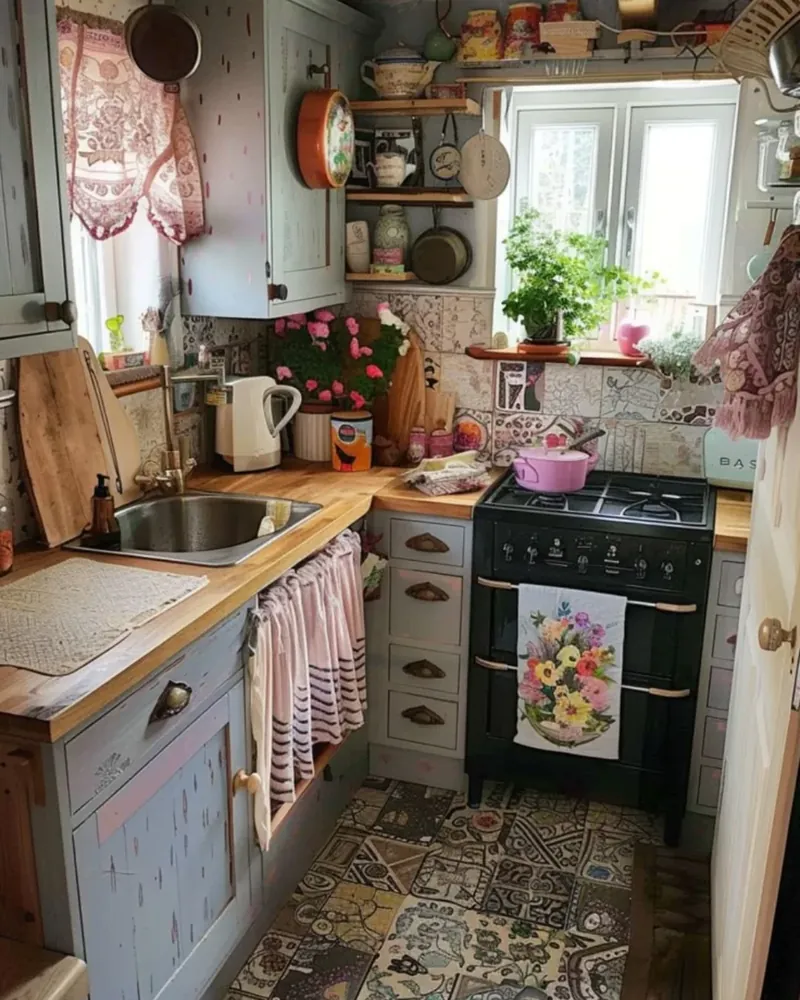
Every inch of wall works hard in this painted cottage kitchen. Frying pans hang near the window, and a stack of small wood shelves holds teapots and mugs. Cutting boards lean upright beside the sink, so they never eat into the butcher block. Below the counter, a pink striped fabric skirt covers one open base where a door would have stuck out.
Renter tip: How the skirt is hung is not clear from the photo, but a tension rod and a fabric panel give the same look with no drilling. Swap the fabric with the seasons for a quick refresh.
Storage tip: Keep only the two or three pans you cook with most on the wall. The rest can nest inside the oven drawer or a low cabinet.
What to avoid: Skip hanging pans right above the burners, where grease and steam build up on them.
4. Add a Slim Breakfast Bar Off the End Wall
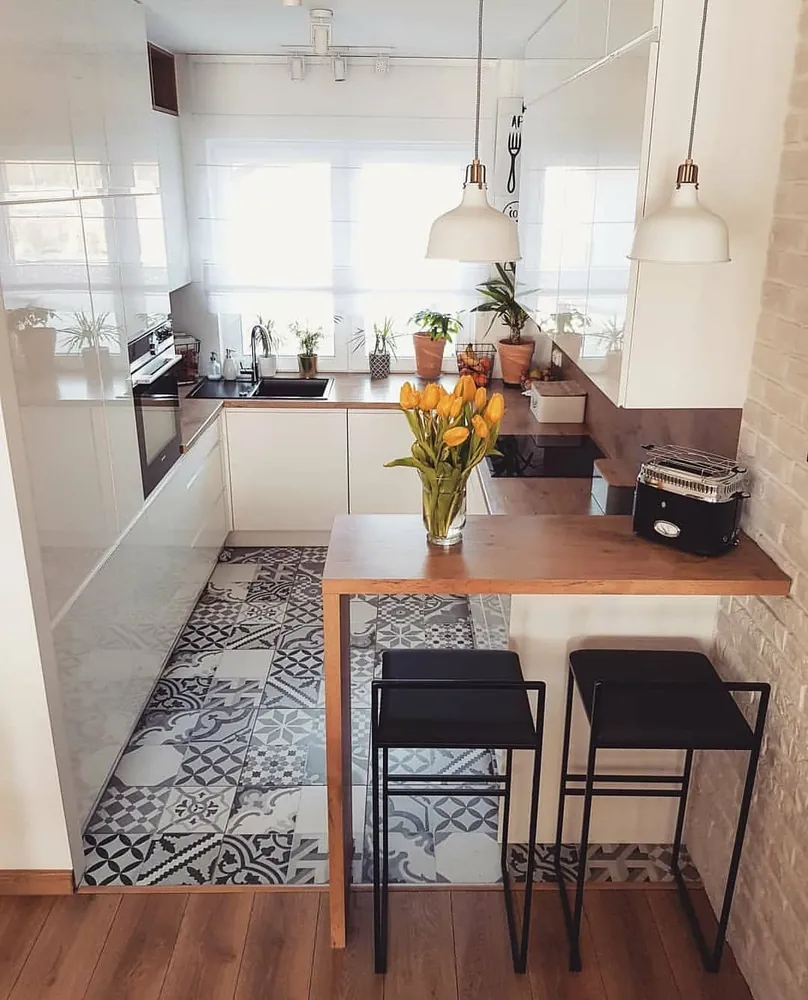
One wood slab turns this white U shaped kitchen into a place with real elbow room. The bar runs off the end of the counter, rests on a single leg, and tucks two black metal stools underneath. Right now it holds a toaster and a vase of yellow tulips, but the same top handles rolling dough or setting out plates.
Why it works:
- Resting on one leg, the bar keeps the floor open, so the room still feels wide.
- Stools slide fully under the top and stay out of the walkway.
- Two white pendants mark the bar as its own zone after dark.
Proportion note: Keep a bar like this shallow in a tight room. Even a narrow top fits a laptop or a cutting board, and it leaves enough space to walk past while someone sits.
5. Mount the Microwave Above the Cooktop
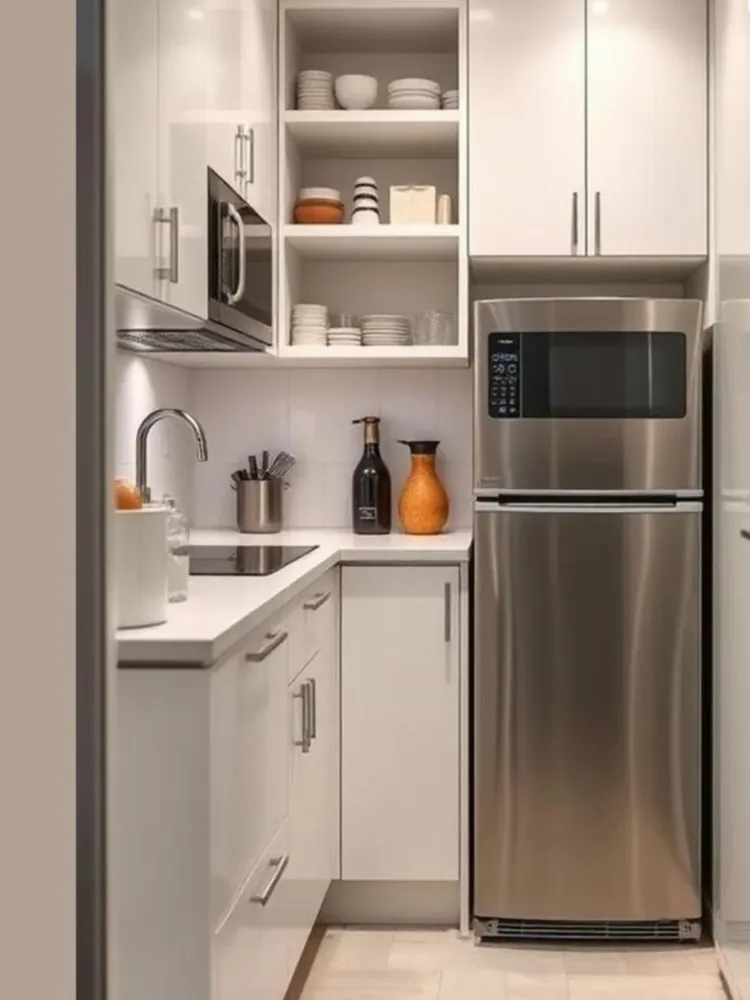
Microwaves are counter hogs, so this compact white kitchen lifts one off the surface entirely. It hangs under the upper cabinets right above the black glass cooktop, with a vent grille along its base. Below it, the smooth white counter stays open for a utensil holder, a couple of bottles, and plenty of room to work.
Next to it, an open stack of shelves fills the gap between the upper cabinets. Plates, bowls, and glasses live there, which saves a trip across the room and keeps cabinet doors from swinging into your head. Tucked into its own nook, the stainless fridge has a cabinet over the top for bulk items.
Any kitchen with no counter space can borrow this move. Check that your spot above the stove has a vent and an outlet before you shop, and pick a model made for over the range use. Ask your landlord first if you rent.
6. Build a Peninsula That Doubles as a Dining Spot
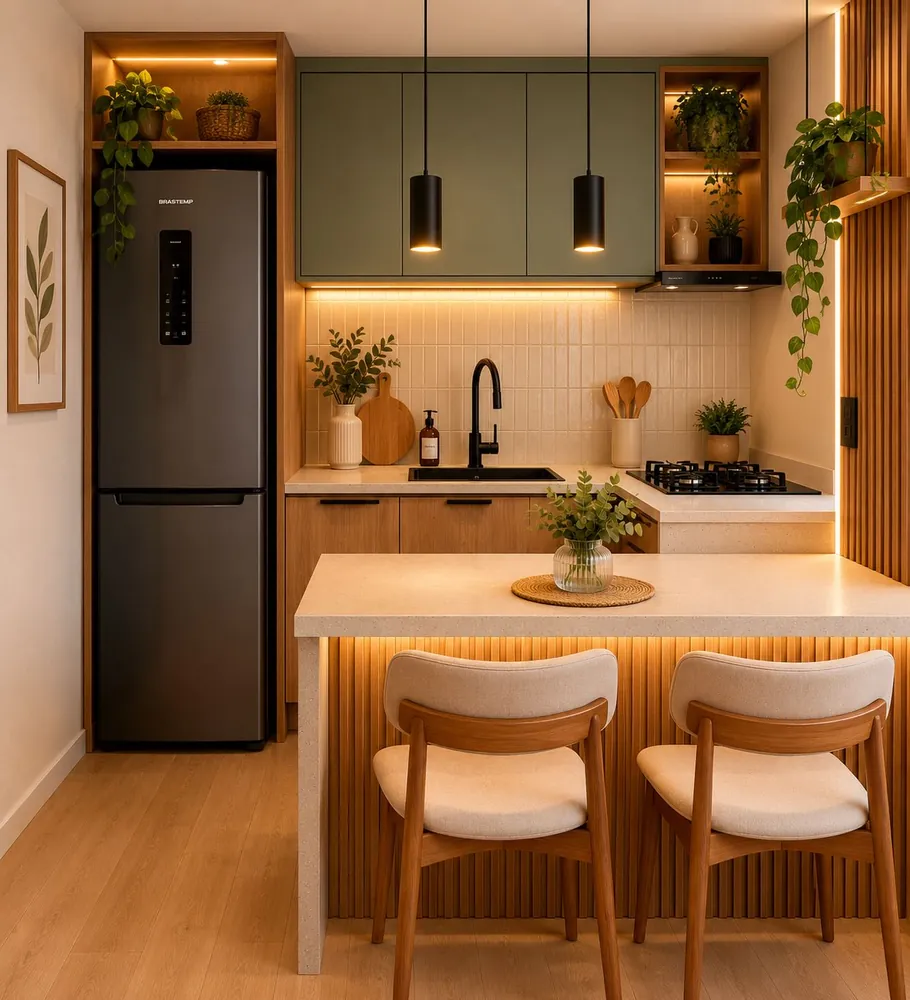
You’ll need: A peninsula top, a base or wall to anchor it, two stools that tuck under, and LED strip lights.
Facing the cooking wall, a pale speckled peninsula gives this sage green kitchen a second full counter. Its front is clad in fluted wood, and two cream upholstered stools slide right under the overhang. During prep it holds bowls and boards, and at night it turns into the dinner table.
Light does a lot of work here too. Warm strips glow under the upper cabinets and under the peninsula lip, so every surface stays bright without lamps crowding the counter. Over in the corner, the fridge sits inside a tall wood frame with an open shelf on top for plants and a basket.
Lighting note: Plug in LED tape lights are a renter friendly way to try this look. Stick them to the underside of the cabinets and run the cord to the nearest outlet.
7. Stack the Oven and Microwave in a Tall Cabinet
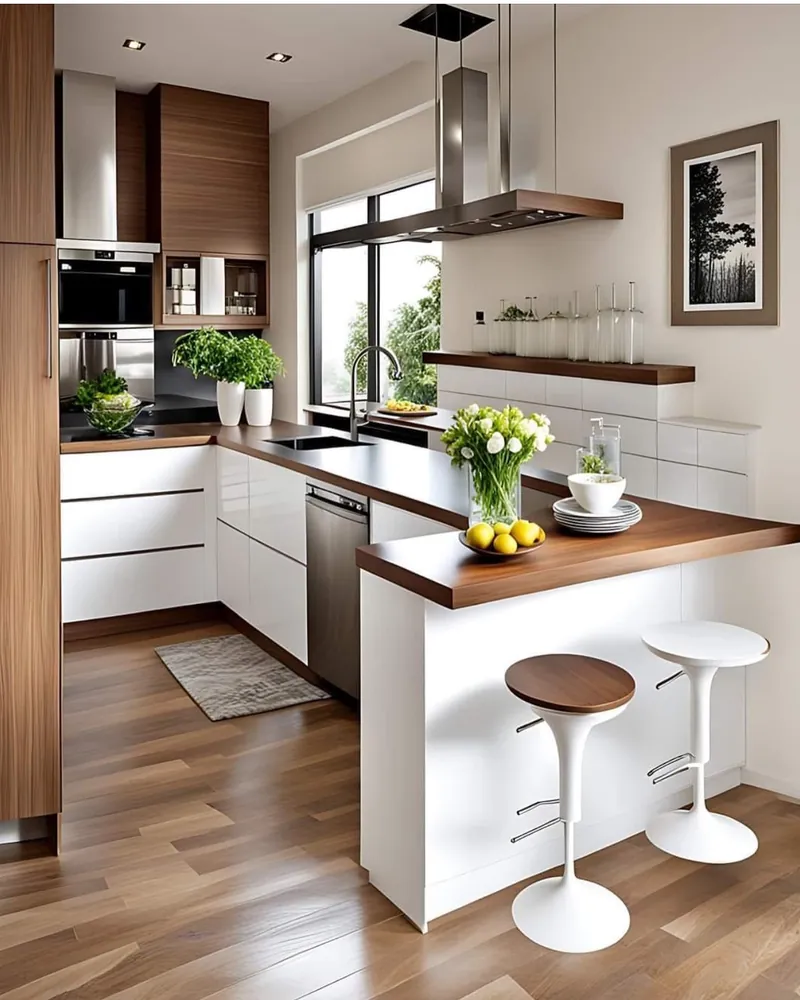
Best for: Open plan apartments where the kitchen backs onto the living area.
Tall walnut cabinets on the left hold the oven and a second appliance stacked in one column. Pulling them off the counter run frees the dark top for herbs, a sink, and a long stretch of open prep space. White gloss drawers underneath keep pots hidden and bounce light around the room.
Across from the sink, a walnut topped peninsula sits on a white base with two pedestal stools beside it. Lemons, a vase of white flowers, and a short stack of plates show how it serves as both a work counter and a casual spot to eat. On the back wall, a floating walnut shelf lines up clear glass bottles.
Budget swap: Built in towers like this are a big job. Try a freestanding microwave cart or a tall pantry unit with a shelf sized for your appliance instead.
8. Corral Daily Tools Into One Caddy Beside the Hob
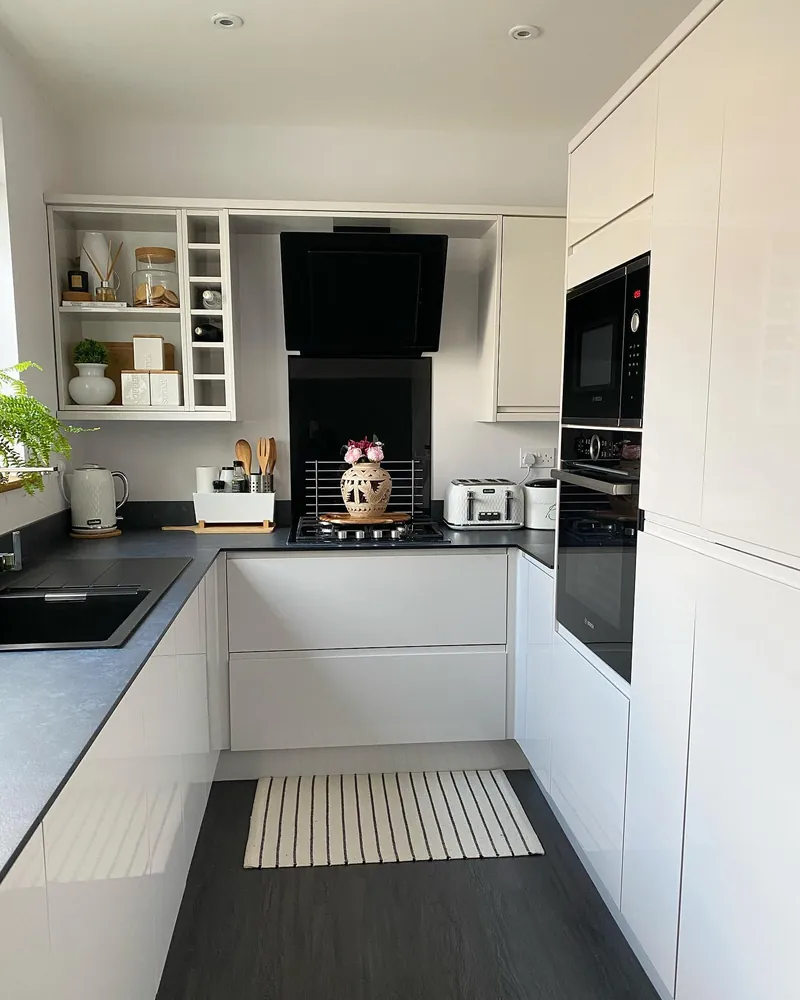
- Zone: Cooking tools stay within reach of the gas hob in one corner.
- Containers: A white caddy on a wood tray holds spoons, spatulas, and oils.
- Labels: Clear glass jars in the open cubby show contents at a glance.
- Upkeep: Empty the caddy weekly and wipe the tray under it.
Small appliances and loose tools usually scatter across every surface in a tiny kitchen without counters. In this white gloss U shape, they line up along the back wall instead: kettle, caddy, toaster, and a small white appliance in a single row. One upper unit stays open, with a narrow bottle rack built into its side.
Grouping tip: Set the caddy on a tray so lifting one thing clears the whole spot for wiping. That tray also catches oil drips before they reach the counter.
9. Give the Microwave Its Own Cabinet Niche
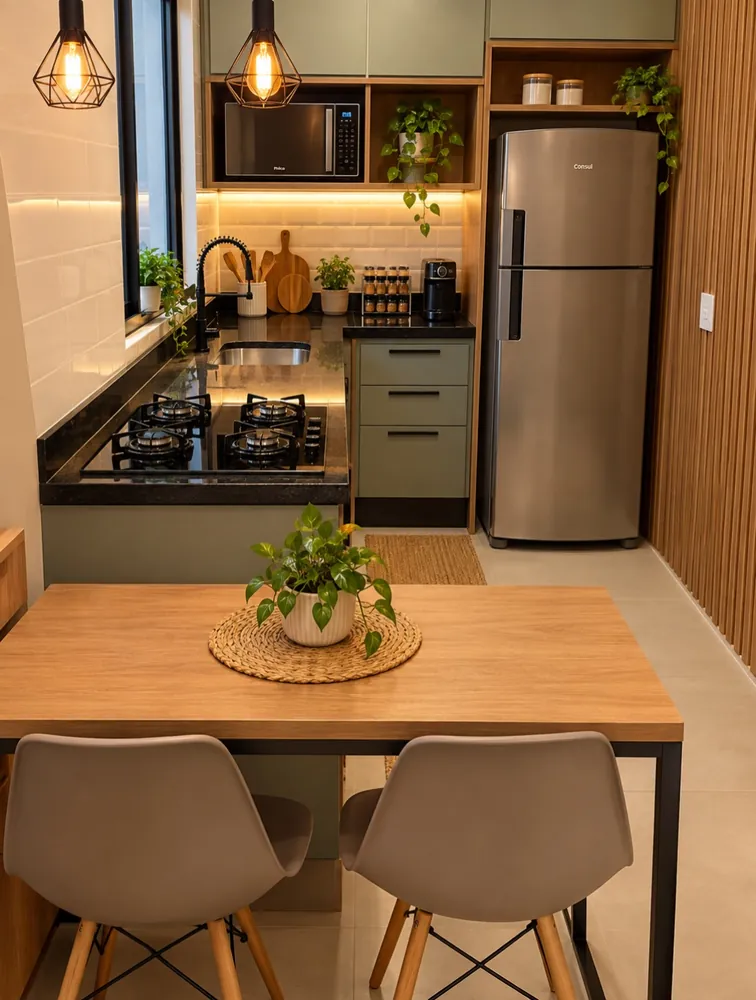
Above the black granite counter, a cabinet opening holds the microwave with a trailing plant beside it. That one change leaves the counter below clear for spice jars, a coffee maker, and wood boards. Just steps away, a wood table with black metal legs is ready for extra chopping or a quick meal on two grey shell chairs.
Why it works:
- Raised appliances free the strip of counter you use most.
- Strip lights under the niche brighten the prep zone below.
- Spice jars stand in a tidy row against the wall, not in a pile.
Safety note: Keep a niche microwave below shoulder height. Lifting hot soup down from above your head is how spills and burns happen.
10. Push a Narrow Table Against the Side Wall
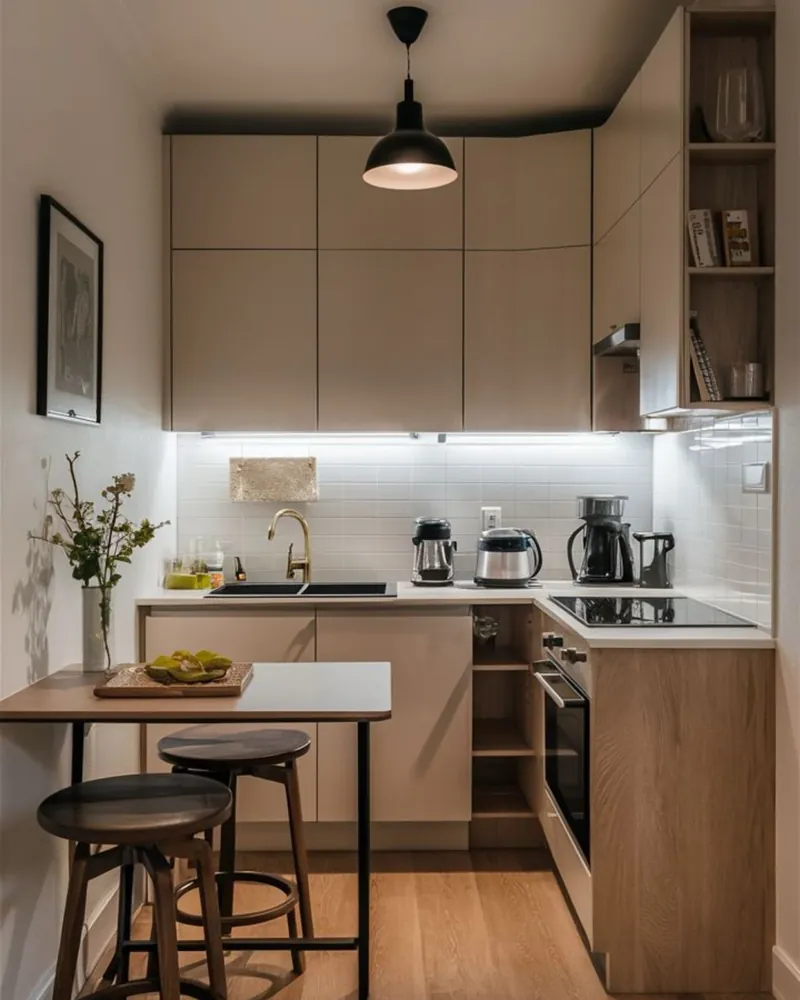
Pulled tight to the left wall, a slim table with black metal legs gives this beige kitchen a spot to work and eat. It is narrow enough to leave the floor clear, and two round wood stools tuck beneath it. In an apartment kitchen short on counter space, that kind of overflow surface matters. A wood tray resting on top shows how it can act as a serving station while appliances crowd the main counter.
Placement tip: Line the table up with the end of the counter so it reads as one long surface. You can then slide a bowl from the sink side straight onto it.
Shelf styling tip: Open shelves at the end of the cabinets hold cookbooks and a glass. Use that end slot for things you read or reach for, not for food storage.
Scale note: Backless stools with foot rings take up less visual space than chairs in a tight room.
11. Hang a Rail Under Your Lowest Shelf
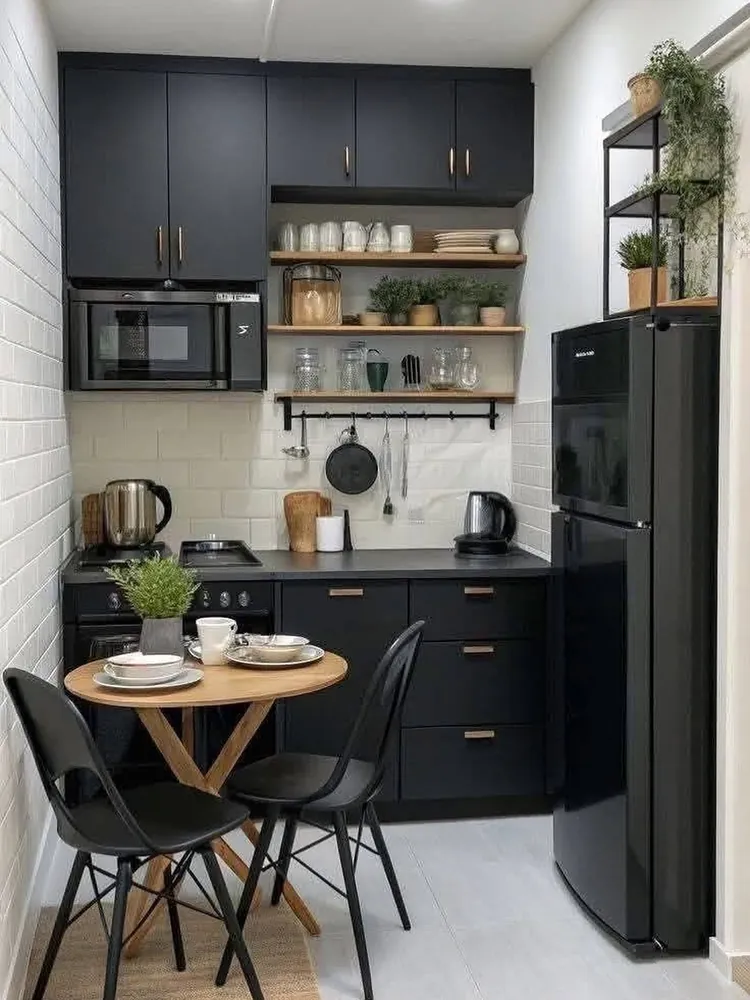
You’ll need: A metal rail, a set of S hooks, and the tools you grab most while cooking.
Under the bottom wood shelf in this black kitchen, a slim rail carries a ladle, a small pan, and two utensils on hooks. Nothing on it touches the counter, so the dark worktop stays free for a kettle and a cutting board. Above, three open shelves stack white mugs, plates, potted herbs, and glass jars.
Check the fridge too. A black metal shelf unit sits on top of it and holds trailing plants, using height most people leave empty. Pushed into the corner, a small round table with crossed wood legs works as a breakfast spot.
Style note: Matching black on the cabinets, fridge, chairs, and rail ties a busy little room together. Light wood shelves keep the dark from feeling heavy.
12. Turn a Bare Side Wall Into a Pantry Wall
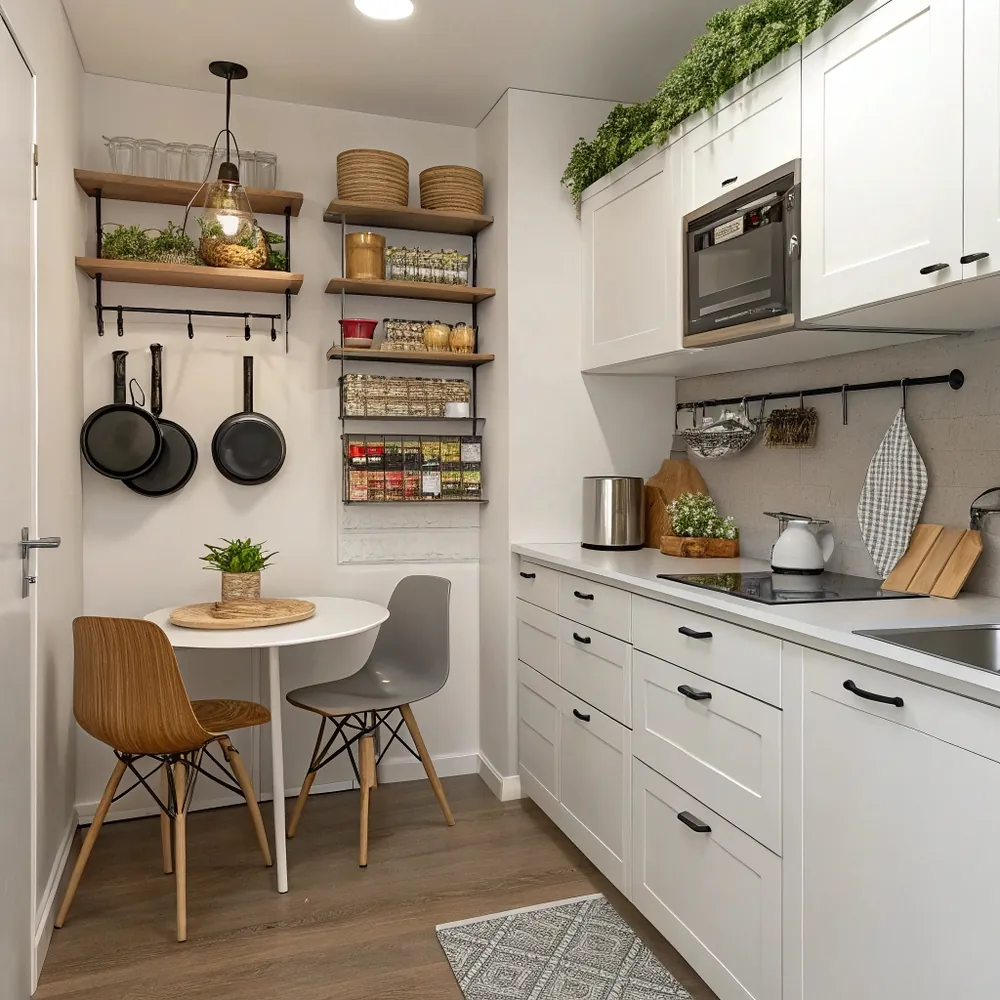
- Zone: One side wall holds pans, spices, glasses, and dry goods near the table.
- Containers: Wire racks and woven baskets keep small packets from sliding off shelves.
- Labels: Spice packets stand upright, so the front of each one acts as a label.
- Upkeep: Check the wire racks each month and toss anything past its date.
Most tiny rental kitchens ignore the wall beside the dining nook. This one fills it with wood shelves on black brackets, three frying pans hung on the wall, and a tall column of shelves ending in a wire spice rack. Over by the cooktop, a second rail holds a basket, a tea towel, and cleaning tools so the counter stays clear.
Organization tip: Hang pans from largest to smallest so each one lifts off without knocking the others.
13. Mount the Paper Towel Holder on the Wall
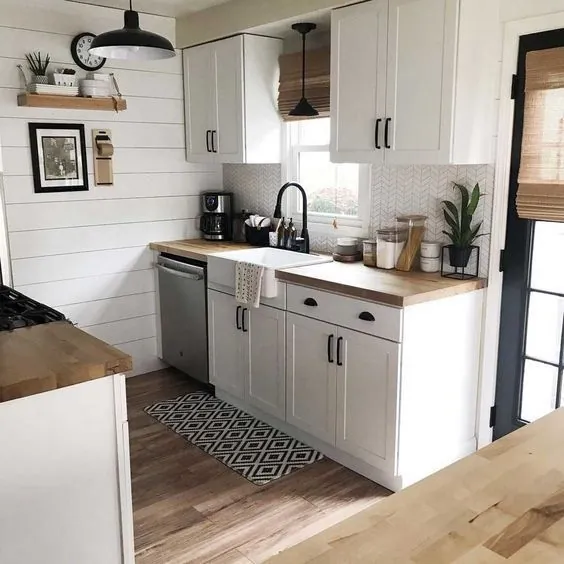
Small things steal counter space faster than big ones. In this white shaker kitchen, the paper towel roll hangs on the shiplap wall beside a framed photo instead of standing next to the sink. Above it, a single floating wood shelf holds a plant and a few small dishes under a round clock.
Because the wall carries those extras, the butcher block stays open for a coffee maker, glass canisters of pasta, and a potted plant. A dishwasher slides in beside the farmhouse sink, so drying racks never need to sit on the counter either.
Try this tonight with one item. Pick whatever sits on your counter but only gets used once a day, then find it a hook, a shelf, or a spot inside a door. Repeat the habit every week and the clear space adds up.
14. Set a Bar Table Under the Window
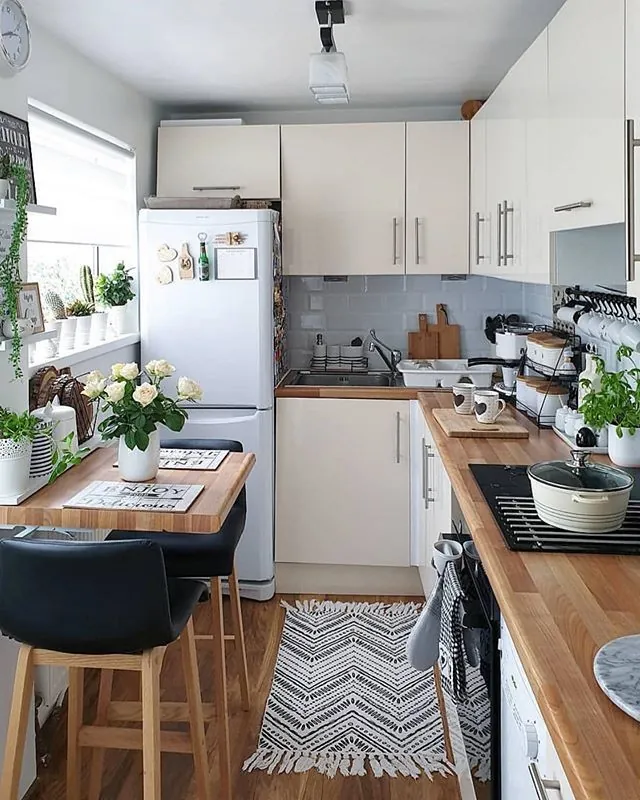
Window walls usually go to waste in a kitchen with little counter room, but here a slim wood bar table fills that run. Two black padded bar stools pull up to it, and white roses sit on top beside a pair of mats. Across the aisle, the long wood counter handles prep, while a corner rack holds mugs and lidded canisters off the work surface.
Hosting tip: A bar table at counter height turns into a buffet when friends come over. Line up the dishes there and let the main counter stay free for plating.
Small kitchen tip: Deep windowsills make good plant shelves. Moving herbs and succulents there clears one more crowded spot.
Care tip: Wipe wood counters dry after washing up, since water dripping from the dish rack can mark them over time.
15. Run Glossy Handleless Cabinets Toward the Ceiling
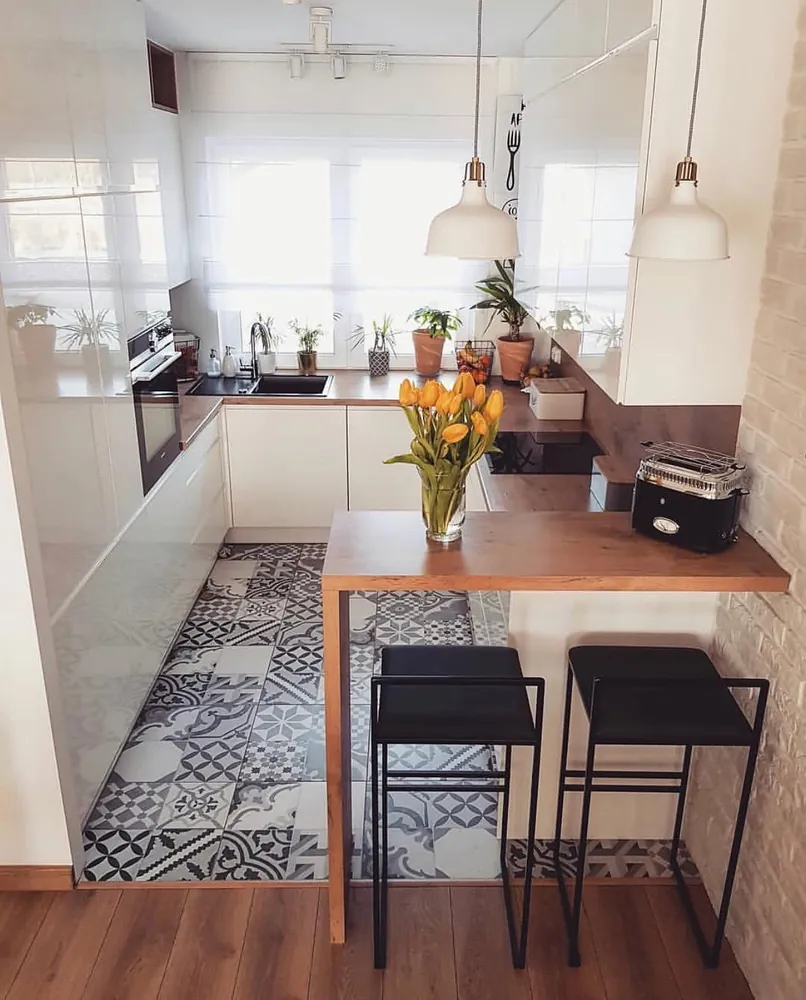
Glance past the breakfast bar in this bright kitchen and notice the wall of white gloss cabinets on the left. They climb close to the ceiling with no handles at all, which means more closed storage and nothing sticking out to catch a hip in a narrow aisle.
With dishes and pans hidden behind those flat doors, the wood counter under the window carries only soap, a fruit basket, and a row of potted plants. Gloss fronts also bounce daylight from the window deep into the room, so the space reads larger than it is.
Notice where the black toaster lives too: at the far end of the bar, well away from the sink. Giving each appliance a fixed parking spot keeps it from drifting onto your main prep zone. Pick that spot near an outlet and the habit sticks.
16. Cover the Stove With a Wood Board for Extra Prep Space
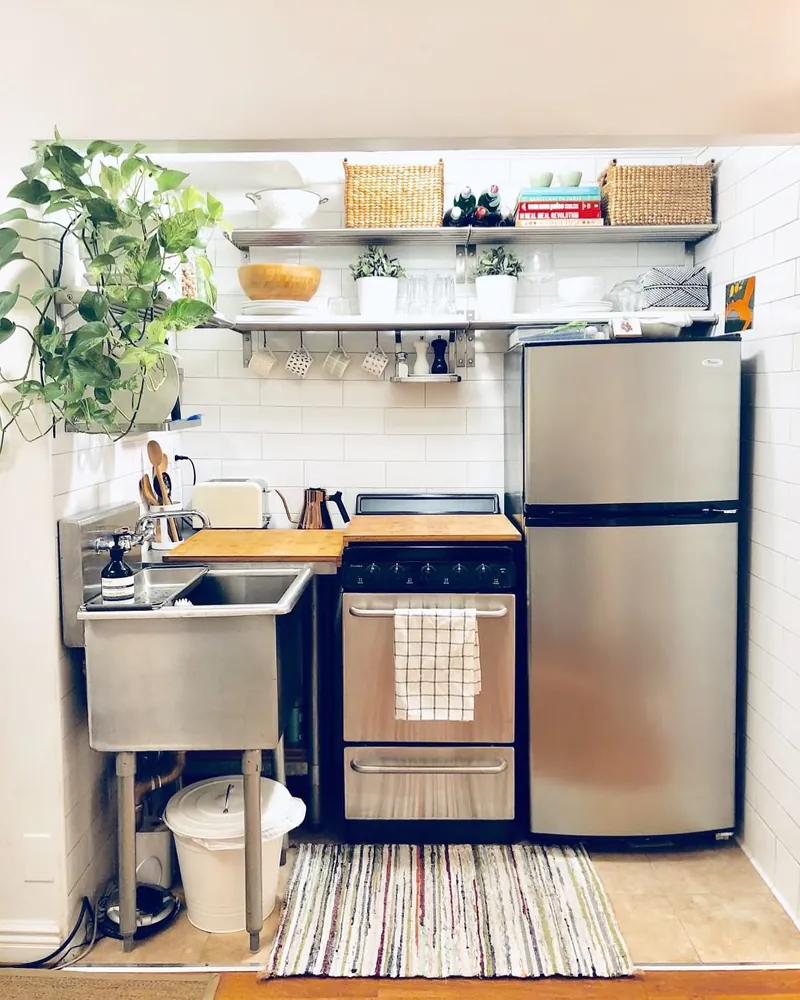
Best for: Studio alcove kitchens with a small range, a sink, and no built in counter at all.
This tiny alcove has no true counter, so it makes its own. Wood boards rest across the top of a compact range and bridge the gap beside a freestanding steel utility sink. A toaster, a copper kettle, and a crock of wooden spoons share that surface, and nothing else competes for it.
Overhead, two steel shelves run the full width of the nook. Mugs hang from hooks on the lower one, while woven baskets, bowls, plants, and cookbooks fill the top. Under the sink legs sits a trash can, using space most people forget.
Try instead: A cover board cut to fit your range sits steadier than a loose cutting board. Lift it off before turning on a burner, and wait until the stove cools before setting it back.