19 Vertical Wall Storage Ideas for Camper Kitchens

Camper kitchens never come with enough counter space, but most of them have more wall than anyone uses.
Rails, pegboards, hanging baskets, and slim shelves can hold everything from spices to skillets without eating into the few square feet you actually cook in.
The trick with camper kitchen wall storage isn’t finding more room, it’s using the room you already have differently, going up instead of out.
This roundup pulls together nineteen real setups from real rigs, from a simple brass rail with S-hooks to a full pull-out pantry hidden beside a fridge.
Some ideas cost almost nothing and take an afternoon. Others are bigger builds worth planning around a renovation.
Either way, every one of them keeps the counter clear and puts what you need within reach, whether you’re parked for the weekend or driving down the highway.
1. A Brass Rail and S-Hooks Turn Blank Wall Space Into a Utensil Station
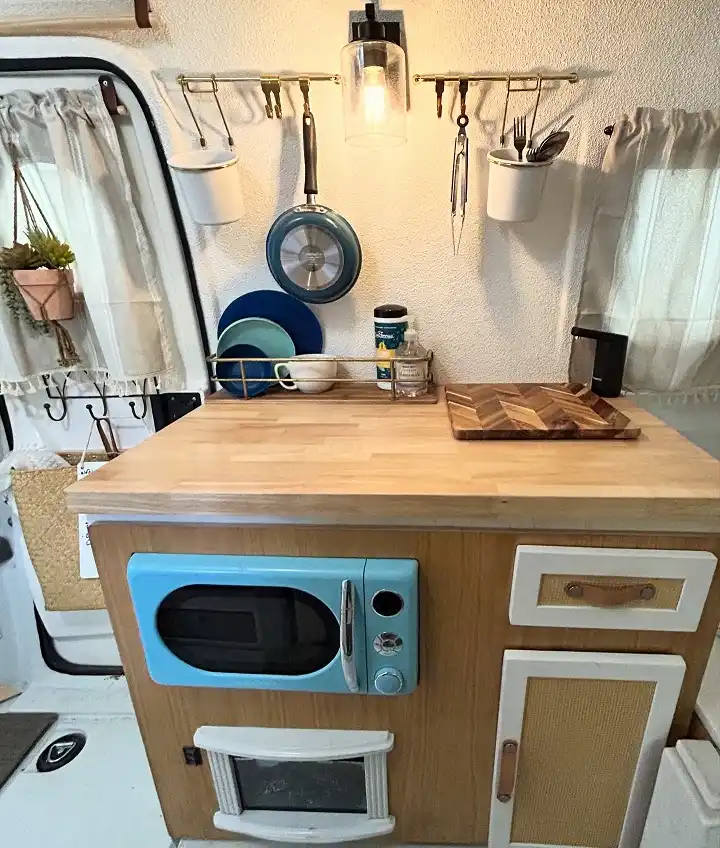
That strip of wall above the counter used to be dead space in most campers, but a slim brass rail changes that fast.
Two enamel-style cups hang right on the bar for spoons, forks, and tongs, and there’s still enough room left over to hang a small skillet by its handle.
Nothing here needs drilling into cabinets or eating up drawer space, which matters a lot when your whole kitchen is a few square feet.
The trick is picking a rail long enough to space out three or four hooks without them bumping into each other when the rig is moving. S-hooks with a tight curl stay put better on bumpy roads than open ones.
2. Hang Jars and Glassware From a Rod So the Window Ledge Never Sits Empty
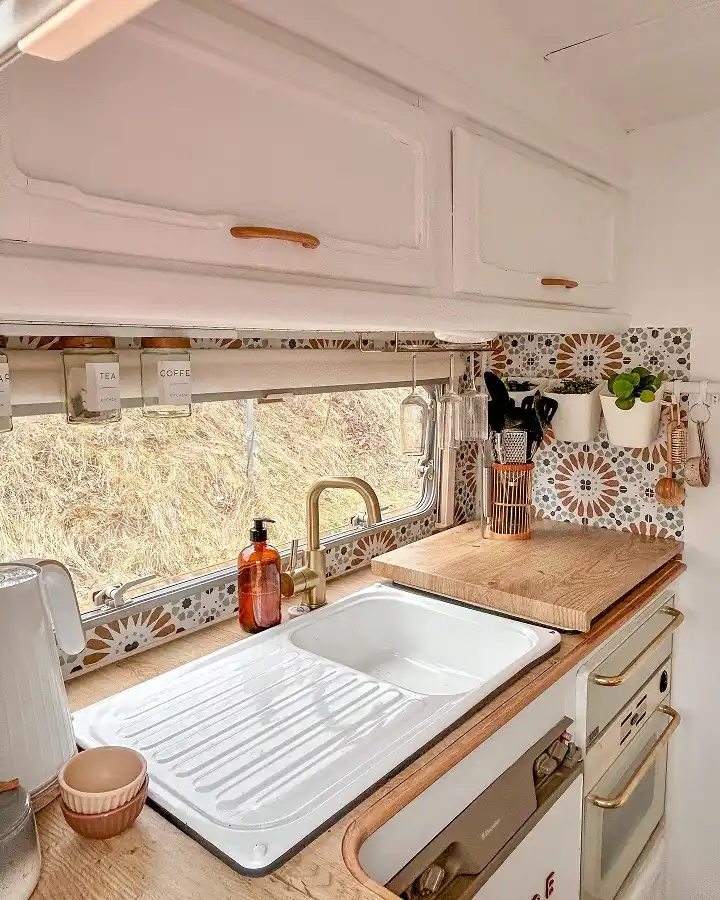
A slim rod tucked right under the window here does double duty. Labeled glass jars for tea and coffee clip onto it by their wire handles, and a couple of wine glasses hang upside down on the same bar just past them.
It keeps the daily dry goods in plain sight instead of buried in a cupboard, and the window ledge stops being wasted space.
Clip-top jars are worth the extra dollar over plain screw lids, since they seal tighter when the road gets rough.
On the tiled backsplash beside it, a small wall hook holds a whisk within reach of the stove, and a tiny hanging planter adds a bit of green without taking up an inch of counter.
3. Mount a Narrow Floating Shelf to Catch the Small Stuff Cabinets Never Fit
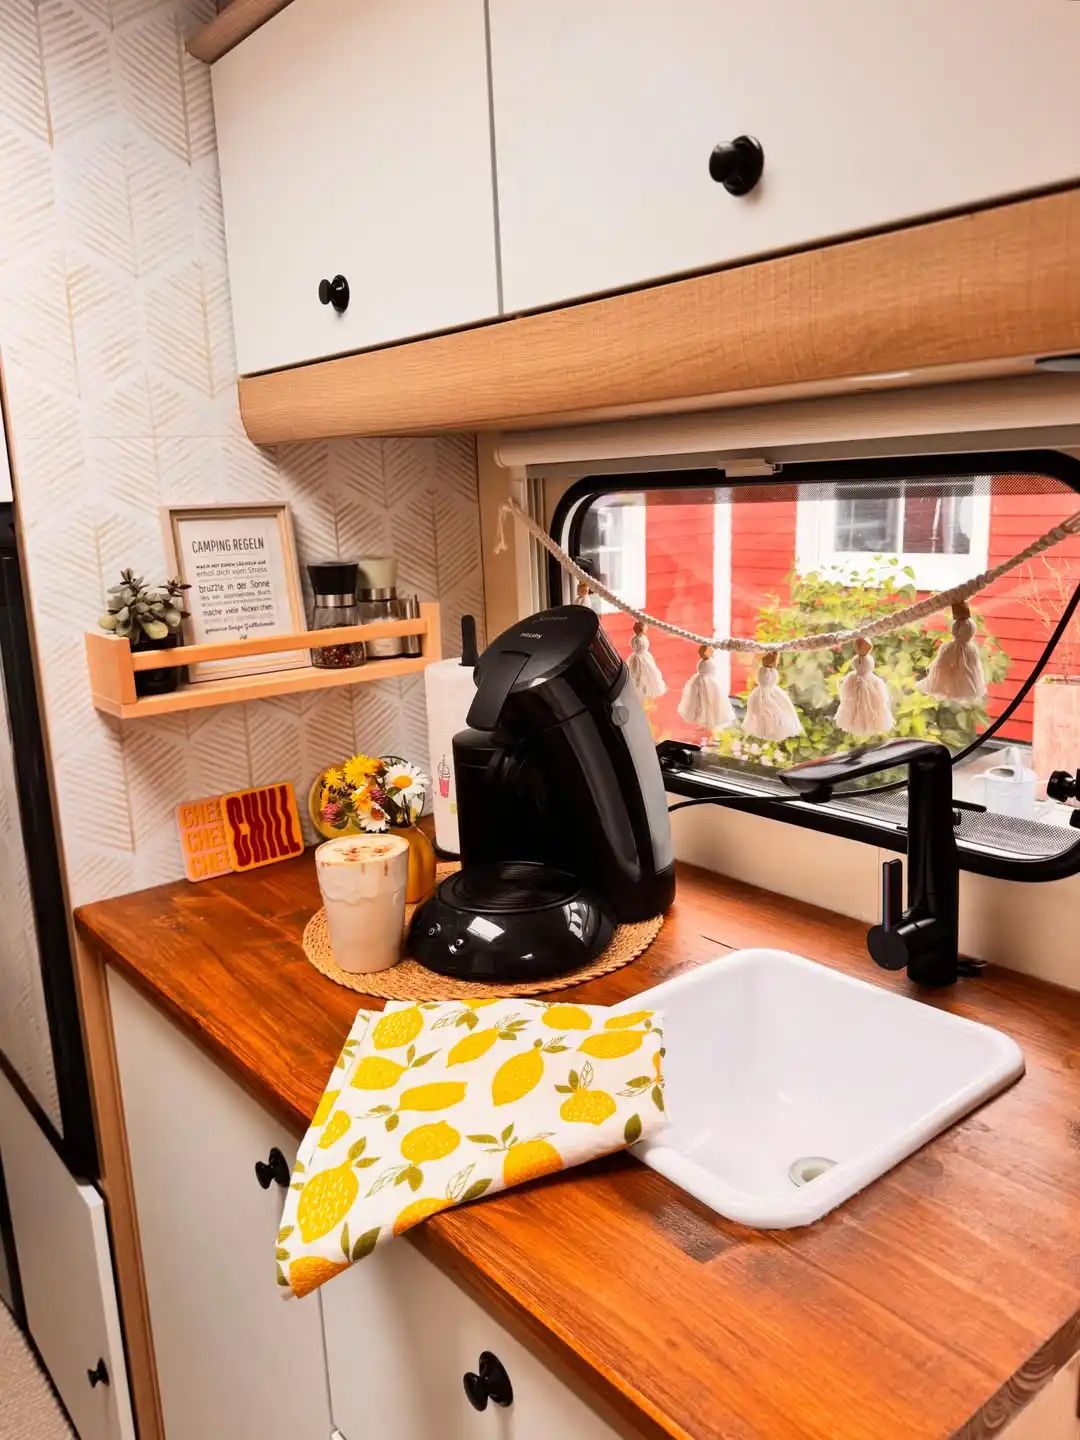
A slim wooden shelf on the wall beside the cabinets is doing more work than it looks.
It holds a small framed sign, a tiny succulent, and salt and pepper grinders all lined up in a row, keeping them off the counter where the coffee maker and everything else already needs room.
Because it sits above the countertop instead of on it, the shelf catches the odds and ends that would otherwise clutter every flat surface in the rig.
This works best with a shelf no deeper than four or five inches, just enough to hold jars and small frames without sticking out where you’d bump your head.
A short lip or raised edge along the front keeps things from sliding off when the road gets bumpy.
4. A Macrame Ring Holder Keeps Paper Towels Off the Counter and Within Reach
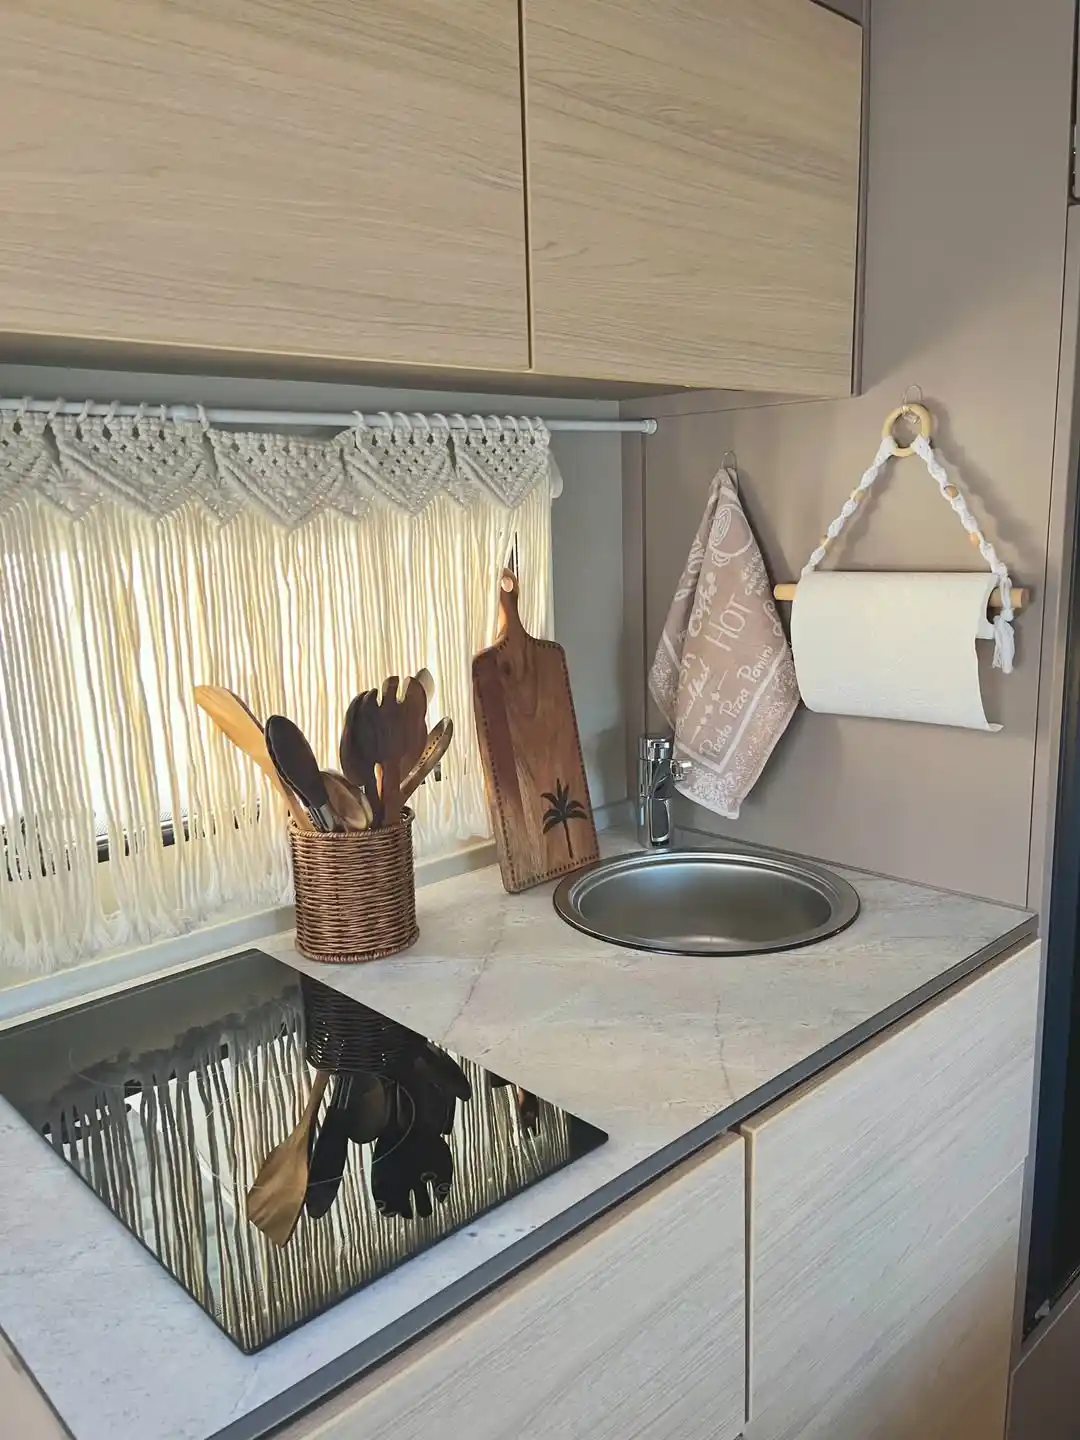
That wood dowel hanging from a beaded macrame ring by the sink solves a problem almost every camper kitchen has: paper towels rolling around loose or taking up a whole cabinet shelf.
Hung straight from a small hook, it swings a little with the road but stays put, and it sits right next to the tea towel on its own hook so both are grabbed with one hand while you’re at the sink.
A chopping board leans on a peg just beside it, using the same stretch of wall instead of a drawer.
It’s a setup that costs almost nothing to copy since the whole thing is a hook, a ring, and a dowel.
Pick a spot near the sink where your hand naturally lands.
Slide the dowel and roll through the ring before hanging.
Use it for a tea towel or a hanging chopping board.
5. Stack Woven Bins on a Slim Wall Rack for Open, Grab and Go Storage
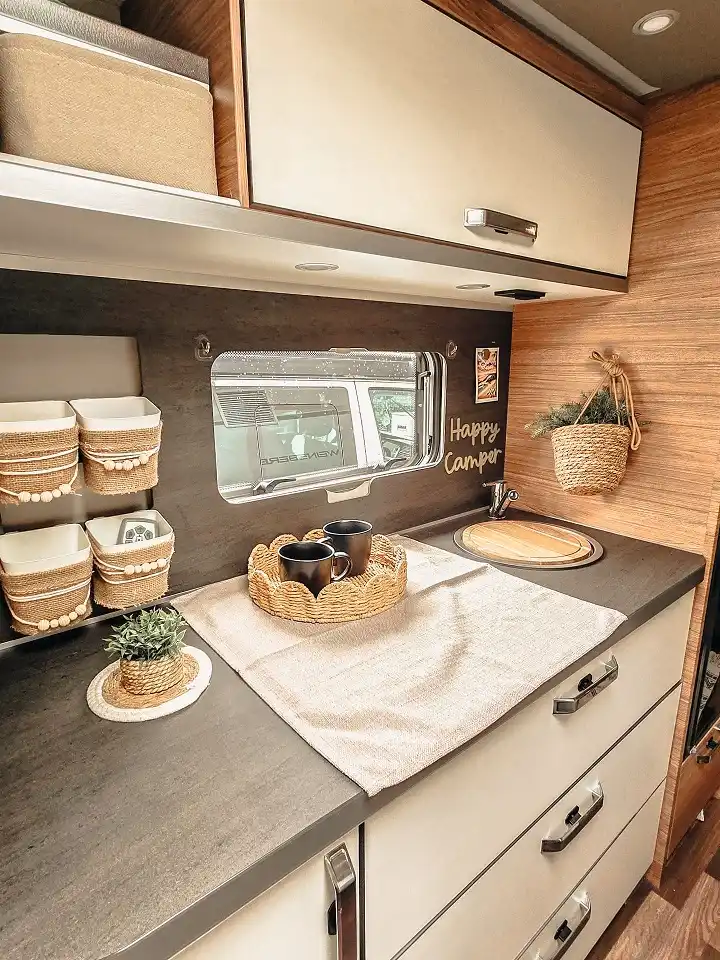
The wall to the left of this window is doing the heaviest lifting in the whole kitchen.
A narrow rack holds four small woven bins in a tight two by two stack, each one pulled open with a little wooden bead so nothing needs a latch or a hinge.
It’s basically a mini pantry hung sideways, and because the bins are open topped, grabbing a snack or a spice packet takes one motion instead of digging through a drawer.
A few things make this work in a moving vehicle rather than just looking nice in photos. The rack sits flush against the wall with almost no gap, so the bins can’t swing.
And keeping the bins uniform in size means the whole thing reads as one clean block instead of clutter.
6. Run One Floating Shelf the Full Width for Baskets, Mugs, and Everyday Dishware
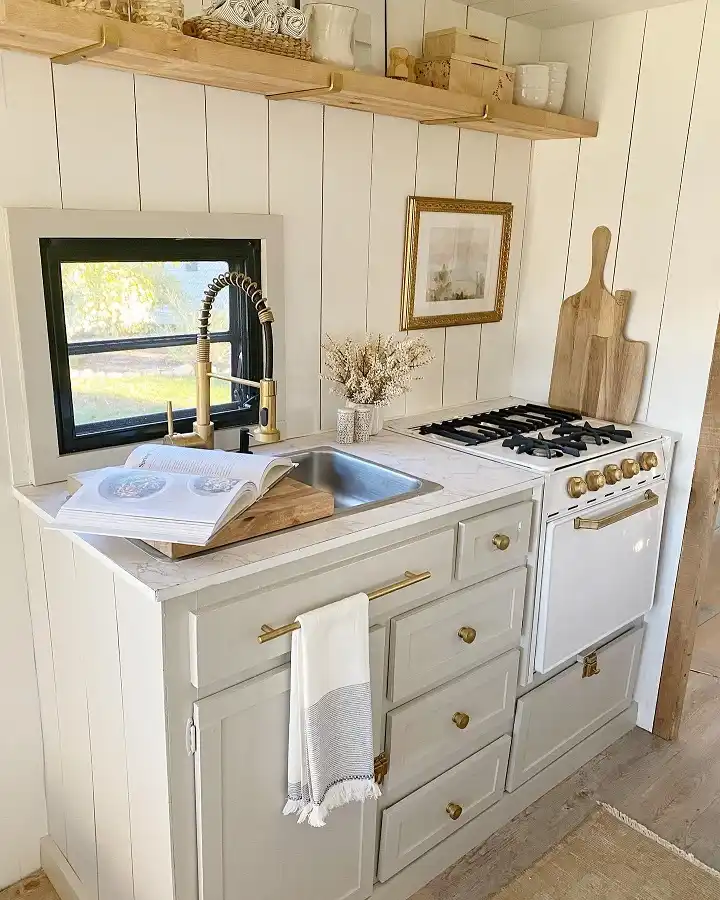
Above the whole counter, one continuous shelf on brass brackets replaces what would otherwise be a row of upper cabinets.
Woven baskets sit at one end for towels and odds and ends, mugs line up in the middle, and small decorative boxes fill the far corner without anything feeling crowded.
Because it’s one long board instead of separate cubbies, the whole thing reads as intentional rather than like extra storage bolted on as an afterthought.
A pair of wooden cutting boards leans against the wall near the stove too, using vertical space that a cabinet door would have blocked.
Brass L-brackets spaced every couple of feet keep a shelf this long from sagging under stacked dishware, which matters more here than it would on a short one.
One long shelf holds more than several small ones, and it looks like built-in storage instead of an add-on.
7. Add a Raised Front Rail to Any Open Shelf So Nothing Slides Off Mid-Drive
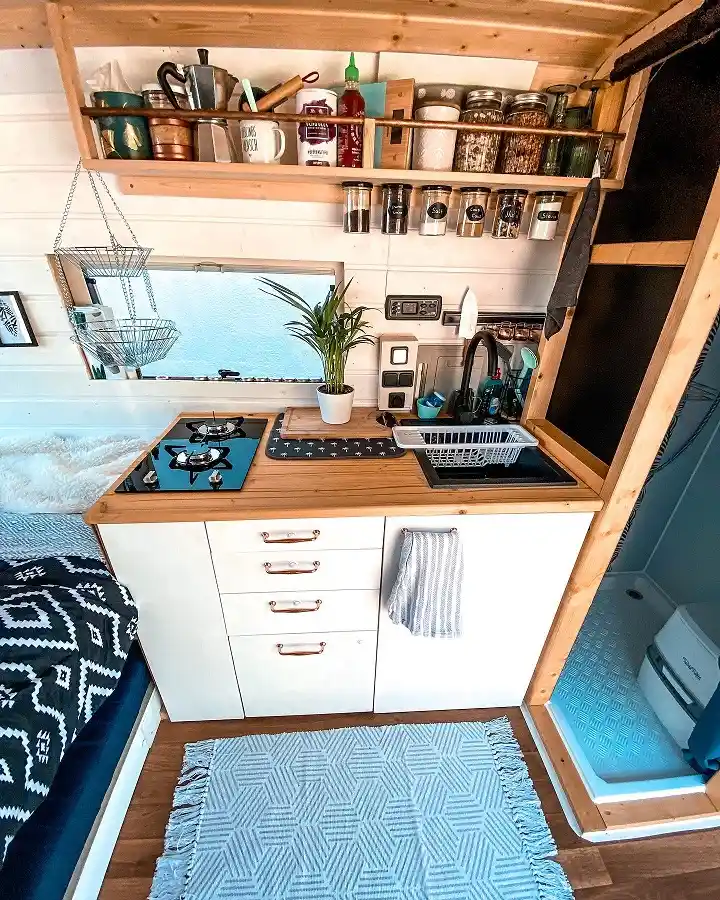
Two stacked shelves above this window hold almost the entire cook set, from mugs and bottles up top to a row of labeled spice jars just underneath.
What keeps it all from ending up on the floor is the thin wooden rail running along the front edge of each shelf.
It’s a small detail, but it’s the difference between open shelving that actually works in a moving vehicle and open shelving that only works parked.
A pair of wire hanging baskets swings near the window too, holding produce that would otherwise roll around a cabinet.
If you’re building shelves from scratch for a camper kitchen, this is the one upgrade worth the extra half inch of wood.
Add a raised front lip to every open shelf that holds jars or dishware.
Group jars by height so shorter ones sit at the front rail.
A flat shelf with no edge for anything taller than a mug.
Loose stacking near the front where sudden stops can knock things off.
8. Mirror Two Small Spice Racks on Either Side of the Window for Balanced Reach
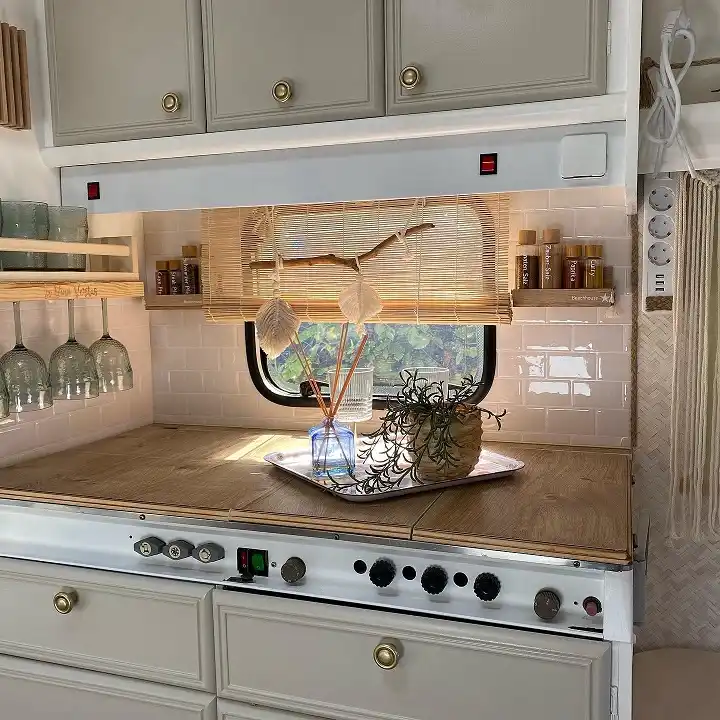
The stretch of wall right below the cabinets and around the window gets used for two matching spice racks, one on each side.
Small glass jars filled with everyday seasonings sit in a single row on each, so you’re never reaching across the stove for the one jar that’s always on the wrong end.
Underneath the cabinet on the left, a slim stemware rack holds four wine glasses upside down in the gap that would otherwise just be empty air above the counter.
Mirroring the racks like this keeps the whole wall visually balanced instead of lopsided, and it means whichever hand you’re cooking with, a spice jar is close by.
| Left Rack | Right Rack |
|---|---|
| Small glass spice jars in a single row. | Matching jars, same row layout. |
| Stemware rack tucked underneath. | Open wall space left clear. |
| Mounted just under the cabinet edge. | Mounted at the same height for balance. |
9. Hang Crochet Produce Baskets in a Grid So Fruit Gets Air Instead of Sitting in a Drawer
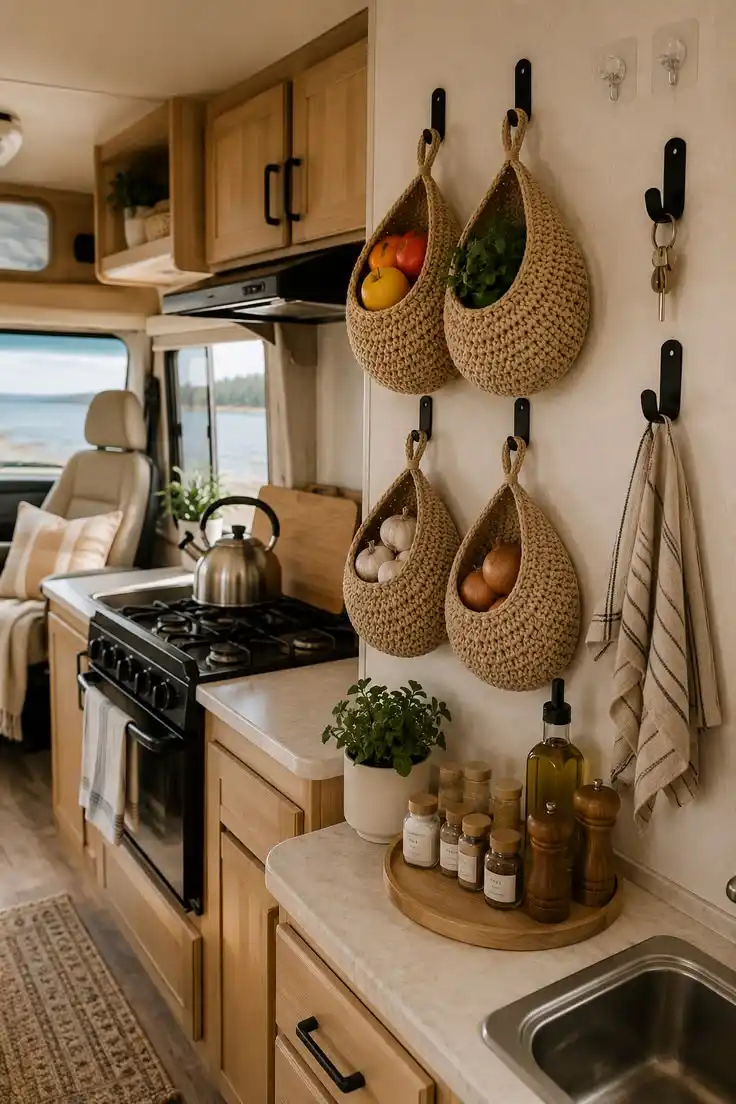
Four teardrop-shaped crochet baskets hang in a tight two-by-two grid here, each one holding produce that would otherwise go soft in a closed drawer.
Tomatoes and greens sit up top, garlic and onions below, and because the baskets are open weave, air moves through them instead of trapping moisture the way a plastic bin does.
Black hooks screwed straight into the wall hold the weight fine, and a couple of clear adhesive hooks off to the side handle lighter things like keys, so not every hook needs a drilled hole.
Keep root vegetables in the lower row and anything that bruises easily up top, since the top baskets swing less.
Lets air reach the produce so it lasts longer than sealed storage.
Fits a lot of produce into a narrow strip of wall.
Screw hooks for weight, adhesive hooks for light items.
10. Stack a Spice Rack Two Rows Deep Instead of Spreading It Across the Wall
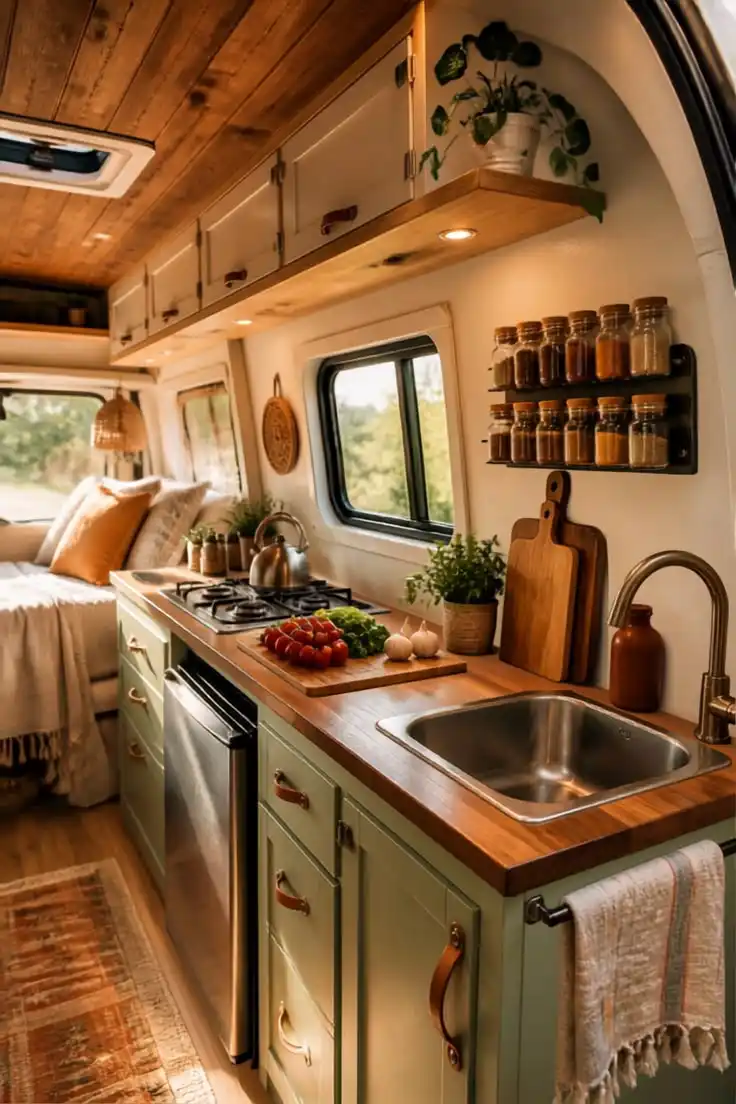
Stacked in two neat rows, this black wall rack fits close to twenty matching glass jars into a space barely wider than a cutting board.
Going vertical instead of horizontal here means the rack never eats into the window or the cabinet edge beside it, and every jar still reads clearly since the rows sit close together at eye level.
Right underneath, two wooden cutting boards lean against a slim rail rather than stacking flat in a cupboard, so they’re already drying and ready to grab at the same time.
Uniform jars matter more than the rack itself. Mismatched heights break the tidy grid look fast.
11. Hang a Three-Tier Wire Basket From the Ceiling Instead of the Wall
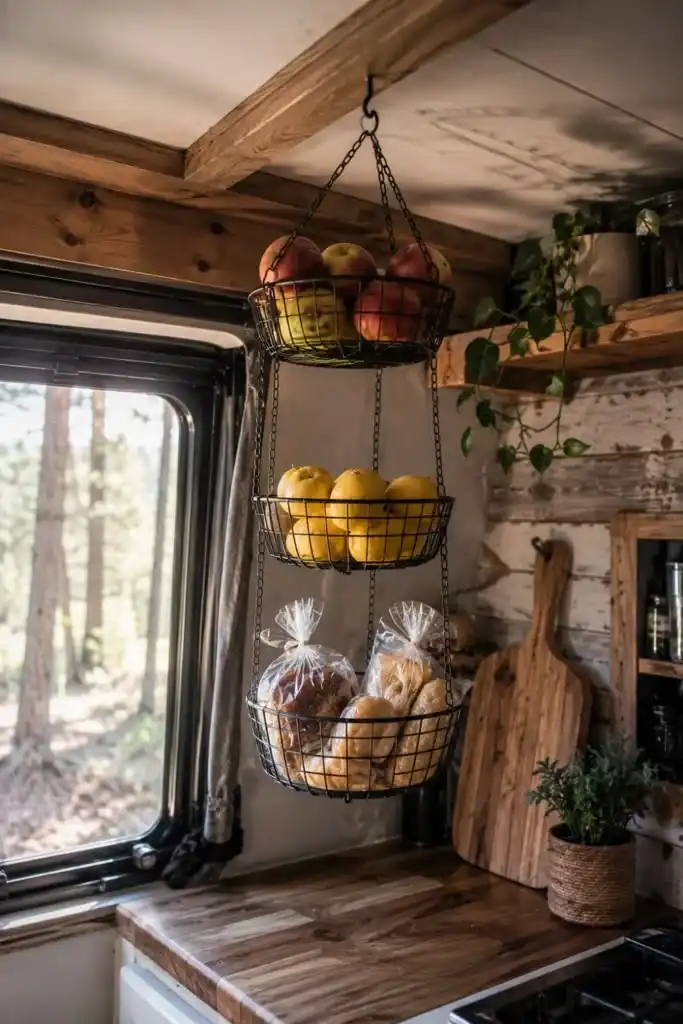
Ceiling space gets skipped in almost every camper kitchen, and this three-tier hanging basket puts it to work.
Apples fill the top tier, lemons sit in the middle, and bagged bread rests in the bottom one, all suspended from a single hook screwed into a ceiling beam near the window.
Because it hangs rather than mounts flush to a wall, it clears the counter completely and still keeps fruit visible enough that nothing gets forgotten in the back of a bin.
A hook rated for real weight matters here, since three full tiers of produce adds up fast, and swinging chain links can rattle against cabinets on a rough road unless the basket sits tucked into a corner like this one.
12. Mount a White Pegboard So Ladles and Spoons Hang Exactly Where You Cook
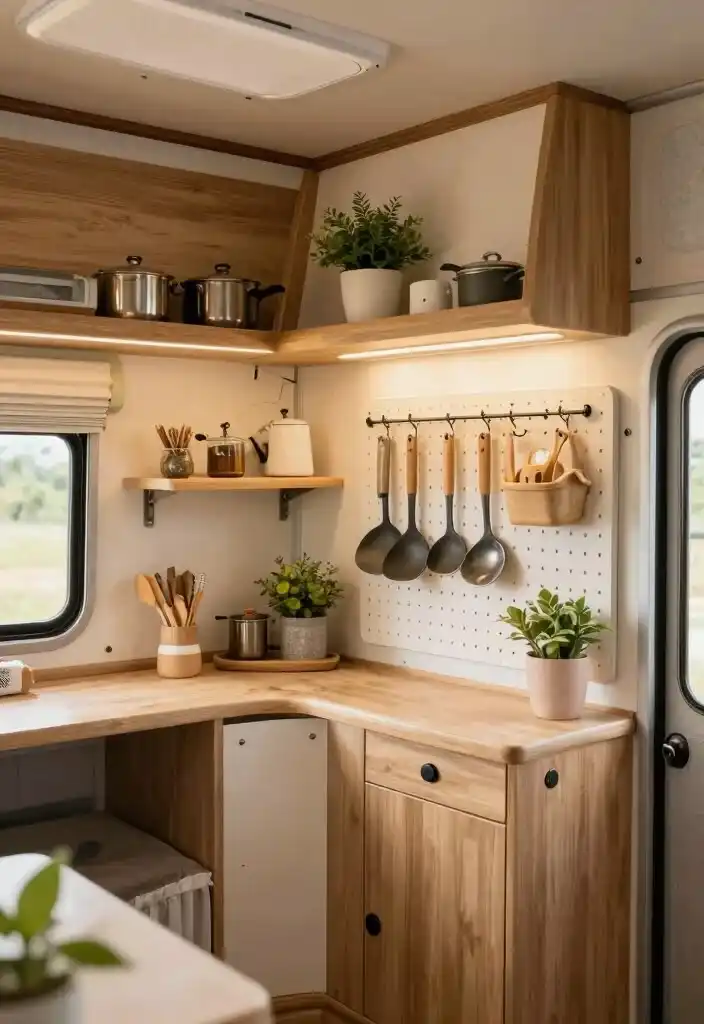
Screwed flush to the wall right beside the stove, this pegboard turns a blank panel into adjustable storage for the tools used most.
A metal rod strung with S-hooks holds a row of long-handled spoons and ladles, and a small basket clips onto a second hook for smaller items that would slide off a plain hook.
Since pegboard holes let you move hooks around, the layout can shift the day you swap a bulky pot for a smaller one.
Use a rod with S-hooks across the pegboard instead of single pegs, so utensils hang in a tidy row instead of scattered spots.
13. Turn a Tall Open Shelf Into Zones Instead of One Big Jumble
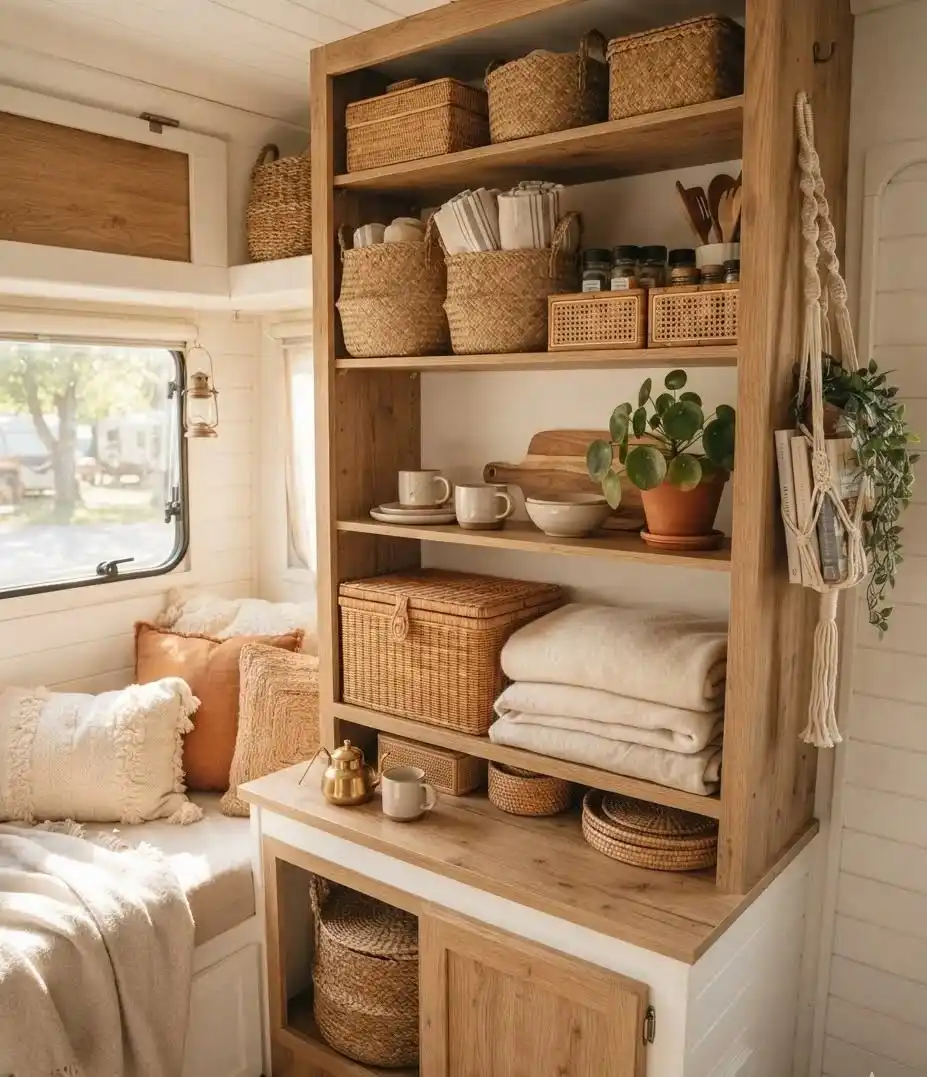
A floor-to-ceiling shelf unit like this works best when each shelf gets one job instead of holding a little of everything.
The top shelf here is all baskets, the second mixes folded towels with spice jars, the third holds mugs and a plant, and the bottom shelf swaps to soft storage with a woven trunk and stacked blankets.
A small macrame hanger on the side end holds a trailing plant, using the one strip of wall a shelf this deep would otherwise waste.
Splitting kitchen items from soft goods like towels and blankets on separate shelves keeps grease and crumbs away from anything you’d want to keep clean longer.
Shelf Storage Plan
14. Layer a Shelf, a Jar Row, and a Hook Rail to Fill One Narrow Wall Completely
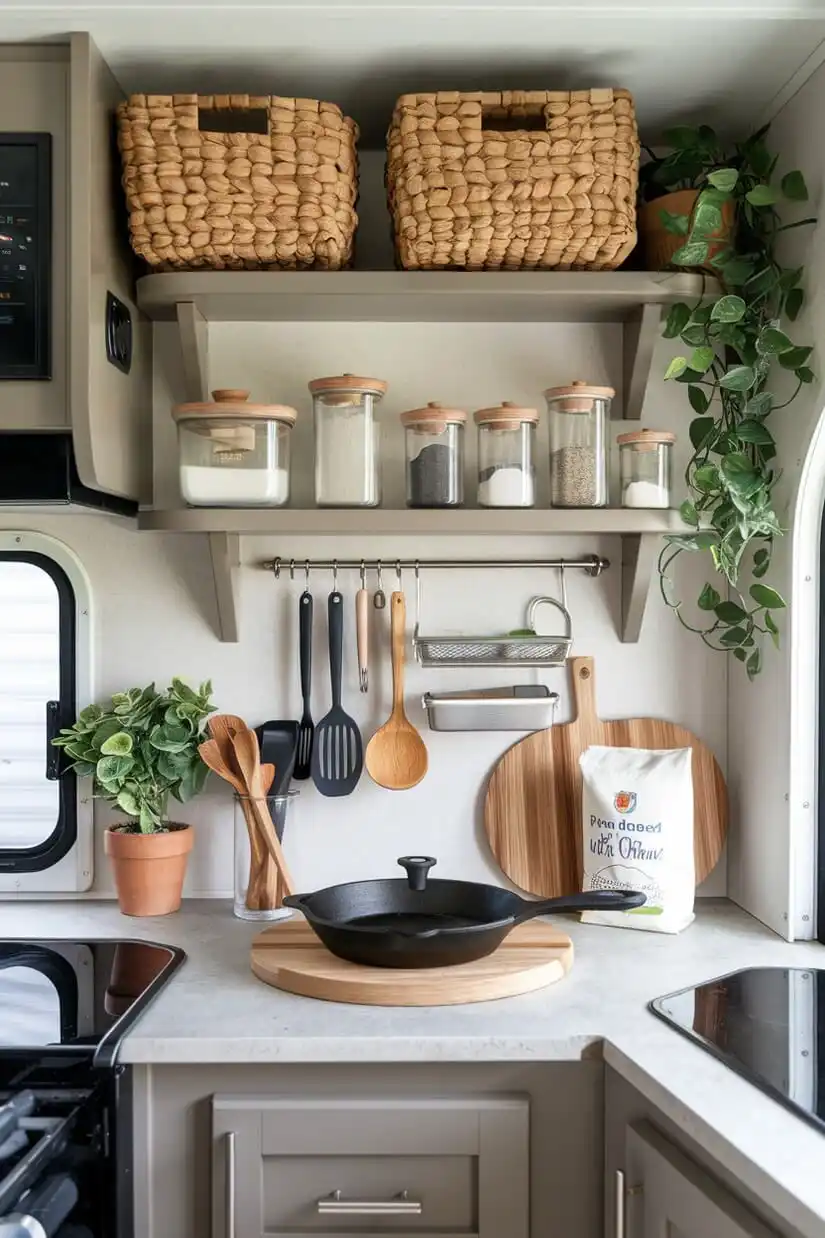
Three separate storage layers stack on top of each other in this corner, and none of them eat into the counter below.
Woven baskets sit up top out of daily reach for bulk items, a row of matching glass jars lines the shelf underneath at eye level for flour and sugar, and a hook rail bolted just below that holds spatulas, tongs, and a small wire caddy for a sponge.
A round wood trivet on the counter gives the cast iron skillet a landing spot so it never touches the countertop directly.
Building storage in layers like this means every zone has its own job, from bulk goods up high to daily tools right where your hand lands.
15. Use the Gap Above the Cabinets for Baskets You Only Grab Once in a While
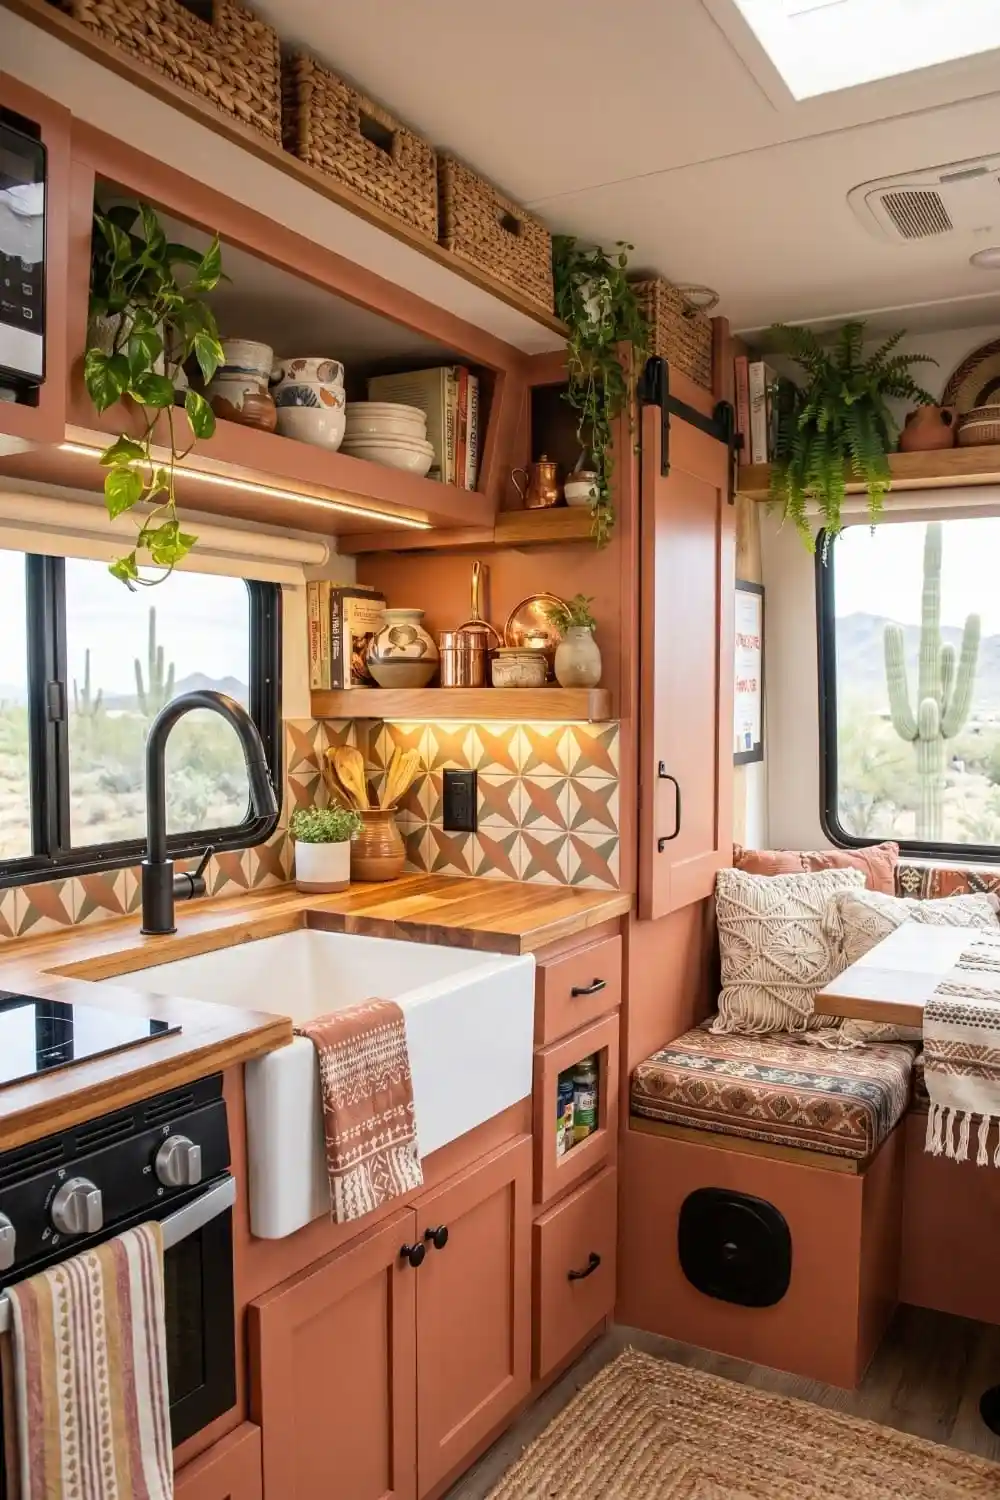
The strip of space between the top of these upper cabinets and the ceiling usually sits empty, but here it holds four matching woven baskets in a tidy row.
That’s prime real estate for things you don’t need daily, like extra linens or paper goods, since it’s a small step up to reach.
Below it, open shelving mixes bowls, mugs, and a couple of cookbooks together, which works because everything shares the same warm color palette instead of looking like a random pile.
Trailing plants hung along the shelf edge soften all that hard storage without taking up a single inch of usable space.
16. Build a Slim Pull-Out Pantry Into the Wall Beside the Fridge
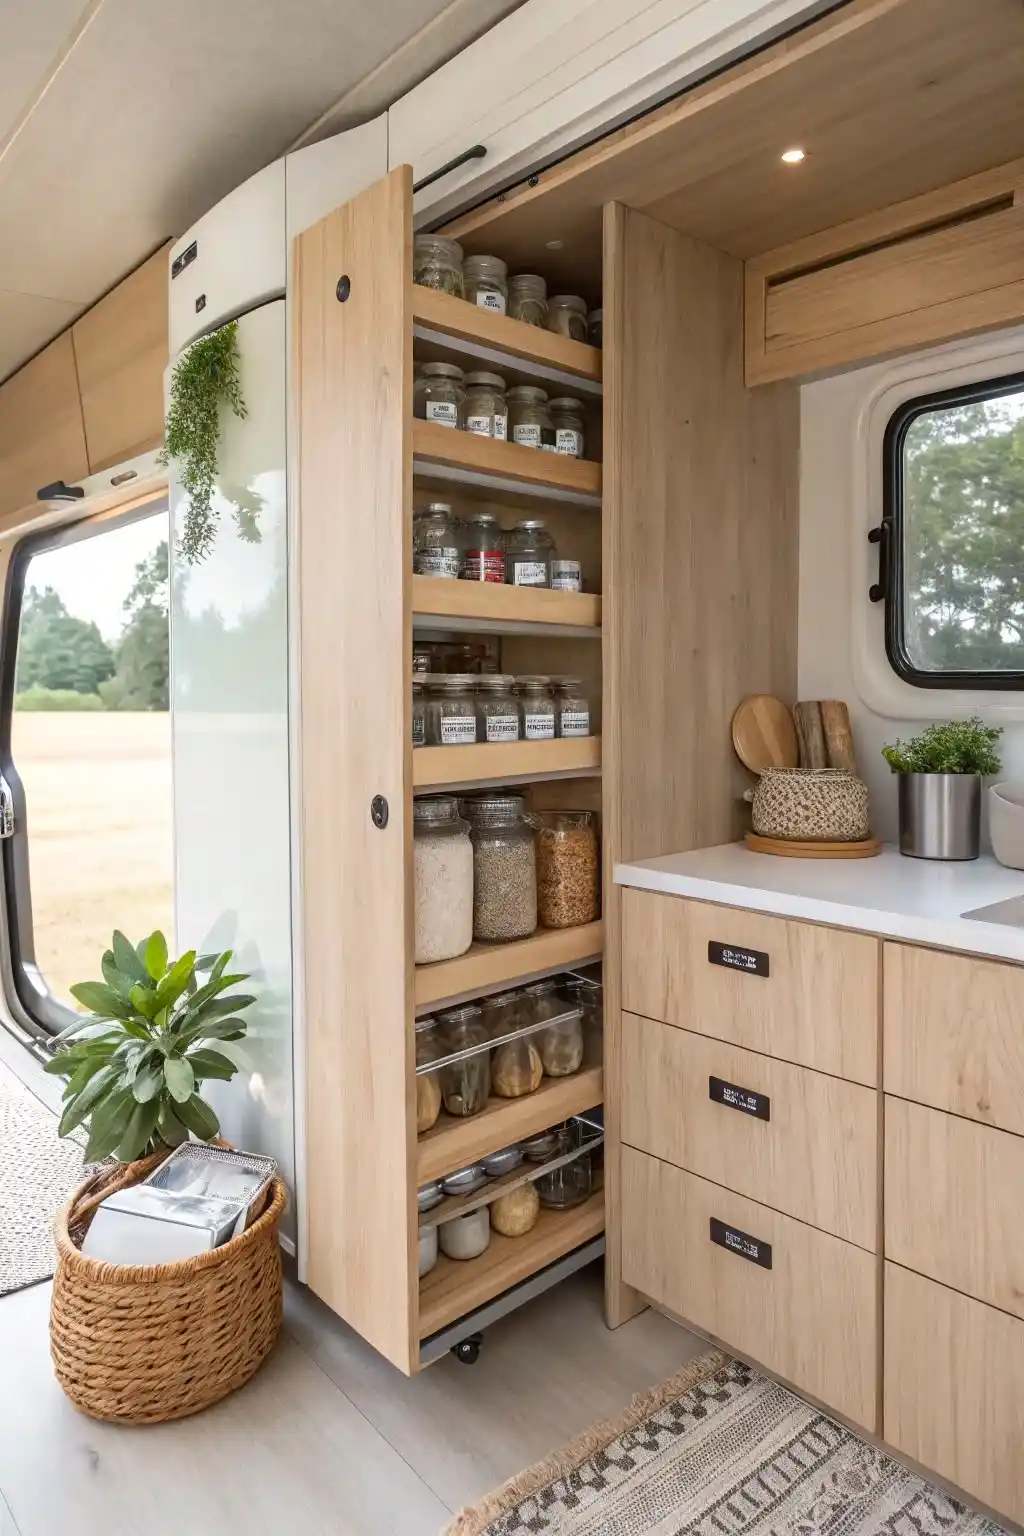
Tucked into a gap barely wider than a cutting board, this pull-out pantry rolls forward on hidden casters to reveal six narrow shelves stacked with labeled jars.
Closed, it looks like a plain wood panel next to the fridge, so it hides a serious amount of storage without adding any visible bulk to the kitchen.
Every shelf is shallow enough that jars sit in a single row, which means nothing gets lost or forgotten behind a taller container the way it would in a deep cabinet.
Labeling each jar matters even more here since the whole shelf slides sideways as you pull it out, and it’s easy to lose track of where something sits when the cabinet is this narrow.
Look for wasted space beside a fridge or tall cabinet.
One row deep so nothing hides behind anything else.
Keeps things findable once the shelf slides sideways.
17. Stack Two Slim Racks So Jars and Hanging Tools Don’t Compete for Space
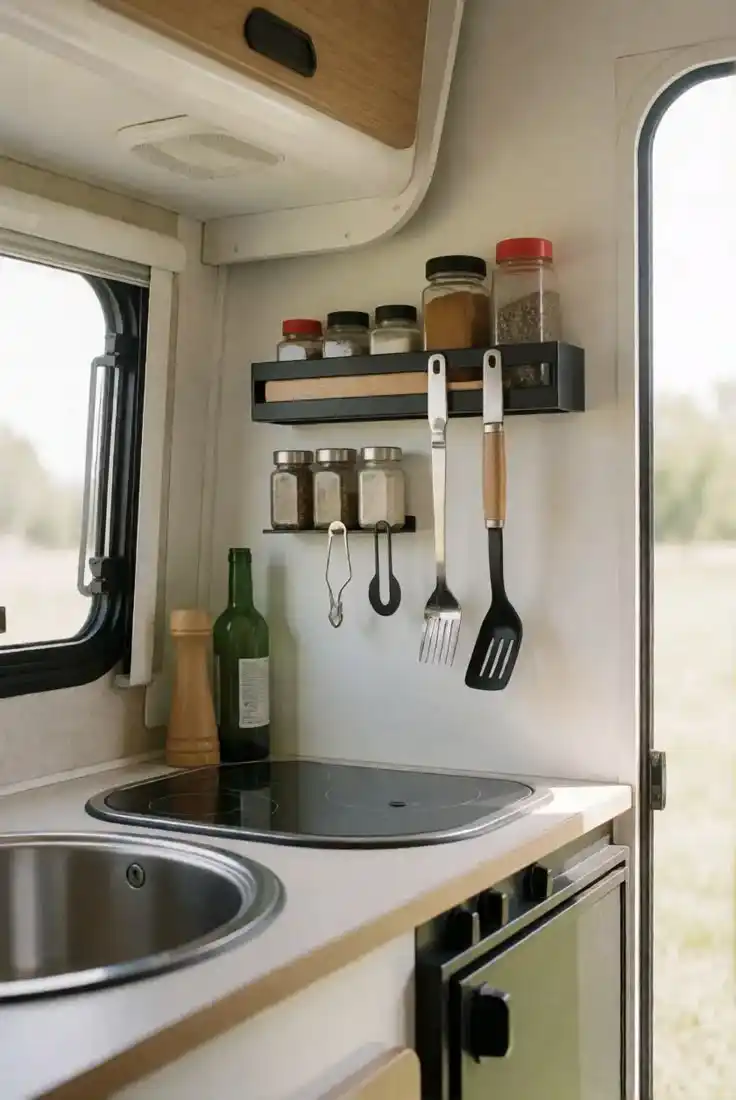
Two black metal racks mount right on top of each other above this stovetop, and each one has exactly one job.
The top rack holds spice jars with a small lip along the front to keep them from tipping when the stove heats up nearby.
The rack underneath skips jars entirely and holds two hooks for a spatula and a fish turner, letting the cooking tools hang loose enough that grabbing one mid-stir takes half a second.
Splitting jars from hanging tools onto separate racks like this keeps grease off the labels, since the utensils that touch the pan hang a few inches lower and further from the heat.
18. A Full-Size Pegboard Holds Everything From a Whisk to Kitchen Shears
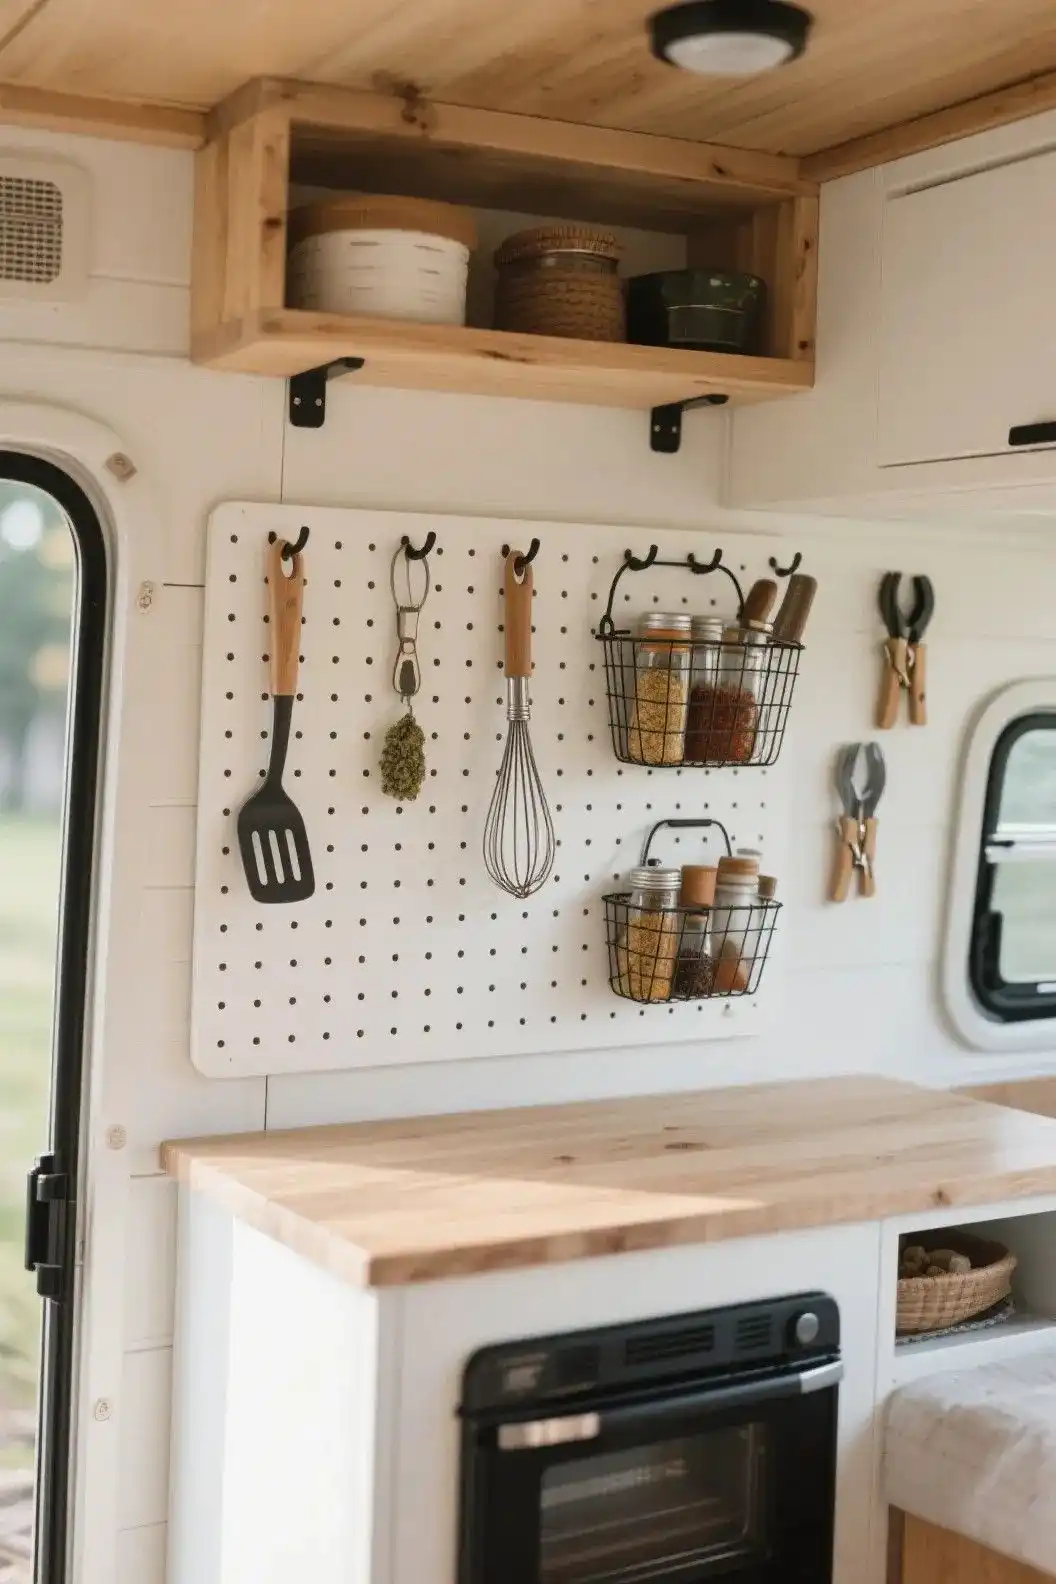
Covering nearly the whole wall between the cabinet and the counter, this pegboard turns into a small wall of tools instead of just a spot for one or two items.
Single hooks hold a whisk, a spatula, and a pair of kitchen shears by their handles, while two wire baskets clip on lower down to catch loose spice jars that would just roll around on a hook.
Above it, a small open shelf on wood brackets holds a couple of lidded canisters, keeping the storage going all the way up to the ceiling.
What makes a full board like this work better than a few scattered hooks is that everything stays visible at once, so nothing gets buried behind something bigger.
19. Mount a Magnetic Knife Panel on a Cabinet Side Wall for Blade Storage That Never Touches a Drawer
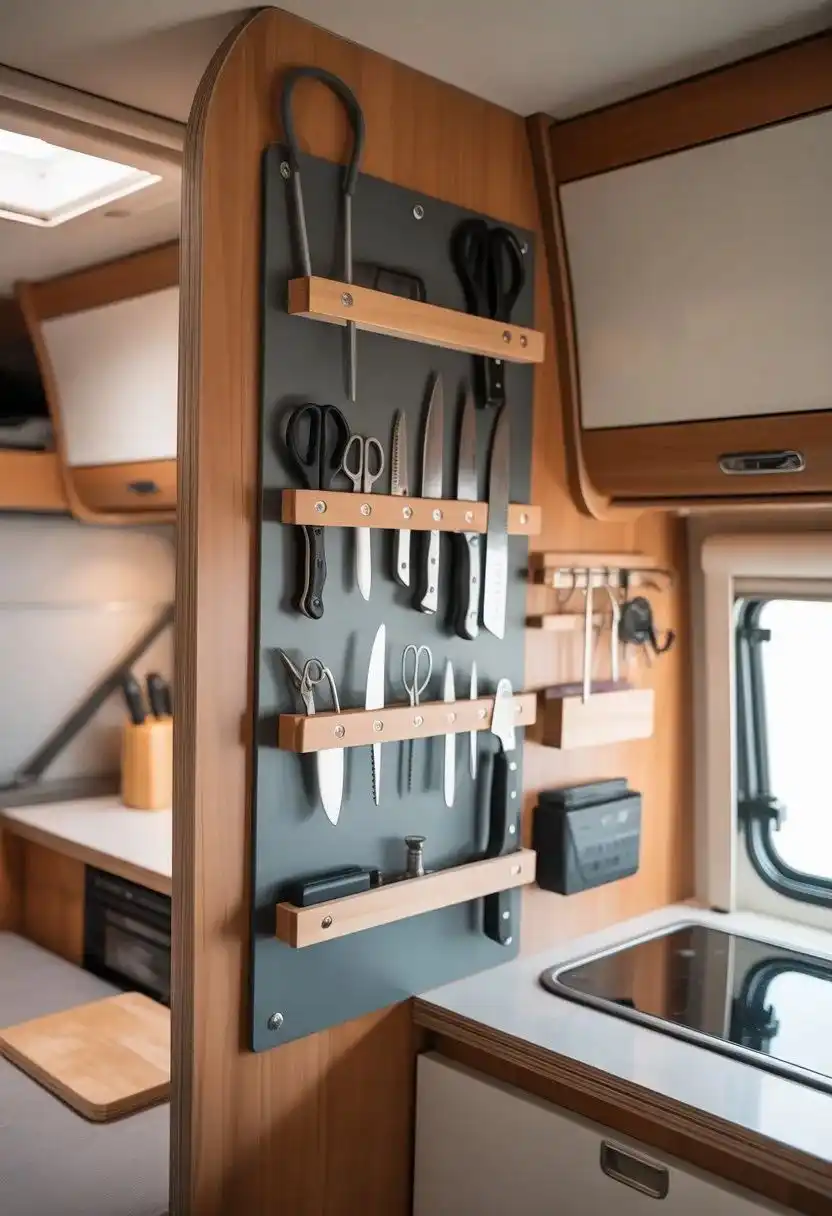
Instead of a block taking up counter space or blades rattling loose in a drawer, this dark magnetic panel holds an entire knife collection flat against the side of a cabinet.
Four slim wood ledges hold the blades just above the metal strip while the tips sit safely tucked below, so nothing slides free on a bumpy road.
Scissors, a boning knife, and even a bottle opener share the same board, sorted roughly by size from top to bottom.
Mounting it on a cabinet’s end panel rather than the main wall means it uses space that would otherwise sit completely empty, and it keeps sharp blades well out of the way of anyone moving through a tight galley.
Mount a magnetic panel low enough that kids or guests walking past don’t brush against exposed blades at head height.